From Monday to Wednesday, I only worked a little on the robot arm, doing some lite sanding on the printed parts to get a more finished look.
On Wednesday I met with the group in Dronesonen and started to put everything together. Hossein and Kevin helped with the assembly and continued to code the arm after everything was put together. The parts fit together well, and there was only a slight crooked angle between the main arms that could be seen. From what I could detect that might cause the crooked angel, it would be the screws that is used for the servomotor arms. The screws are quite small, and seems to be of a cheaper quality then the other screws I used for this project. It was a little difficult to screw the screws into the different parts, without damaging the screw thread on the head. If I was to redo the design of the arm or change anything from what I have learned and experience through this project, I would research the possibility to have larger screws and arms for the servomotors.

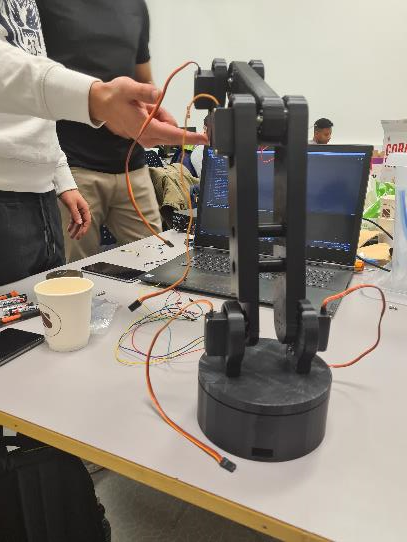
All in all, the arm works as intended and holds together nicely. The only part I might have to do a few iterations on is the base of the arm. The outer joints of the arm weigh a little bit more than expected, so I might have to make a few adjustments to prevent the arm from tipping over. Hossein and Kevin were not done with the coding on Wednesday, so I did not get to test how the arm functions with the base and stepper motor.

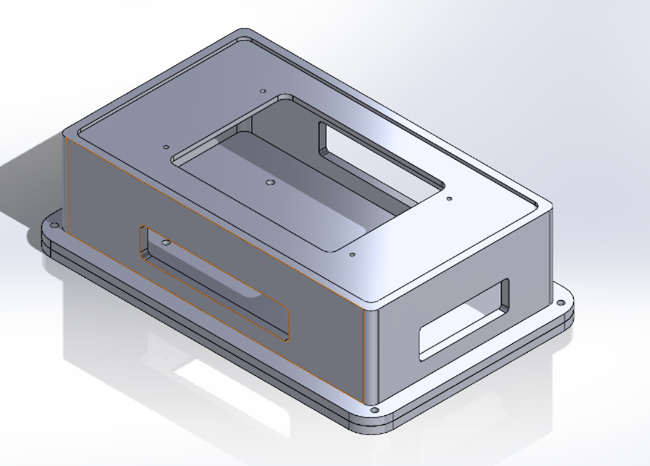
When we were done putting the arm together, I started to work on how we are going to put all the components together, to create the “arcade game” we envisioned at the start of this project. Marte needed a storage box for the Raspberry Pi and camera, so she and I worked on the design of the storage box together. We finished the design, but there are a few measurements we need to confirm before we can print the box.
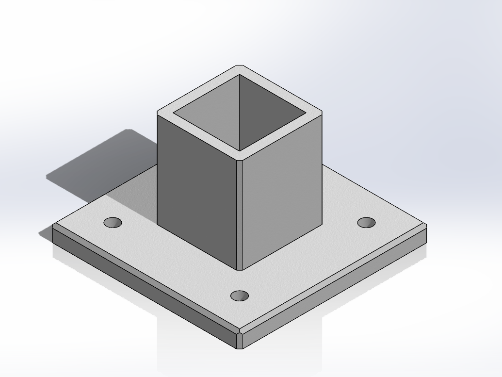
After this I continued to work on the “arcade setup” and had a small talk with Richard about which materials that were available. The design for the setup is based on the camera that we are going to use for the recognition of the chess pieces. The camera needs to hang over the chess board, about 50cm above, and I plan to use aluminum rods to create the whole camera setup. The aluminum rods will be placed inside a bracket, with a rod that connects horizontally between the two rods that go in the vertical direction, with the camera hanging in some form of bracket / holder I must design. I plan on continuing with this next week, I just have to clarify some details with Richard before I continue with the design.
Due to my daughter’s kindergarten being closed next Wednesday, our group will work on the project on Tuesday.
Workhours this week: 8.5 hours.
Mechanical Engineering – Liv Marte Olsen
Computer Vision
RASPBERRY PI 3B+ SETUP
This week I started setting up the new Raspberry that I got from Dag. Since we no longer have the Raspberry Pi 4, I have had to make some change in the plans on how to use the computer vision model with the Pi. Initially I wanted to have the model deployed on the Pi but since the 3B+ is a lot “weaker” than the 4 we will need to use a hosted API solution instead. This method is supposed to be a lot lighter on the system, but I am still worried that it might still be to much for it.
Since I don’t need to deploy the computer vision model on the Pi anymore, which means I don’t have to use Ubuntu as an operating system. I will be using Raspbian instead.
I flashed my SD card with Raspbian, and I started with the configuration, which took some time, with updates and other things like language, time and account settings.
After I had everything up and running, I turned it of to combine it with the 7” touch screen I had gotten from Zoran earlier. How I did this is also in a previous post, that I will link below. The plan is to have this screen on the side of the chess board, to show a live feed from above with the tracking on the chess pieces.
Link: Setup for the touchscreen
I also connected the camera for the Pi, but the camera is way to short for our plan for the setup, so I will need to ask if there is any available cables that is longer.
sTORAGE BOX FOR THE PI
I met up with Liv Marte at school at 09.00 on Wednesday, and we started looking at the design for storage box that will hold the Pi and Camera. You can see the design in detail in Liv Martes post above. I didn’t contribute to the making of it of course, but I just told her what I need/want for openings and stuff like that, and we figured out the measurements that would be necessary.
I asked Zoran about any available cables for the Pi, but there wasn’t anyone that was long enough, so I ordered a 2m cable from digitalimpuls.no.
MORE PI SETUP
I started planning what I apps I need for the Pi. Pi-Apps is an app that contains a lot of the apps I want for easy download through it, so I run the terminal command below to install it.
wget -qO- https://raw.githubusercontent.com/Botspot/pi-apps/master/install | bashWhen it was finally done, I started downloading one browser after the other to check what was performing the best. I found out pretty quickly that there might be an issue with the performance, since just loading a simple page in a browser took forever. I did land on Firefox for the browser that performed the best, but it was still not good. The other browsers I tried was: Puffin, Vivaldi and Chromium.
I also did install Arduino for the code that the guys are working on for the robot arm.
I then tried to log in to my Roboflow account to test out the computer vision model, and after about 20 tries of it just reloading the page so I couldn’t input my details, I actually got in. I was able to test it with the camera, but there where more bad news there. The live feed did show the tracking, but it was in 0 fps, so it was only able to recognize change every 30 seconds or so… This isn’t a very good sign, and my worries for if the Pi is too week might be correct. I still have some hope that I might have done something wrong and will ask Joakim for some guidance next week.
PLACEMENT OF CHESSPIECES
I have started to look into a solution on how to get the locations of the pieces on the right square on the board with the boys. I have designed my computer vision model to also detect the board, and I have a hope that we will be able to see where the board and the pieces overlap and then turn the board prediction into a 8×8 grid and maybe be able to get a location from that.
Hours on the project this week: 9,5 timer
Marte Marheim, Computer Science
I dag ble armen ferdig, så vi begynte å legge opp alt og montere det på plass(litt pussing måtte til osv), etter en periode (kanskje 1-2 timer) så var ting på plass, derifra så var det mye feil med overalt, vi fikk ikke til bevegelsen av underdelene på armen, der er det nemlig 2 servomotorer, vi prøvde masse forskjellig, også demonterte vi og monterte igjen (tilfelle servomotoren ikke var likt innstilt) men selv da var det problemer, en av lærerne mente kanskje armen var for tung for to servomotorer. etter en del testing (5-6 timer) så kom vi frem til at servomotoren til høyre nederst var defekt.
Hossein & Kevin, Computer Science