This week, we’ve been busy testing and fine-tuning our dynamic system. Our motivation is (maybe) at an all-time high as we’ve successfully tackled challenges and made significant strides.
Highlights include GUI enhancements, a user-friendly testing node, and progress on the plant mover logic. We’ve even dealt with unexpected hiccups, like MQTT library quirks and mechanical issues.
Stay with us as we share our journey of innovation in the world of Smart Plant Movement.
Shahin Ostadahmadi
This week have been more testing and debugging. We feel that the way we have setup the system is quite good, and making tests and adding functionalities goes fast. All the work of making the system more dynamic than we had planned pays off now. Our group is quite motivated to work with the project and It helps to keep up the motivation when we get things to work. As project leader, Im happy that the motivation is so high, our group worked together last week as a team to make the system work with the servos and no body went home before it was done. Its motivating all of us. We are excited to move forward with the project and finally see the result of all the work
Logic controller, plant mover, and plant information node
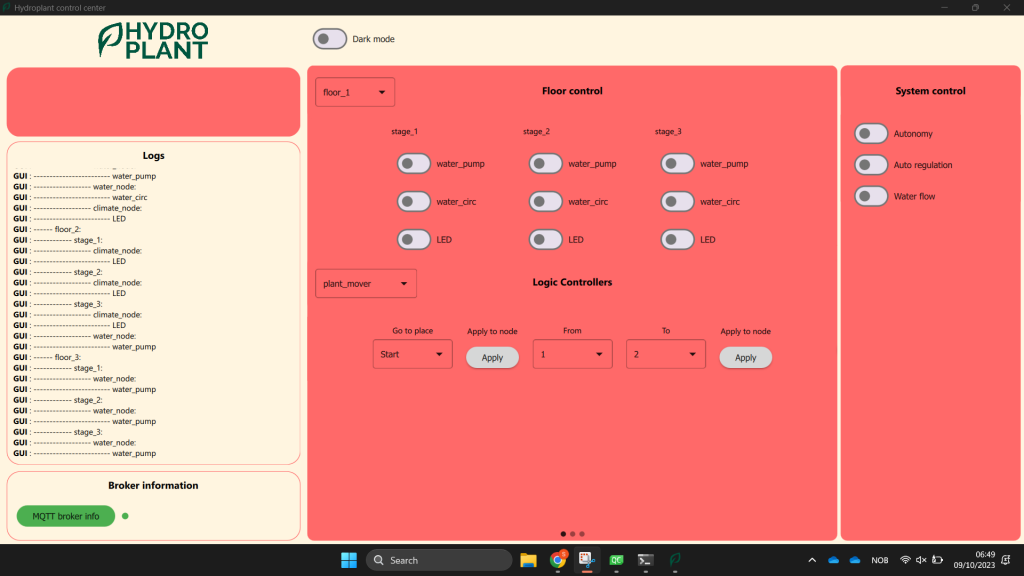
I implemented the GUI functionalities for plant information node and plant mover node. This is also done dynamically; so when a node for a particular node notifies that it has plantmover, or plant information node, the GUI will make the visual elements appear when they are active and the “apply” buttons will be able to send commands to the right node through MQTT connection. When you change a floor from the dropdown menu; the logic controllers will also change to the actuators and logic controllers to a particular floor and the visual elements will appear for the respective floor.
Both GUI and library
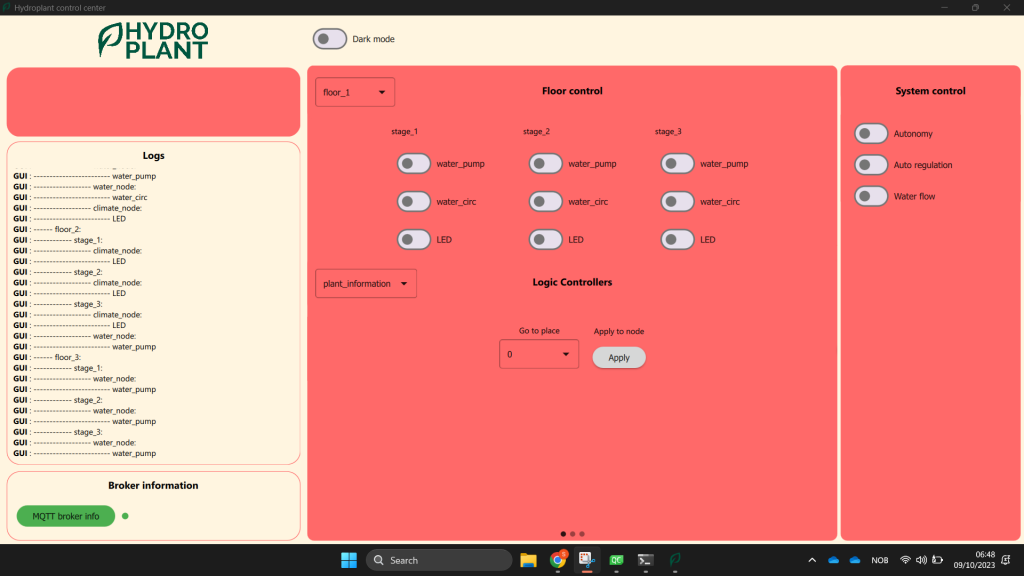
You can see when the “Plant Mover” is chosen from the dropdown menu, the right visual elements is showing. I also added some extra constrains; since out plants can only move forward, you will always be able to choose the field “To” larger than field “From”, and all the “illegal” options is hidden so the operator can’t choose wrong at any time.
Release file application
This week I made the first release for our GUI application; other group members can download the application on the their own computer and test the part of the system at any time. We will also setup a computer to run the GUI all the time for testing. However, I ran into some problems with release file because of the MQTT library; since MQTT is not one of the built in the Qt Quick library, I had to add the library manually, and I found out that the binary files was different for release and debug mode. I had to had to compile the MQTT library for release mode and add it to Qt Creator environment again. The problem was solved.
Test setup
I also setup some of the test setup with Theo as you can see in the picture, we used some time to find some proper materials that is good enough for the testing purpose and also calibrating so the “bumps” actually toggle the switch that is mounted on the servo station. As you can see in the video under Aditi’s part, they will be used with the servo to make switches toggle while they are moving from one place to another. Since the mechanical part is not included in Smart Systems, we will not design anything our self. The mechanical students in Hydroplant making 3D printed solution for this.

Commits
https://github.com/hydroplantno/library/commit/8725b2fa8c2c2b561675ee2c97181f3adc04e4d0
https://github.com/hydroplantno/gui-node/commit/8ba4230ea7b1ed2ceb8580af02a57d4dbf73c915
https://github.com/hydroplantno/gui-node/commit/20e05840fe699831a73306488a7fcae2ac9f6d24
Oscar Melby
Master-controller
Rewrote GUI command handling a tiny bit to be more readable. Next week will hopefully go towards handling “plant mover states” and maybe start on the algorithm for moving a plant holder from a place to another, which sounds much easier than it is. This is because we can have empty places, and can only move the plant holder one way. Which means we might need to do multiple actions in the correct order, to be able to move the plant holder we actually want to move. When moving these holders they will also be in different stages depending on how grown they are, which master-controller needs to keep track of.
Testing node
Shahin had made a simple testing node which connects to the MQTT broker for testing. Purpose of this node is to easily be able to subscribe and publish messages to chosen topics, as this is a hassle to do manually, and will save us time in the future. This way we can listen to and send messages directly to whoever to see if everything is working as planned before implementing the logic into master-controller or the GUI.
The node is working, but didn’t manage get it like I completely wanted, but will hopefully be “done” next week. It should be as user-friendly as possible, and if given no input it will use the previous setting.
The node is not a part of our initial requirements, but will accelerate debugging and development going further.
Plant mover
Worked together with Aditi on implementing the configuration startup for the plant mover. Met a lot of problems while doing this, some we thought were mechanical others were software/logic issues. We should probably mount a LED to the output of the switch so we can physically see that we should be able to read a HIGH signal. We got it to work eventually, but hardcoded to count up to 12 stages, which is actually the opposite of what we want. Chose to do it this way since we don’t have enough interrupts, but might be able to just read the last end switch from a normal pin going forward, since SHOULD only happen once during setup 🙏
Turns out the interrupts are so fast that when the switch lets go and jumps back to its LOW state, the interrupt picks up on the shaking within the switch to multiple HIGHs, so we had to add a 300 ms delay. If a switch goes to HIGH within 300 ms after being HIGH, we ignore it as this is most likely the switch just shaking. Also had issues with MQTT dropping the connection while moving the “plant mover”, so we have to “ping” while moving it, so we can send the configuration message to master-controller after counting up all the places which exists.
Commits
https://github.com/hydroplantno/master-controller/commit/8fa7d17a33a9b35b3613d8d41c47ee1167866850
https://github.com/hydroplantno/testing-node/commit/4bf1742f90d7d7a656e217eae253d9019dea31f1
https://github.com/hydroplantno/testing-node/commit/e1eba40aa9316678118f1d5858473f020a7e64d0
Aditi Deshpande
After the presentation on Monday, the others in the group set up the switches on the mover, one on the front of the stepper motor and one on the end. There was a slight problem in that the Arduino Uno has only 2 interrupt digital pins, and we need 3, but we figured that the front switch and the row switch( the switch on the mover) could be interrupt pins, and we could program it such that it would stop automatically stop after counting 12 switches for now.
On Tuesday we tried to connect the switches and programmed the mover to move in accordance, we encountered some problems on the way but we changed the settings of the stepper motor and both the movers in the plant mover controller and plant information node worked pretty smoothly. On Thursday I worked more on the calibrate function where I wanted it to go backwards and forwards to the end while counting the amount of plant holders. Ivan and I worked on this and we got it to go forward and backward and it would stop while it met the end switch, as I programmed the end switch and the front switch to be an interrupt.
On Friday Oscar and I switched it up (yes, that was a pun) into making the row switch as an interrupt, and after facing many(many !!!) problems like the switch sending too many signals at once, and the switch being activated whilst moving backward we got it to count all the rows, and we also got it to settle itself in the middle after being done, so the entirety of the calibrate function was done. In the end, we also added communication, so after the mover calibrates it sends the master controller a message that contains the amount of rows present in the system. Here is a small demo of the calibrate function:
- The entire code of calibrate function
- The lesser prototype: https://github.com/hydroplantno/plant-information-node/commit/bd588a2da887a00a1adf570e1ca1d06b87fe17a9
Theo Magnor
This week i have spent time visualising the function moveRowFromTo(), this function is responible for moving the plant rows from one location to another. The function consists of multiple functions like moveToRow() which moves the unit to a specific row, detach() and attach() which will grab and let go of a row in order to move it. After i had visualised the logic, i started coding, and came up with something that i think will work, but i have to do some testing and more fine tuning before i can know for sure.
Diagram:
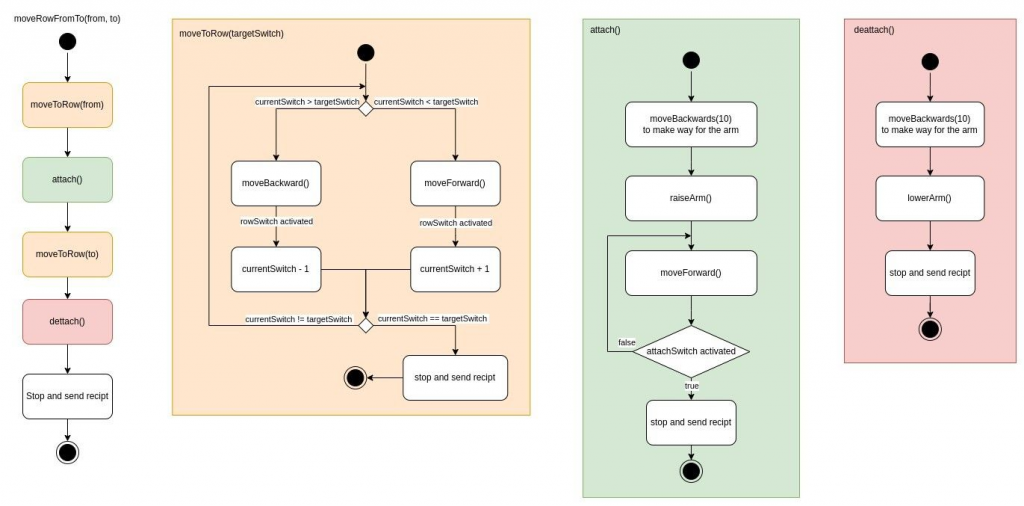
Code for the different functions mentioned above:
void PlantMoverController::moveToRow(int targetSwitch){
    if (targetSwitch < m_currentSwitch){
        my_stepper->moveBackward(10);
        if (row_switch == true) {
            m_currentSwitch -1;
            if (targetSwitch == m_currentSwitch){
                // send recept
            }
        }
    }
    if (targetSwitch > m_currentSwitch){
        my_stepper->moveForward(10);
        if (row_switch == true) {
            m_currentSwitch +1;
            if (targetSwitch == m_currentSwitch){
                // send recept
            }
        }
    }
}

 void PlantMoverController::moveRowFromTo(int from, int to){
    moveToRow(from);
    attach();
    moveToRow(to);
    detach();
    // stop and send recipt
 }

void PlantMoverController::attach(){
    my_stepper->moveBackward(10); // making way for the arm
    raiseArm();
    my_stepper->moveForward(10); // moving towards plant row

    if (attach_switch == true) {
        // stop and send recipt
    }
}

void PlantMoverController::detach(){
    my_stepper->moveBackward(10); // making way for the arm
    lowerArm();
    // stop and send recipt
}
Ivan Bergmann Maronsson
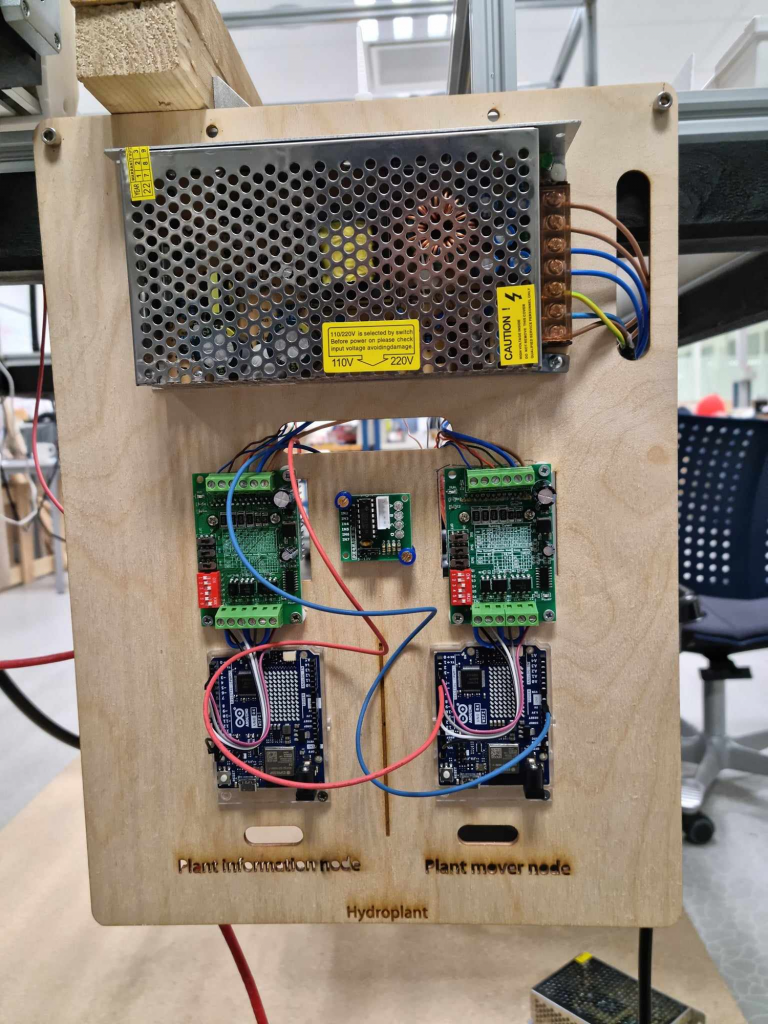
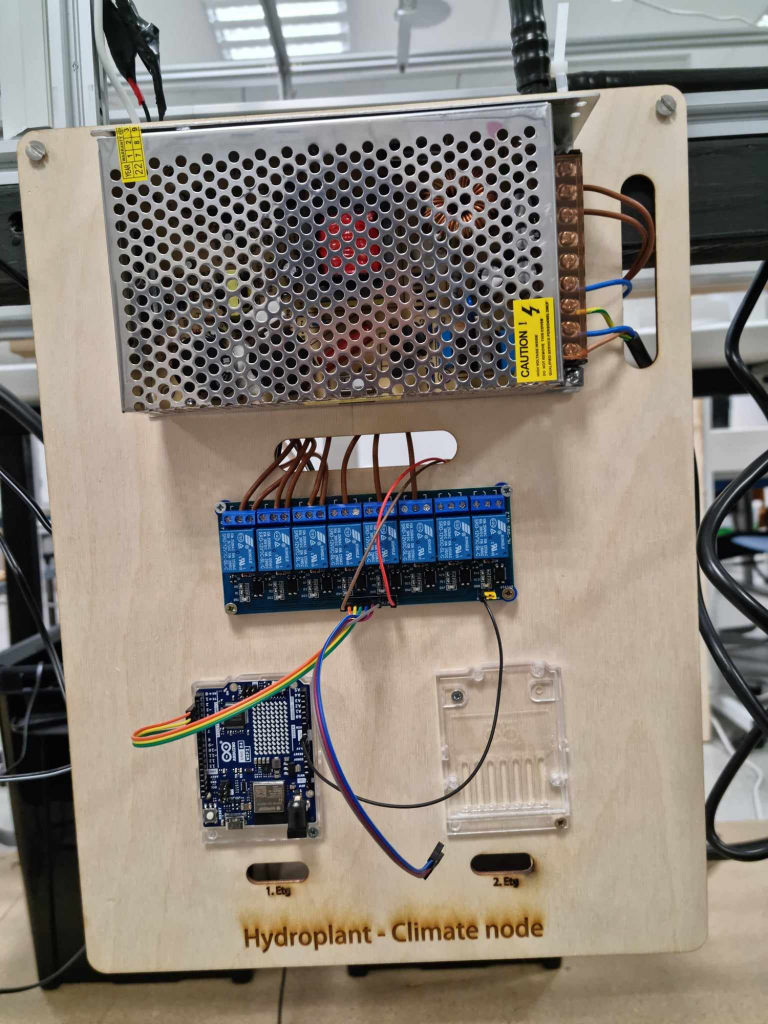
This week I didn’t work so much on the PCB aspects, but rather focused on getting the test benches up, with the help of Aditi, Oscar, Shahin, and Theo. Where certain parts of the system can be tested individually and easily. And I tidied up most of the cables and wiring around the exciting system. Then I helped the others when it came to testing the plant mover node, where certain switches had to be mounted and connected, from one end of the of the system to the other.
Climate Node:
Plant Information & Plant Mover Node:
