On Monday I met with Richard to get some help with the design of the spur gears. And it turns out that all the math I have been trying to get right, is something I don’t have to focus on. So yeah.. that’s 10 hours of my life I will not get back.
I have also, alongside doing some finishing touches on the design of the spur gear, started to print all the parts for the arm and base. Three of the parts where too big for my printer, so I ended up sending the files to Richard for print.
By Wednesday all the parts I sent to Richard was finished, and I started to put everything together. Kevin has started to code the prototype, and he wanted to continue with the coding. So, I put together all the parts that I could put together, and I will continue next Wednesday when I can get the rest of the parts from the prototype.
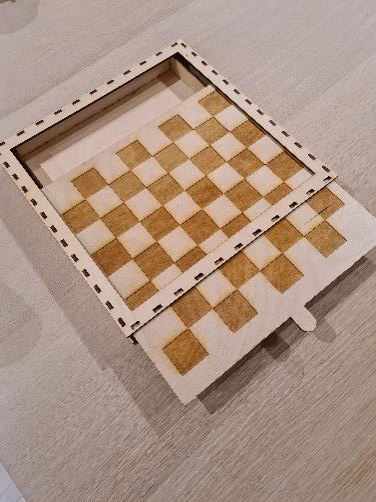
Since the first chess board I made turned out to be a little bit too small, I had to make a new board, and started to cut out all the parts I needed on Wednesday morning. On Friday I engraved the tiles on the chess board.

Workhours this week: 10.5 hours. Excluding the 3D printing and the time worked on the gears.
Mechanical Engineering – Liv Marte Olsen.
Computer Vision
PAINTING CHESSPIECES
Since we found out last week that the chess pieces had some of the magnets facing the wrong way, Liv Marte had to open them up end turn them. Some pieces got broken in the process and she printed some new ones that I painted to get them ready for the modification I wanted to do to my dataset this week. Painting took about 1,5 hours
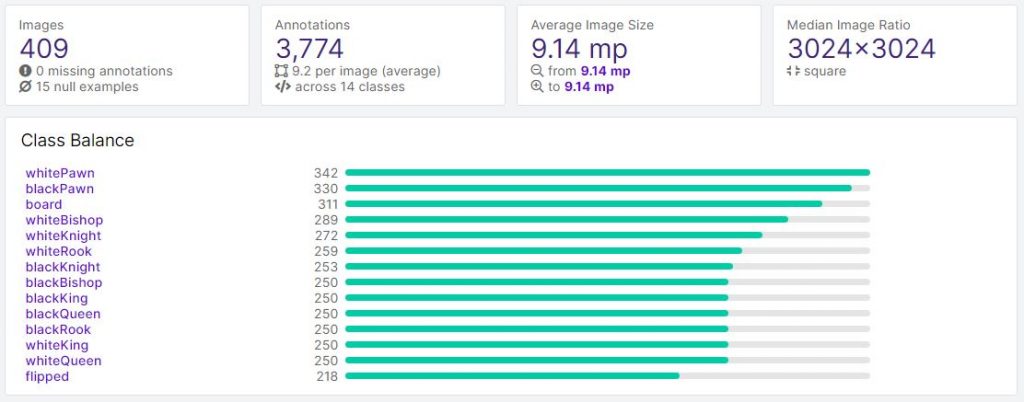
nEW IMAGES TO IMPROVE HEALTH CHECK
To improve the «health» of my dataset I sat down and calculated how many more of each class I needed. I wanted to aim for about 250 annotation per class and in the new pictures I needed to include:
- 2 Black Rooks
- 20 Black Bishops
- 38 Black Kings
- 48 White Queens
- 56 Black Queens
- 77 Flipped Pieces
- 80 White Kings
This ended up being around 100 pictures all together and this took me about an hour.
aNNOTATING THE LAST IMAGES BEFORE TRAINING
I annotated all the last images in about 3,5 hours. Now the health of the dataset is a lot better as you can see on the image below. I have also added some “empty” pictures to the set, so it doesn’t learn that there always have to be something in frame. Now that it’s all done, I must send it away for training, which takes about 24 hours.
PRE-PROCESSING AND AUGMENTATION STEPS
Before you send the model away for training, you are able to add some augmentation steps to all the images, and some prepossessing steps before this. This will allow each image I have annotated to be used more than one time, since each augmentation steps I add tweaks the images a tiny bit, and then adds those images to the set.
Pre-processing steps I added:
- Resize: Stretch to 416×416
- Grayscale: Applied
Augmentation steps I added:
- Flip: Horizontal, Vertical
- 90° Rotate: Clockwise, Counter-Clockwise, Upside Down
- Crop: 0% Minimum Zoom, 20% Maximum Zoom
- Rotation: Between -15° and +15°
- Shear: ±15° Horizontal, ±15° Vertical
- Hue: Between -25° and +25°
- Brightness: Between -25% and +25%
After these steps the dataset now includes 985 images.
rESULTS FROM TRAINING
By the time I arrived at school at 09.00 on Wednesday my model was done training, so I got to test it.

WHAT DOES mAP MEAN?
On the image above you can see something called mAP. The abbreviation mAP stands for Mean Average Precision. It is employed to gauge how well computer vision models are doing. mAP is the same as the average of the Average Precision metric across all classes in a model.
https://blog.roboflow.com/mean-average-precision/
As you can see in the image the results are pretty accurate, but they are a little too accurate to be honest, and I do believe that the reason for this is that I ended up with too few images for validation and testing. These images are only about 12% of all the images, and if I have time to adjust this before we are done with the project I will add more images to these two parts.
After the training you are able to test it directly in your browser with a webcam and it was really cool to see it in action.
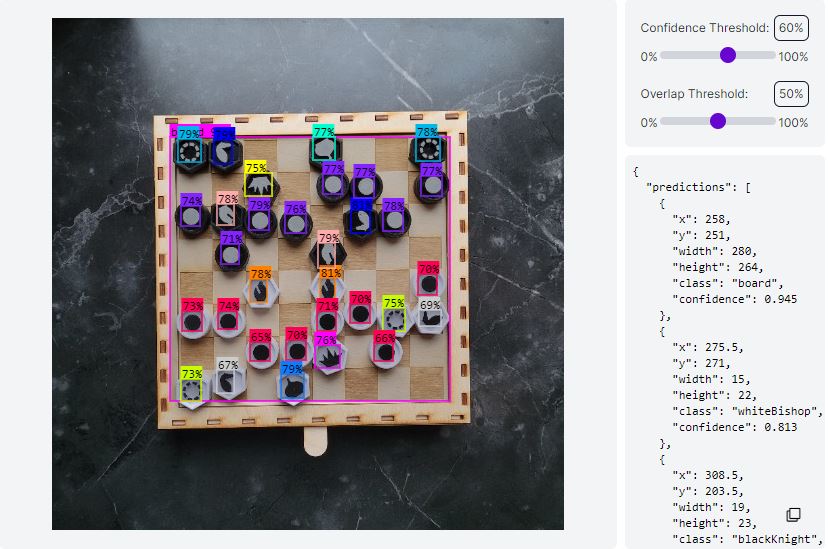
Above you see the results when testen on a picture, and on the right side you see the outputs we need to access in our code to determine where each piece is.
MODIFICATIONS IN THE FUTURE
Possible modifications I will do to the set in the future if I have time for it, would include:
- More validation and training images as mentioned above.
- More pictures of the Knight and the Bishop pieces, as these have a small chance of mixing with each other.
- Remove the “Flipped” class, as I don’t think we will have use for it.
- More NULL examples, meaning more empty images, as it still finds some pieces where there aren’t any in frame.
Hours on the project this week: 10
Marte Marheim, Computer Science
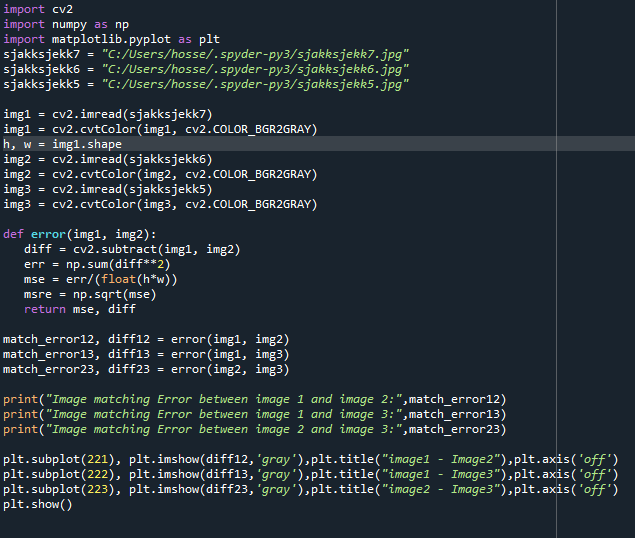
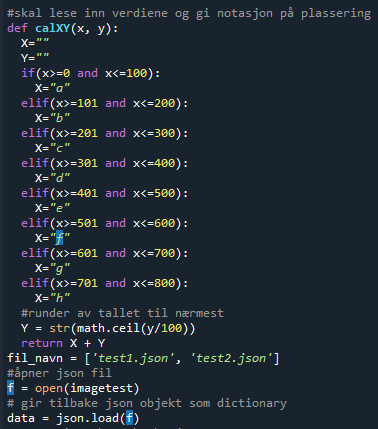
Etter å ha hjulpet med setup til prototypen(1-2timer med småfeil ogsånt), så sjekket jeg videre på plotting av bilder av sjakkbrettet, det er ikke så lett som det virket som, ettersom jeg må få vite forandring i bilder, eller forandring i x – y på brikkene fra bildet. Har sjekket på MSE som står for mean squared error, det er visst en algoritme som man kan bruke for å se forskjell på bilder, etter en del undersøkelse(1-2timer), så fant jeg ut at det blir vanskelig å implementere siden det vil bare fortelle forandring i bildene, noe som kan være eventuelt å bruke om: Kamera tar bilder hele tiden også kun når en forandring har skjedd i bildet så vil den faktisk “ta tak” i bildet og først da produsere nye x -y verdier.
Så jeg bestemte meg heller for å lage et mal for når datasettet(roboflow) er klar for å plassere ting inn, jeg vet ihvertfall at det produseres x og y på hver enkelt brikke i roboflow datasettet. så alt jeg må gjøre err å få ut den dataen når jeg for tak i koden/api key til roboflow
Hossein Sadeghi, Computer Science
Programmering av armen:
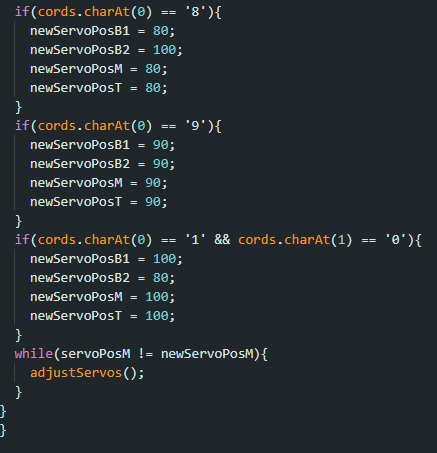
Fortsatt en del feil med bevegelsene til prototype armen. Servomotoren på midterste ledd ble byttet. Hver av motorene ser ut til å fungere hver for seg men ikke for eksempel 2 samtidig. De to nederste er viktigst å få til å fungere samtidig først. Her er foreløpig kode for arm:
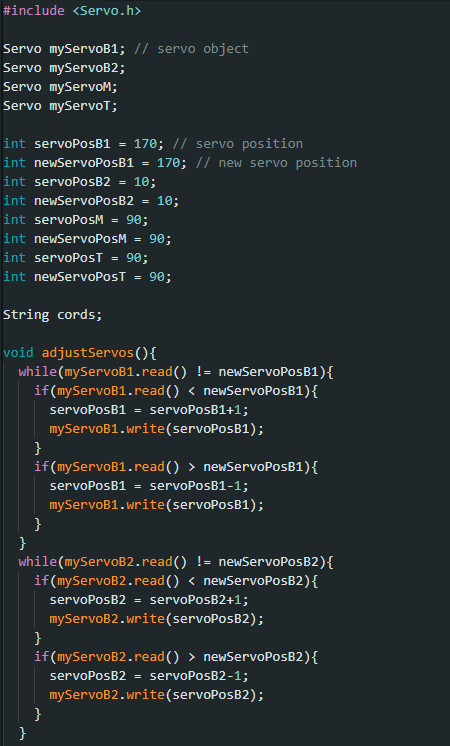
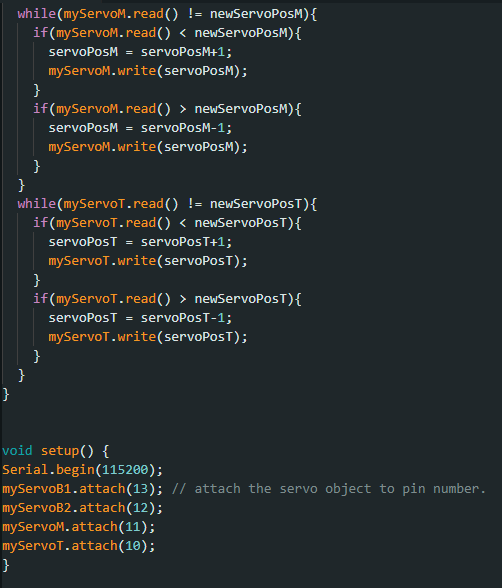
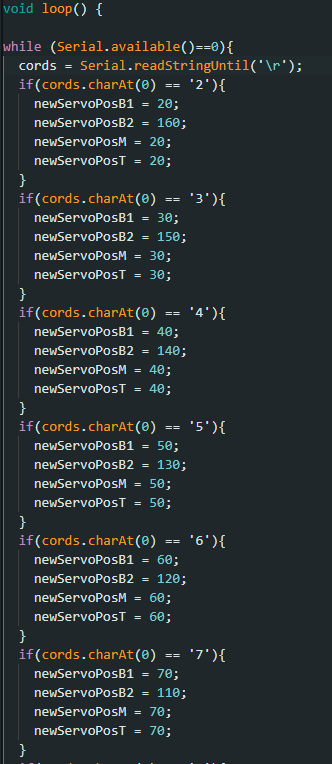
Skiller mellom servo objekter for de 2 nederste servomotorene (avsluttes med B1 og B2), den midterste (avsluttes med M), og det øverste leddet (avsluttes med T). Her er hovedloopen som jeg driver å tester ut:
Kevin Johansen – Computer science