Computer Vision – Week 5:
Wednesday (08:30 – 13:00)
Liv Marte and I (Marte) met in Dronesonen at around 8:30 in the morning to review our work on our part of the project and our plans for the remainder of the week.
Since I don’t work well in dronesonen, I spent the majority of my school time watching a ton of basic tutorials and courses on openCV, Roboflow, and other object detection projects. As a total beginner on this topic, its difficult to locate appropriate learning resources on these subjects. I constantly feel like they skip steps and leave me stranded on new problems.
Some of the videos I have been watching:
- https://www.youtube.com/watch?v=wa2ARoUUdU8&t=168s
- https://www.youtube.com/watch?v=2FYm3GOonhk&t=3558s
- https://www.youtube.com/watch?v=Vg9rrOFmwHo
- https://www.youtube.com/watch?v=HXDD7-EnGBY
Thursday (11:00 – 22:30)
SHOULD I DETECT CHESS PIECES USING OPENCV OR ROBOFLOW?
This was one of the questions from the previous week that I actually learned the answer to. The solution was as simple as combining the two and using the openCV library in the code for its camera functions and using Roboflow for training the computer vision model. I can then utilize the greatest qualities of both of them.
Even though I am unable to accomplish it directly on the Raspberry Pi just now, I wanted to attempt and start programming after discovering the answer to the question above. However, I had to prepare several things beforehand in order to execute this.
Setup – ATOM
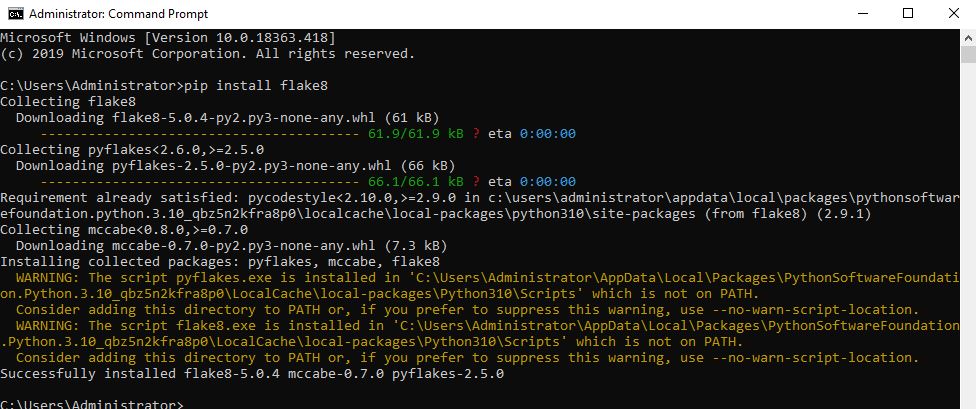
First i had to download and set up Atom which is a text editor developed by github. The suggested programs for the text editor had some issues downloading, so this process took some time.
Setup – openCV Library
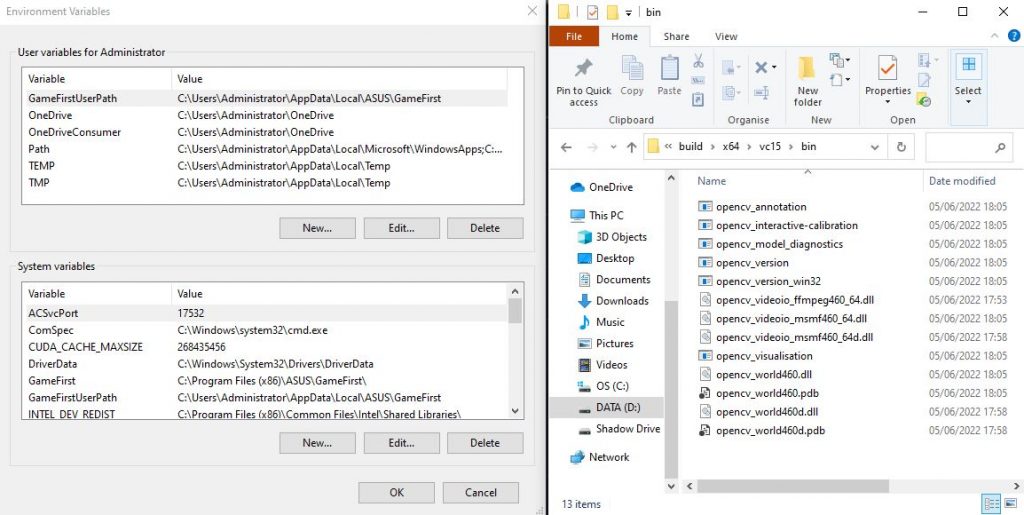
First i downloaded openCV from github.
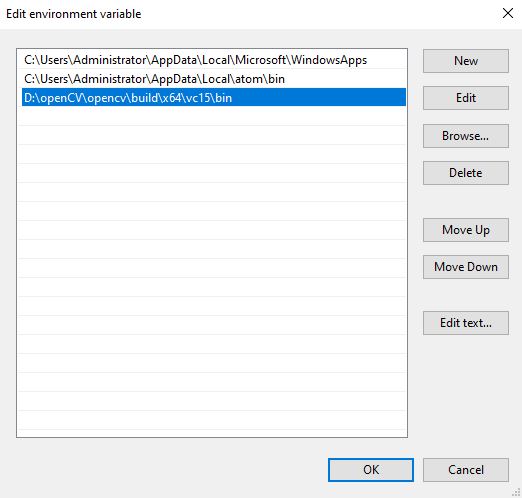
Then I had to add the “bin” folder adress (inside of the openCV folder) to the “Environment Variables Path” as seen below. Your operating system uses the PATH system variable to find required executables from the command line or Terminal window. After all this I just had to restart my computer and import it to any code file.
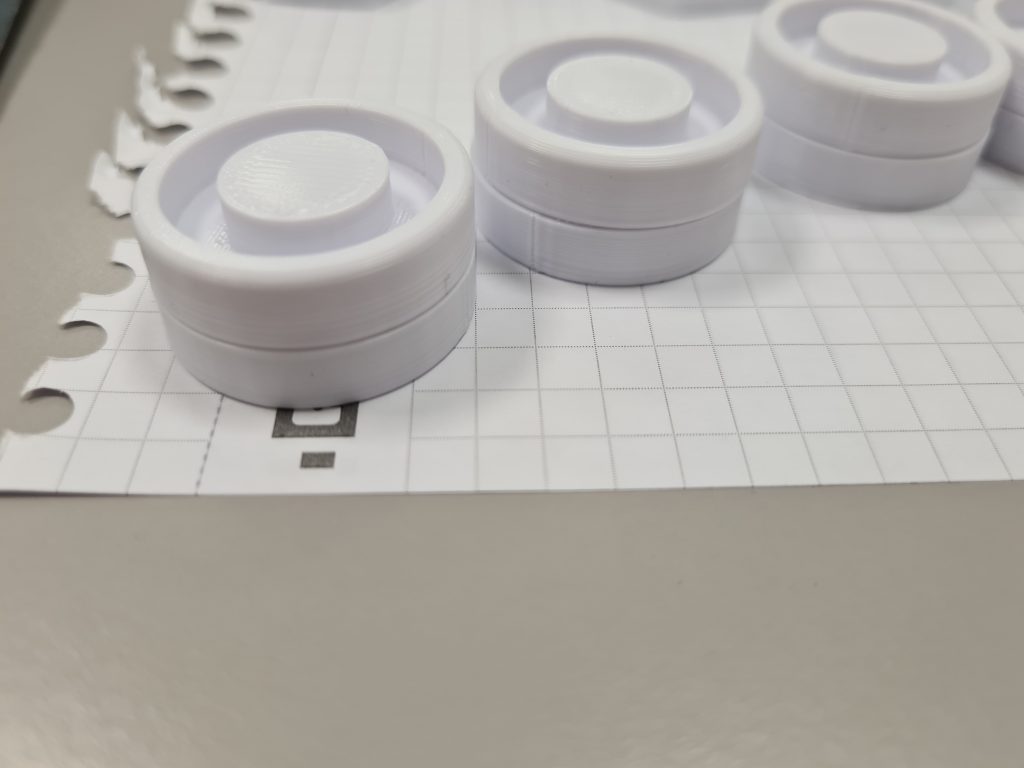
Roboflow Dataset
Since I cannot train my computer vision model until I have my Raspberry Pi operating, I found a public dataset from roboflow that recognizes standard chess pieces to use for the time being. Since our chess pieces are 3D printed in a completely different style to make them easier to pick up by the robotarm, this dataset won’t work for us.
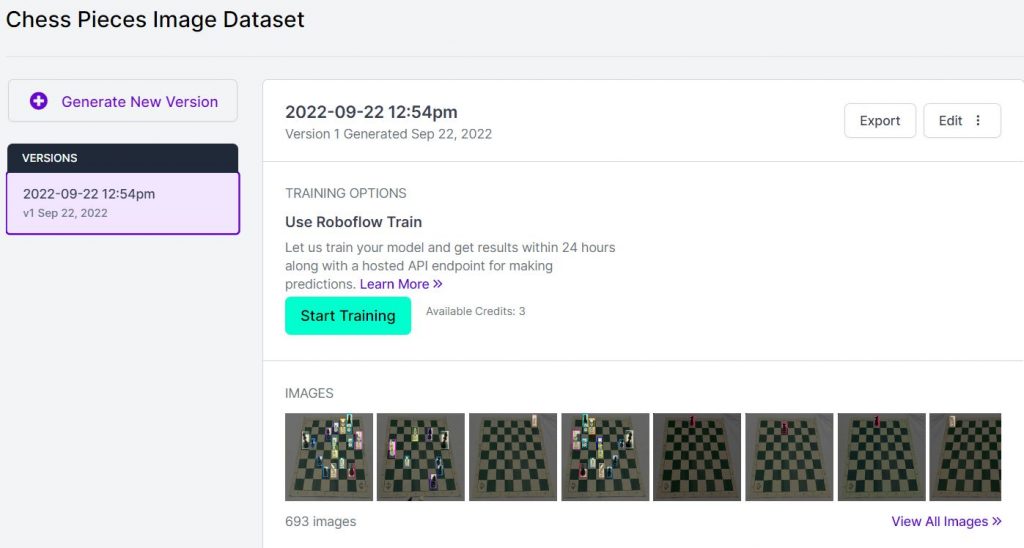
I pressed export to get some data i needed for the code to know what dataset it need to use for recognizing the chess pieces. This data is the API Key and the model name.
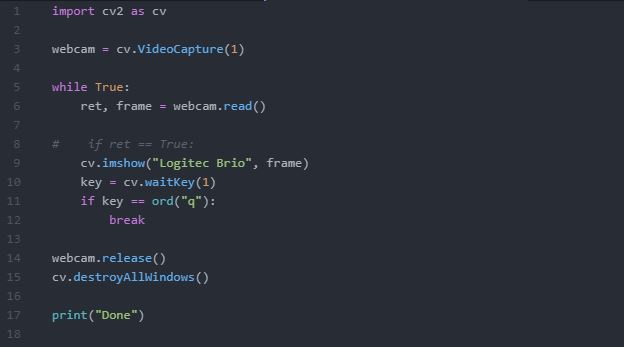
Webcam connection code
Since I had not done this before, I created this short code to check if I could get my camera to open and stream live. I did establish a link, so I felt comfortable beginning to write the actual code for the recognition.
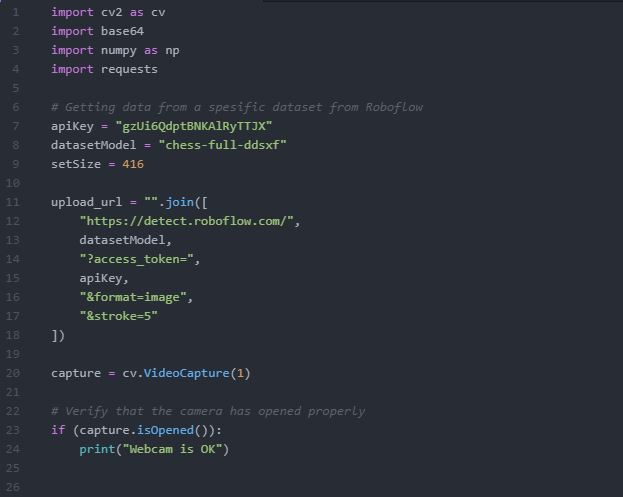
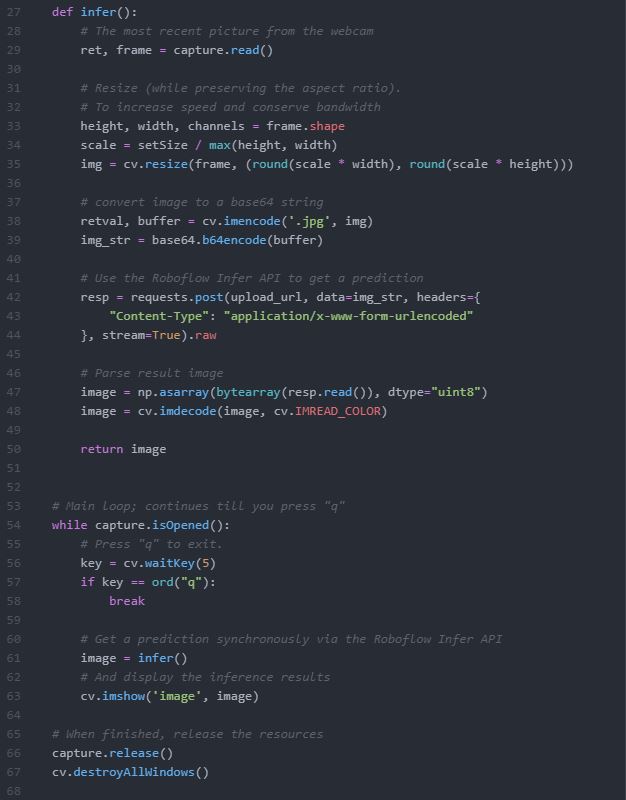
Main code for Object recognition
The code I’ve been working on for the majority of the day and evening is shown below. The code includes comments for each step.
Error message:
Webcam is OK
Traceback (most recent call last):
  File "C:\Users\Administrator\Documents\Atom\testingCode\webcamRoboflow\infer.py", line 66, in <module>
    cv.imshow('image', image)
cv2.error: OpenCV(4.6.0) D:\a\opencv-python\opencv-python\opencv\modules\highgui\src\window.cpp:967: error: (-215:Assertion failed) size.width>0 && size.height>0 in function 'cv::imshow'
After searching online for solutions, I believe that this indicates that imshow() isn’t receiving any video frames from the input-device.
I’ve been attempting to solve this for a few hours now without success, so I’ll try again tomorrow.
Friday (13:00 – 17:00)
I’ve spent the entire day researching this problem, watching videos, reading forums, but I still can’t figure it out. I’m going to take a break from this over the weekend and come back to it next week with a new perspective in the hopes that I can get both that and the Pi to function.
Hours spent on the project this week: 20h
Marte Marheim – Computer Science
Mechanical Engineering
For week 5 I started to work on the project on Monday, where I finished the designs for the bottom plates for the chess pieces. I managed to have it all done and printed by Wednesday, and assembled the chess pieces in class on Wednesday.
The work with the chess pieces was a “straight forward job”. Since I used an open-source 3D print file for the main chess pieces (the top), I used the design and measurement from the completed print when I designed the bottom plates. After the design was done and I had all the bottom pieces printed, I put the magnets inside and glued the bottom pieces on to the main (top) pieces.
As I mentioned previous in this blogpost, I met with Marte in Dronesonen and we had a group metting Wednesday morning. We talked about where we are in our project, and made plans for what we need to continue doing for the upcoming weeks.
Since we dont have anybody from electrical engineering in our group, we had a small meeting with Dag where we discussed the electrical components, how to connect it all and got some help choosing an electromagnetic magnet for the robotic arm. It turns out that the magnet we initially had in mind was not compatible with our thoughts and designs, so we now have hopefully ordered the right magnet for the project.
For the remainder of the day and week i started to work on the chess board. I originally had planned to use an open source for the chess board, since a “chess board is a chess board”, but after a small talk with Richard I ended up designing the chess board myself.
For the upcoming week, the plan is to cut and put the chess board pieces together. The main plate of the chess board will have the tiles engraved. There were some concerns about whether the camera would be able to detect the black pieces on a dark background, but I discussed this again with Marte and we came to the conclusion that it should be possible. If it turns out that it does not work, then I just have to make a new top plate and just engrave the lines on to the plate.
Hours spent working on this project, week 5: 18 hours.
Programming progress
We figured out that we can send data through libraries from python to Arduino from the same computer, therefore we have concluded that we do not need Bluetooth on our device, making it easier for us to connect all the electrical components and making them work together as a whole and since we are not electrical students we have had some outside counsel and used a lot of our time this week researching on how to connect the devices and soldering, considering this task is assigned to us.
Now we are currently testing and figuring out how we can modify the algorithm to write code to send the data from python to Arduino code, using PYSerial library.
We have used 7 hours this week with the project.
Kevin Johansen, Hossein Sadeghi.