This seventh sprint was a bit of a longer one as we have had other subjects we needed to focus on. The following blogpost will therefor include the progress we had the last 1.5 weeks.
Anders
This week I have finalized our control application for windows, I ended up creating a Windows Presentation Foundation application which turned out like this:
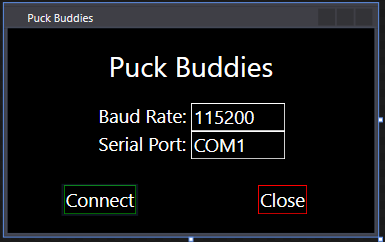
The UI elements seen here are all bound to a variable controlled by the View-Model so that if a value changes is will force an update of the UI element. This will also let us connect the whole model to another UI program if wanted.
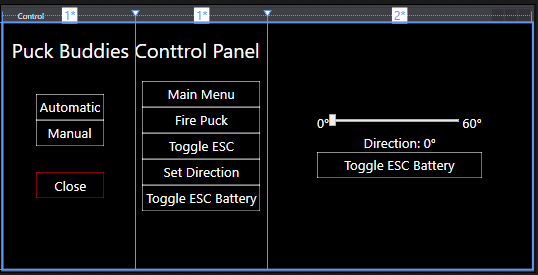
The application uses Serial Port communication to engage with the Arduino microcontroller, and is also created as a MVVM application which lets us reuse large parts of the application if we decide to create an application for anything else!
Halvard
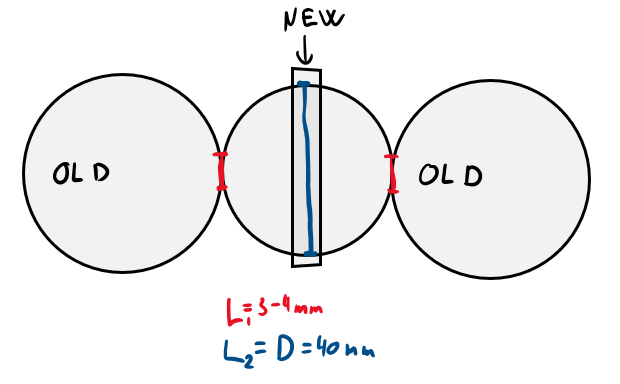
This week I had to rework our firing mechanism. Gaute and I also had to install a new edition of solidworks since the old license went out, so no modeling was done this week. After test firing we figured out that we had to transfer more energy to the puck and remove some of the variables that will affect the accuracy.
Our first iteration relied on using 2 spinning wheels at each horizontal side of the puck, however we found out that we did not transfer enough energy to the puck from the wheels. This is because the wheels only interact with the puck on a tangential surface giving us only 3-4 millimeters of acceleration.
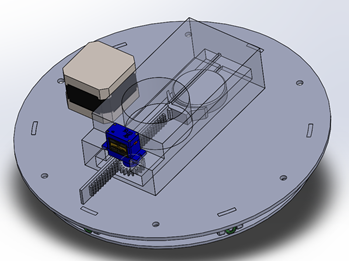
Our new proposal is 2 spinning wheels located on each vertical side of the puck, this allows us to utilize the whole diameter of the puck to accelerate it forward. See the drawing for a visualization of the new sub-system compared to the old.
Gaute
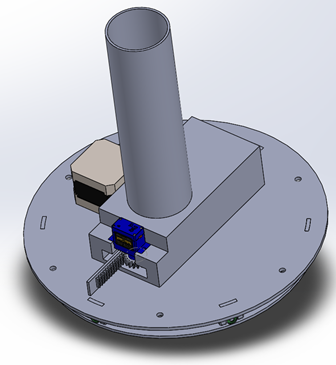
This week I worked on the development on the launching-mechanism. Some of the challenge with this is how are we going to feed the highspeed wheel which accelerate the puck. So far I have worked on a solution where I use a rack and pinion driven by a servo that pushes the puck into the highspeed wheel.
Nicholas
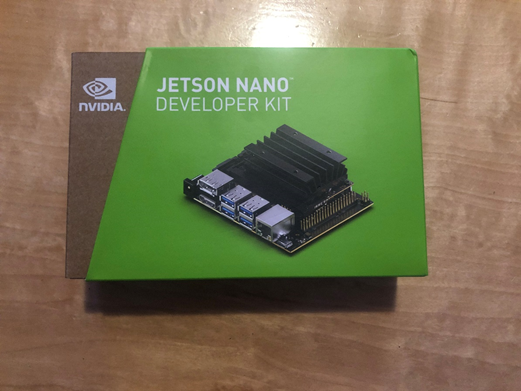
After a bit back and forth we decided to invest in a Nvidia Jetson Nano instead of the Raspberry Pi as it is more suited for machine learning tasks. And let’s be honest, who doesn’t like to play around with new gadgets?
The Jetson more powerful than an Raspberry and can draw upwards of 20W. This extra power consumption comes for the inclusion of a more powerful GPU core. The Jetson uses an Nvidia Tegra X1 SoC which consists of an Arm Cortex-A57 CPU paired with an Maxwell GPU. For anyone interested, the Maxwell architecture is the same one that was used mainly in the 900-series of GTX cards. The CPU on the Jetson Nano is weaker than the one found in the newest Raspberry Pi (Coretx-A57 vs Cortex-A72). However, with CUDA support the extra GPU power of the Jetson Nano relay makes it a better choice for our application.
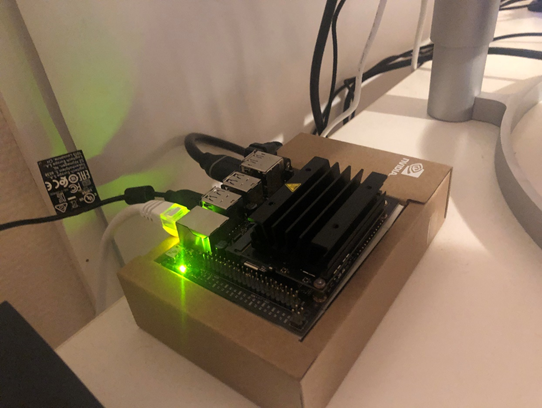
Moving on to setup of the Jetson the process was more or less the same as with the Raspberry. I downloaded the official image from Nvidia called Jetpak which is based on Ubuntu. I then flashed the image to an SD card using Etcher. After initial setup I switched from using the micro USB to power the board to using a separate power jack. Now, with a new power source I changed the power profile of the Jetson to Max power so the CPU would be clocked higher. Then, once again, setup of OpenCV and all of its components.
As before, this process was mostly like before only that I this time needed to add some flags before running the make command.
Adding the flags
-D WITH CUDA=ON
-D WITH CUDNN=ON
as well as some others compiled the OpenCV files with support for CUDA. I then added the following line (commented out here) to the Python program to enable CUDA usage for OpenCV:

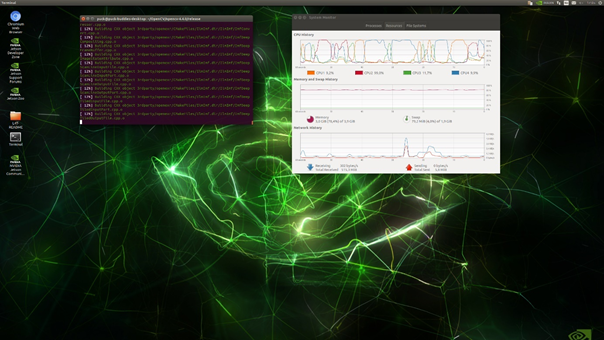
The results so far are promising with an result of roughly ~10 FPS using YoloV3-Tiny. This means that there will be a bit over 100ms between each image which isn’t optimal, but can work as a proof of concept.
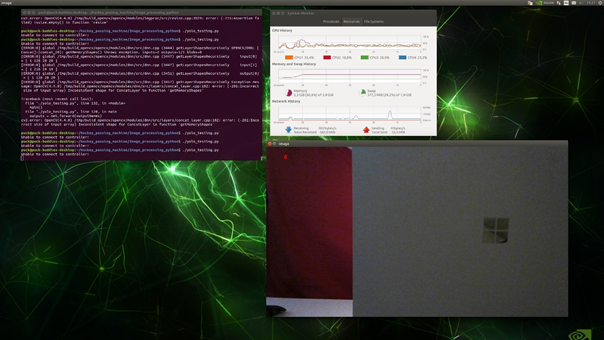
This result was also without any form of optimization to the code as it’s the same Python program I wrote at the start of this semester. This Python program have now been used on my laptop, a Raspberry Pi and now a Nvidia Jetson Nano, all without any modifications based on the platform it’s running on. This has saved me a lot of time and I think it highlights why Python is such a good language to prototype software on as the code can be moved between platforms. Also note that the CPU cores are almost not doing any work in the screenshot above, all the heavy lifting is being done by the GPU.
As the Jetson is more of a niche product than the Raspberry Pi, there is significantly less information available online. There is however enough to get me started and point me in the right direction. I also learned more about bash and generally became more comfortable with only using the terminal to do all tasks while working with the Jetson Nano. Looking ahead now, I will have to make changes to the Python program so it can better work seamlessly between the different devices I run it on. Especially regarding the handling of USB devices as it is different between Linux and Windows. It also needs to be able to run in headless mode, which I currently does not support.
I also talked to Steven this week regarding how to create a tracking program that could be deployed in our project as solutions used by other projects weren’t necessarily possible to use in our project. He suggested using the movement of the object (a person) and tracking the pixel changes. This should work as there wont be any other moving objects inside the frame. Now that I have a working proof of concept I can start to look into how to implement this solution, which without a doubt would give us much better performance. I also want to port over the Tensorflow-light Python program I wrote for the Raspberry Pi and see how that performs on the Jetson Nano. This way I can compare several different approaches and look at the different pros and cons.