Mechanical (Shadi and Per-Terje):
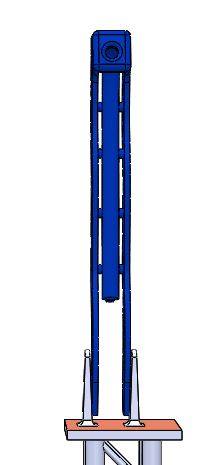
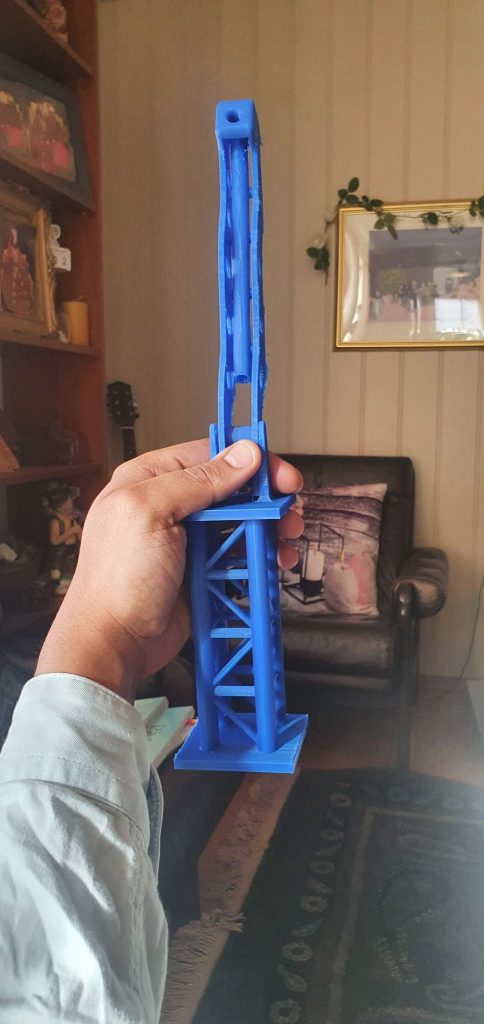
Shadi and Per-Terje have been working on the design and 3d printing of several important parts for our system during this week. First of all the design and 3d printing of the crane is completed at the end of this week. The crane will be attached to our vehicle which will be powered by a servo motor, and at the crane will hold the waterhose as well as a soil moisturing sensor to check if the soil is moist or not.
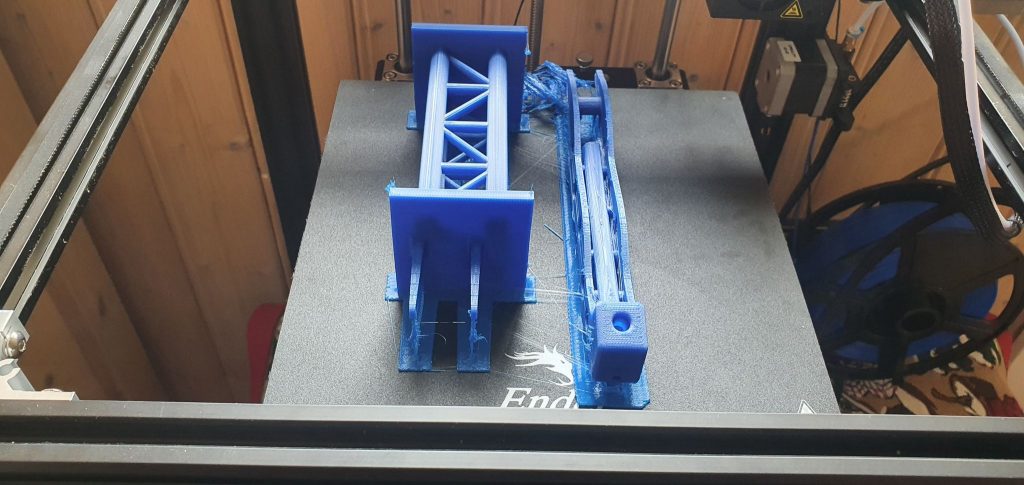
Our mechanical engineers, Shadi and Per-Terje have also designed and 3D printed the bracket which will be holding the Arduino board, batteries, sensor etc.
Electrical (Erlend):
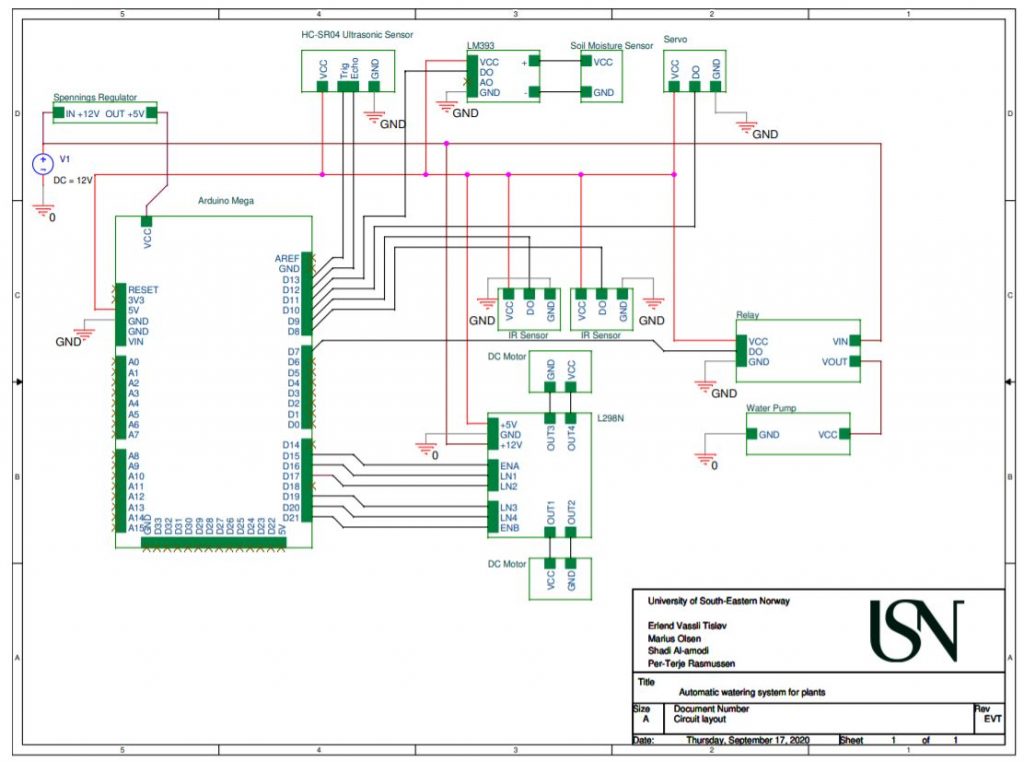
This week I continued the testing of some of the different components we have for our system, mainly the ultrasonic sensor, which will be placed on the side of the robot in order to locate the pot plant. I also used Orcad capture to create an electrical overview of the system which will be very helpful when starting the assembly of our system.
Computer / Software (Marius):
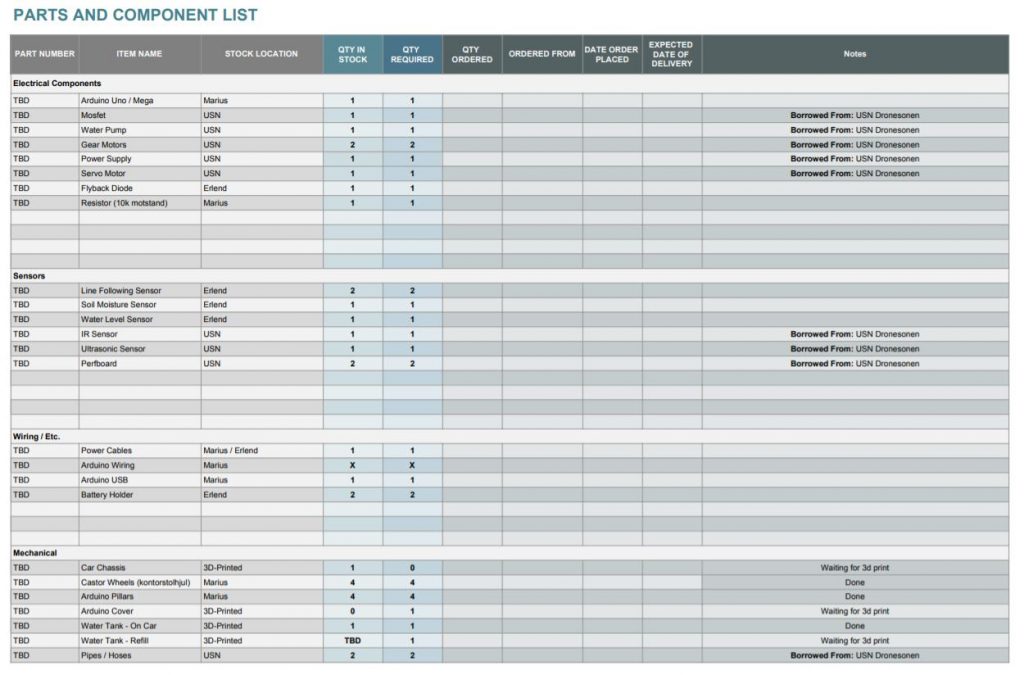
I started this week with some administrative work and updated our parts and component list. We have acquired most of the parts needed for our system to be assembled, but still waiting for a crucial component which is the chassis of the vehicle. We have had a few problems with the 3D printer which have led to some delay regarding the chassis, but hopefully this will be in place soon. The updated parts and component lists can be seen below:

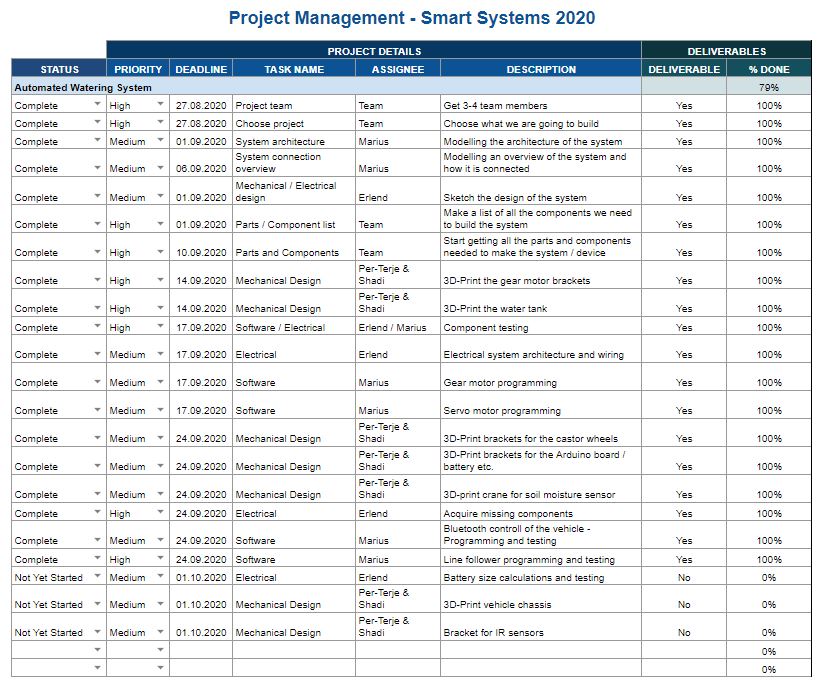
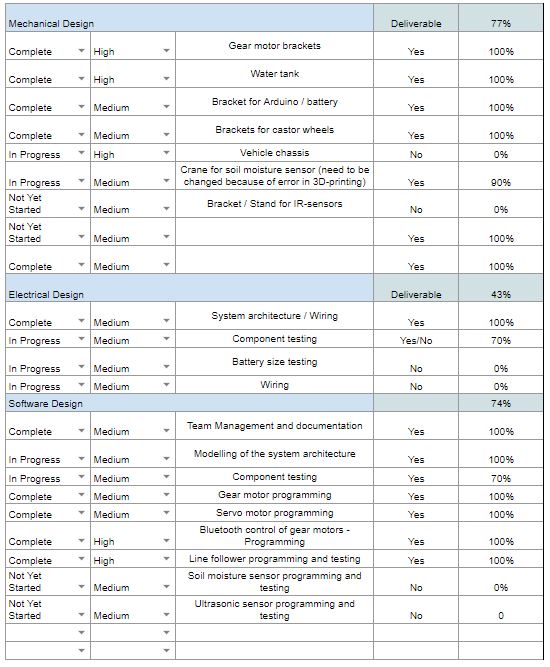
After updating the parts and component list i started updating the project management spreadsheet where we keep track of all the work we have done so far and what we need to be doing next.
Working on the project:
Since we do not yet have a chassis for our vehicle, it was hard to do anything besides testing the different components in our system one by one. Therefore, i decided to make a temporary chassis we can use to test if all the necessary components work together as hoped, and if the 3d printed parts work as intended.
I gathered some castor wheels from Jula which will be used for steering abilities and a plexiglas from Biltema which will function as a temporary chassis until our main chassis is 3d-printed. The two wheels on each side will function as driving wheels and is connected to two different gear motors. These gear motors are attached to the chassis by using the gear motor brackets we will be using on our main chassis.
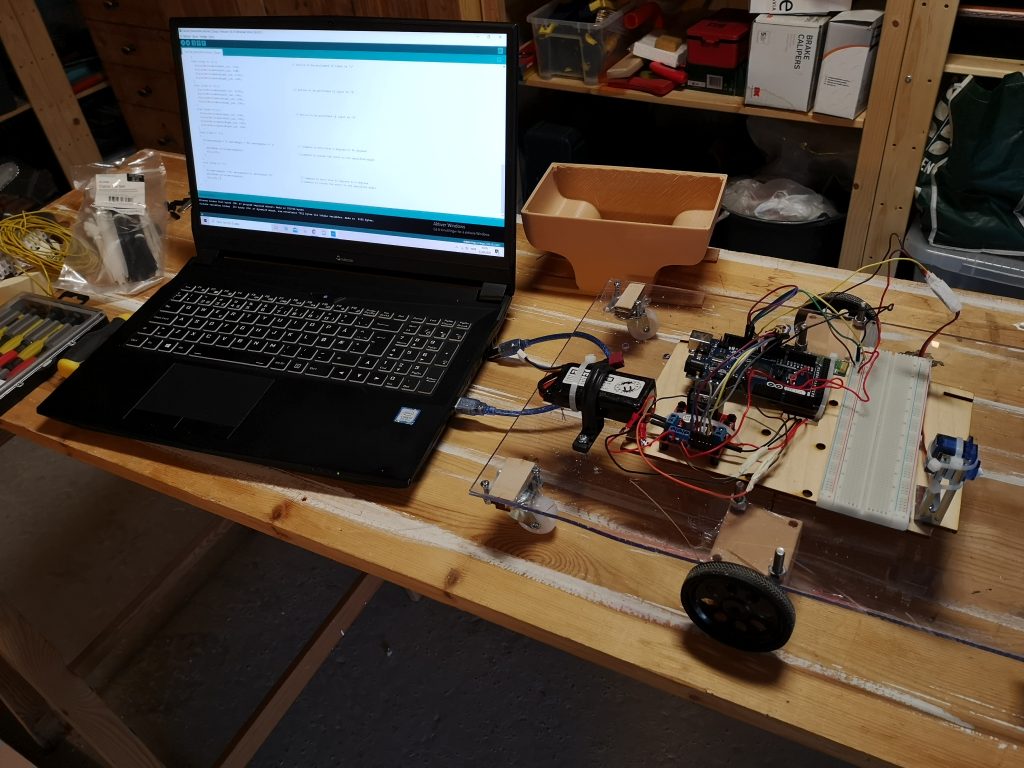
The main goal was to create a program which could operate the vehicle from a bluetooth device such as a mobile phone. This would make it easier to test the servo motor connected to a crane, check if the size and weight ratio work etc, before moving onwards creating an autonomous vehicle.
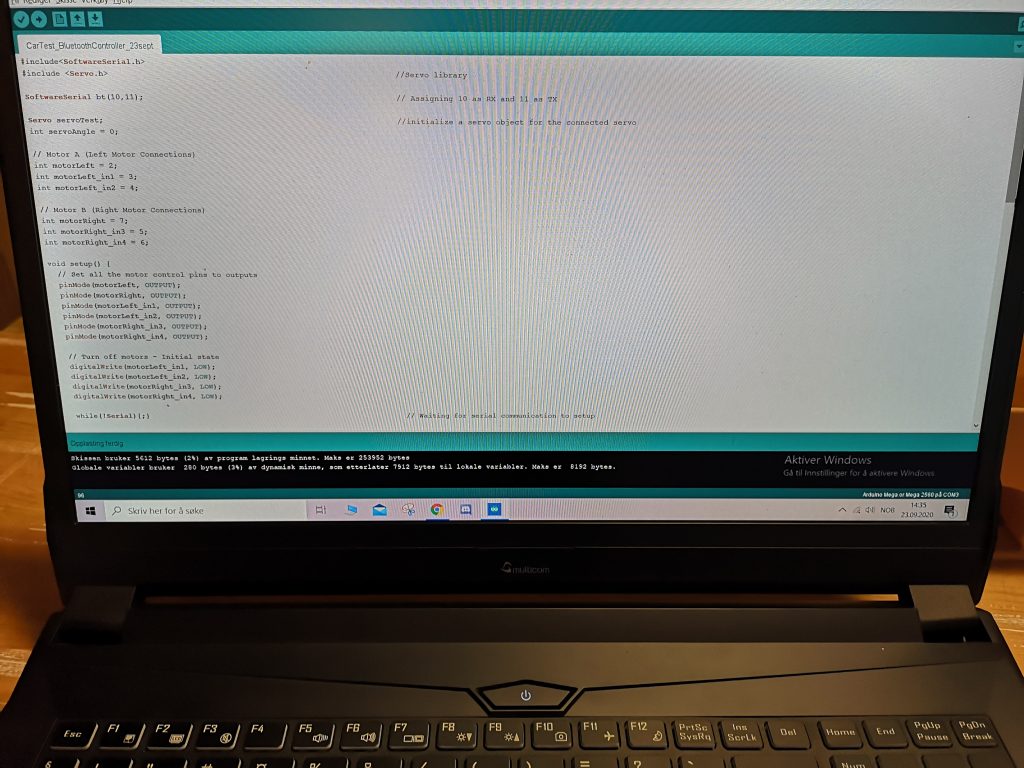
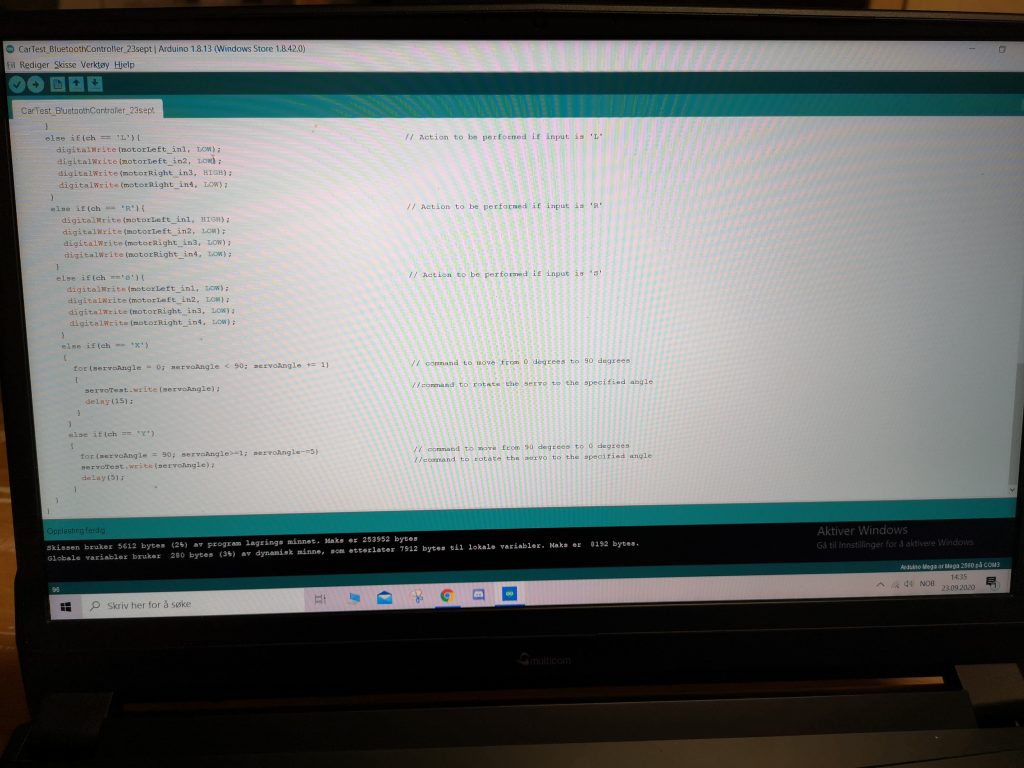
Regarding the programming, i did not have any major issues getting the gear motors and bluetooth control working. I downloaded an Arduino Controller app on my phone from Google Play and added keys for movement forwards (F), backwards (B), left (L), right (R) and stop (S). If the key sent from the bluetooth device to the Arduino BT reciever matches any character: F, B, L, R or S, it will make necessary actions for the gear motors. I also added the keys X and Y which will make the servo motor operate from 0 – 90 degrees when X i pressed, and from 90 – 0 degrees when Y is pressed.
After being finished with both the vehicle assembly and the programming i had to do some minor testing to see if everything works as intended. The video provided below shows some of the testing: