Kristian – Week 7
This week I have connected the rest of the stepper motors with the drivers, except the one I found with a defective switch. The stepper driver is missing one of the setting switches, so I put it aside. Since the switch is either on or off it might still work, if it’s on the correct setting. If we decide to do two stepper motors on one driver it’s still enough even though the last driver isn’t working. We can do this because the two x axis motors can be driven with the same pulses, even though one must rotate the opposite way.
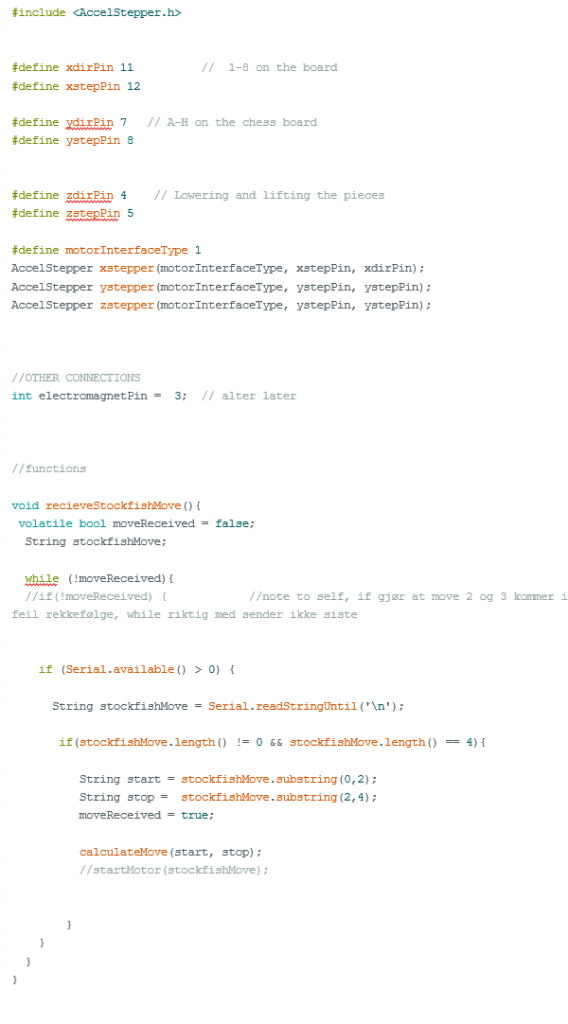
I have also done some coding this week. Since we don’t have magnets, I am still simulating having it with a function sending strings to stockfish. Communication both ways are working, and we can start motors after a move from stockfish. The robot must be able to find a location on the chessboard with the string from stockfish. On Monday we could only start the motors with a random set input.
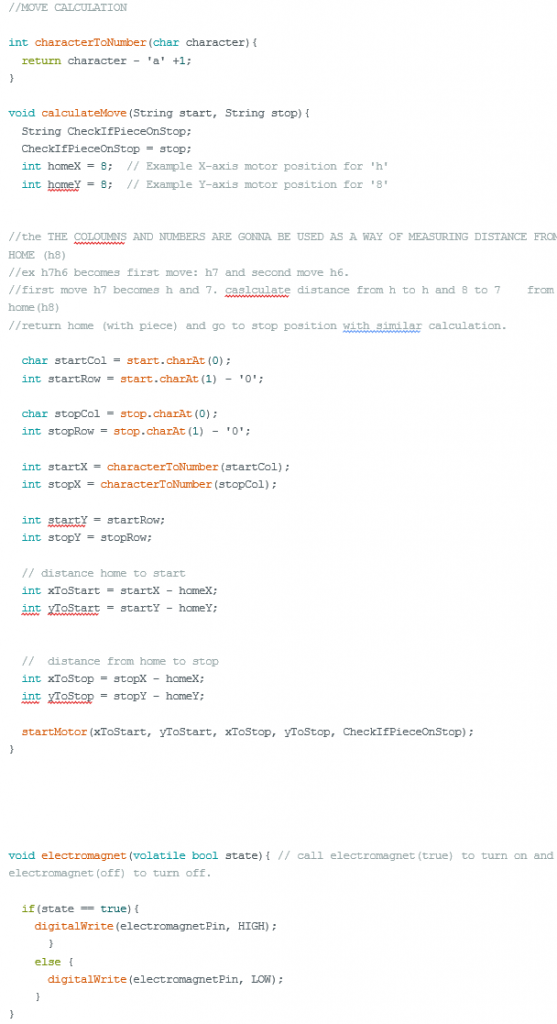
Arduino is receiving a string from stockfish like this: h7h6 which means h7 goes to h6. Emil created a program that splits the string in two. Making h7h6 into “h7” and “h6”. He also did a lot more but I’m saying this to explain where I tried to continue for an alternative solution. I have created a function calculateMove() that takes those splitted string (substrings) as inputs and use these to calculate distance.
it works like this:
robot has a home square which i now set to h8(can be altered) if stockfish wants to move a piece from h7 to h6. Emils function divides the string into two new strings, and then calculateMove() will divide each one more time. Start will be h7 and stop will be h6. as I said home is h8.
first it does start: h7 becomes h and 7. (x and y axis movements) h for x axis and 7 for y axis.
Distance from h to h on the board is 0 meaning no movement needed in x axis.
Distance from 8 to 7 is one meaning movement must be done in y axis.
now we do stop:
h6 becomes h and 6.
distance from h to h is still none, no movement in x axis.
8 to 6 is 2, meaning we need to move 2 squares in y direction.
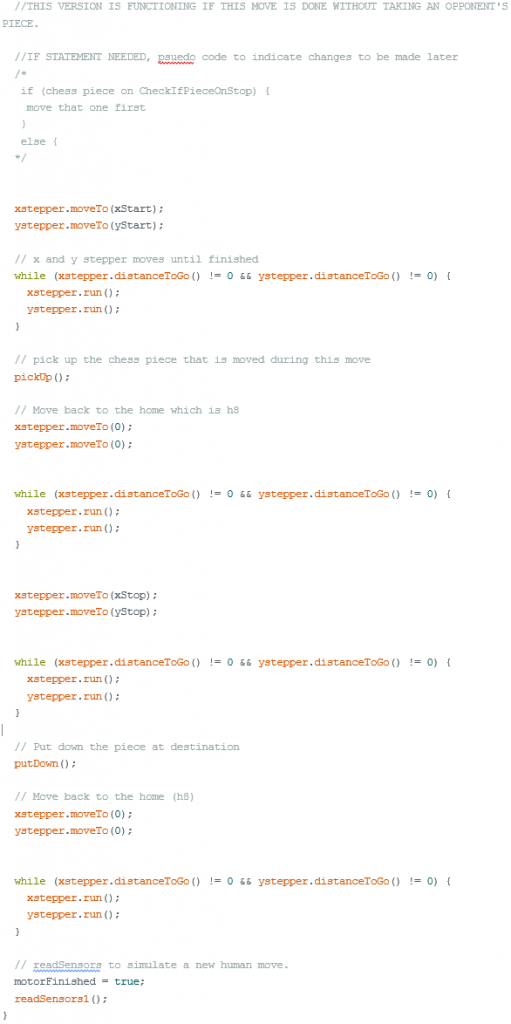
for the time being the program is calculating the distance from home which will force the robot to come home after picking up a piece to then go to the location the pieces shall be moved to.
ex. h7h6. robot goes from h8 to h7, picks up, goes home, goes to h6 put down and then home.
I have also updated the startMotors() function to move with this pattern of movement, the distance received from calculateMove() is also multiplied with an int to make 1 into 1 square in motor distance. This int is gonna be altered when we have everything built to find the correct distance on the board. Currently it’s a random one.
Moving and coordination should be working now. This is not a final decision, but it’s a possible one.
If the move involves taking an opponent’s piece, it will not work. However, I know how to fix this when we can scan the squares on the boards with sensors.
If (piece on the stop square) the robot must remove that piece first.
else
we do as the program does now.
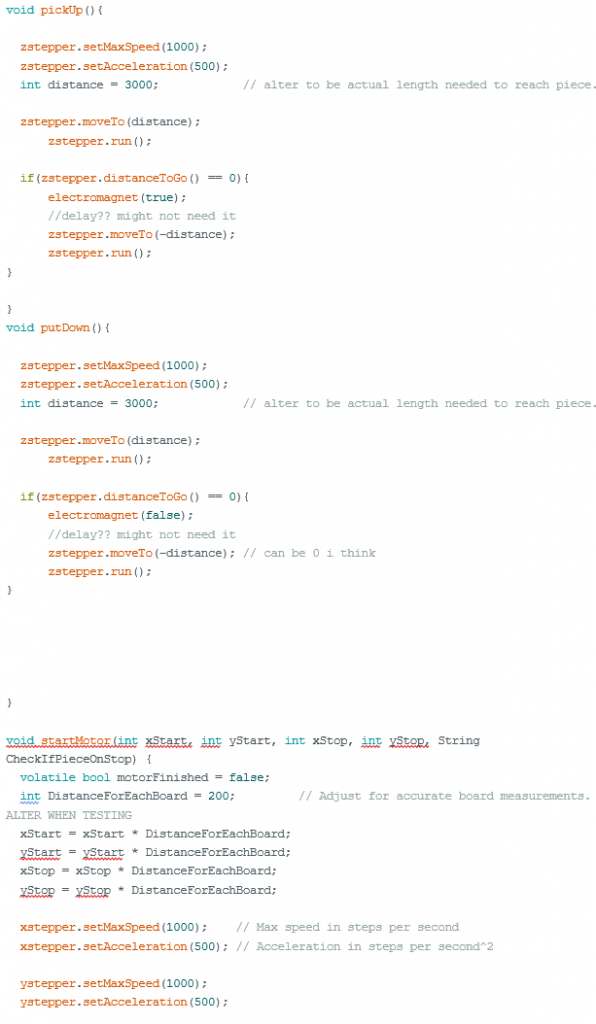
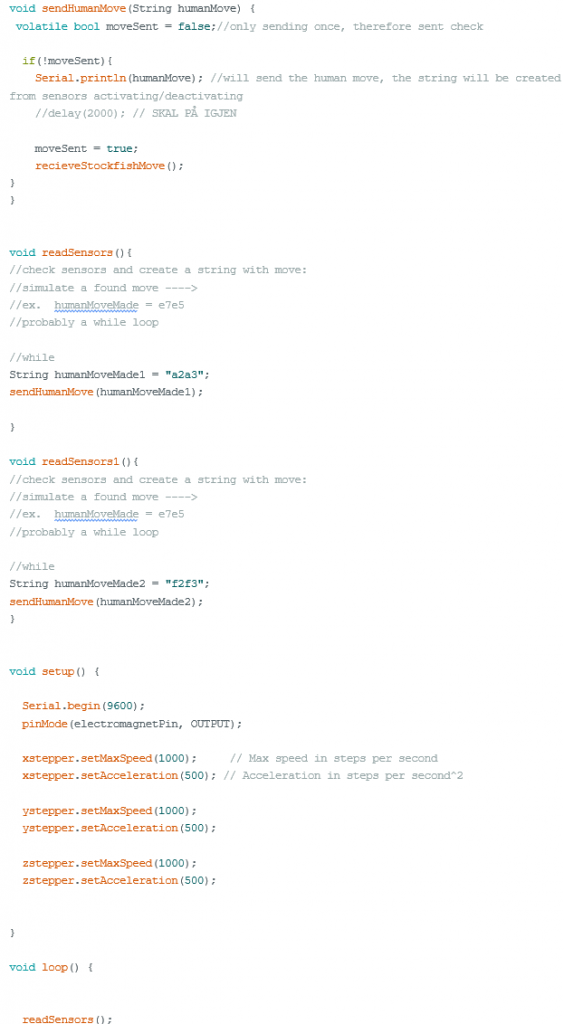
also added a function for electromagnet and picking up and putting down a chess piece.
the code:
Emil – Week 7
For this week me and Kristian worked a bit together, or we sat down together and tried to brainstorm coding ideas to have everything prepared for when the chess machine is put together with sensors and everything.
So, the problem that we face is that when stockfish sends us a move, we have a string that says, for example “d7d5” which is a standard move. This needs to be converted into a position that the stepper motors “know” where is and knows where to go to. The first thing we thought about is that we should split the string that we get to two parts so that it’s easier to work with. We did this with something called substring. Here is the code for doing this one thing:

Kristian had some code that he worked on, and he helped me connect this with stockfish and we tested it from there. I continued adding code to this to then be able to send information to the stepper motors, so they “knew” where to move.
After this code we now have 2 strings to work with. They are now separated into “d7” and “d5”. We now need to be able to figure out how far the stepper motors are supposed to move to get to this square. We had some ideas here and tried some different methods that we realized was not going to work. Then we figured out how we could try and do it. If we made 3 different arrays. One for the strings and then the other two for x and y axis.

This is the array for the strings. Here we have different positions in the array for each square. The idea was that we would have the other to arrays and adjust each x and y for every position in that array. So, let’s say we need to locate d5. We would need to use a for loop to find d5 in “stringpos” and then use that location number to find out how far the motor should go in x and y. I was not able to complete and get this to work this week, but I will be able to do it next week. This is the for loop that I tried to make work:
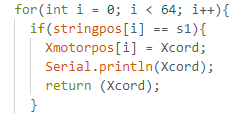
This would be position stringpos [35]. I also added “fake” numbers for x and y like this to test it out. This is an example of the x cords:

I did this all the way up to 63 for both x and y. So when we get the location number from the string array “stringpos” which would be [35] for d5 we would then know the value from Xmotorpos[35] and Ymotorpos[35] would be the amount that the stepper motor would need to move to get to d5.
I was able to split the string and get the correct strings needed. I just now need to send this to a function that works that could locate the position in the “stringpos” and then use this location to then find the values for Xmotorpos and Ymotorpos.
Jon-Eirik – Week 7
This week I’ve waited for the magnets and KY003 sensors to arrive so I can start testing. Steven told us it would be some more time before they arrived, so testing got put on hold.
I helped Kristian some on Monday with testing motors to solve an issue he had from the week before.
I have started planning for when we get the sensors, but testing will have to wait until we get both sensors and magnets so we can start putting them on the chessboard Sondre has made.
The KY003 magnet sensors will check for a magnet field and can output a signal we can read.
Output HIGH (1) = magnet field is detected.
Output LOW (0) = magnet field is not detected.
Each of the sensors have 3 pins, one for power needing 5V, one that needs to be grounded and the last one that sends the digital output of the sensor.
I also talked a bit with steven on Monday about the plan with connecting the sensors. Since we don’t have an electrical engineer, Steven said he would help us fix the setup on how it should be connected.
Ulrik – Week 7
This week has not gone the way I planned. Encountered problems with the availability of the spacers to the gantry wheels. Since the screws and wheel bearings I have are very small in dimension, I have to design around them and print 3d Parts that will make them fit.
Most of this week has gone to designing the full assembly in SW and making the model ready for FEM-simulation as one of the requirements for this course. Mini V-Gantry, stepper motors and mounting. Next up will be the 3D-printing of the spacers and continuing working on the propulsion system.
I am thinking about changing the movement of the bottom gantry via belts instead of gears, it may seem to be a more efficient solution.
Sondre – Week 7
This week I have been participating in military exercise the whole week and therefore not had the ability to work on SW and had very limited access to internet.
The only thing I’ve been able to do is to share some SW files with Ulrik and we have had some few messages discussing design and solutions.