Sondre – Week 6
Finished all the single parts for the chessboard with belonging parts. Completed the assembly of chessboard with belonging parts.
Laser cut and engraved the chessboard, fasteners, supports and the PCB board.
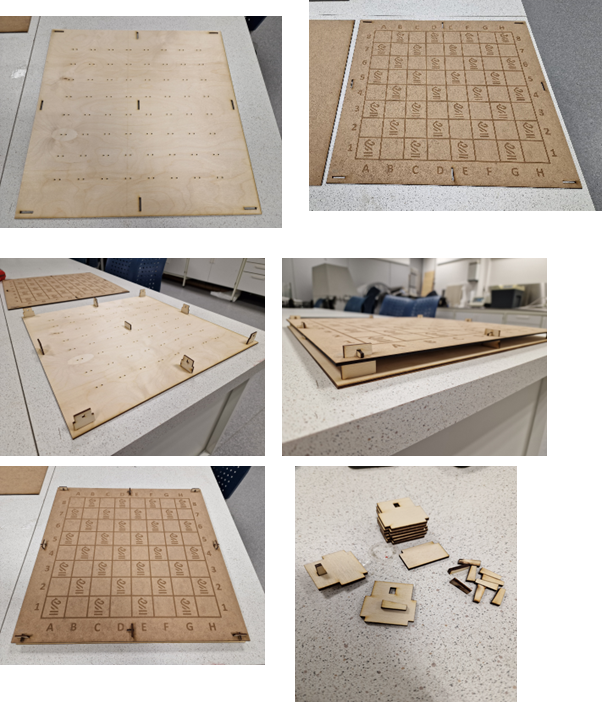
Assembled the chessboard and PCB board.
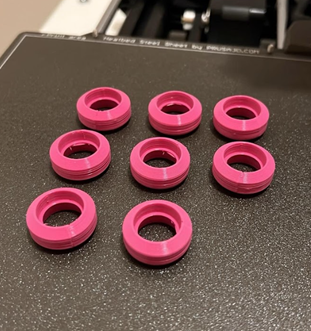
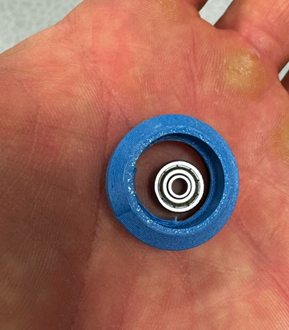
Designed bearings (3x10x4) and 2020 Alu profiles in SW.
Ulrik – Week 6
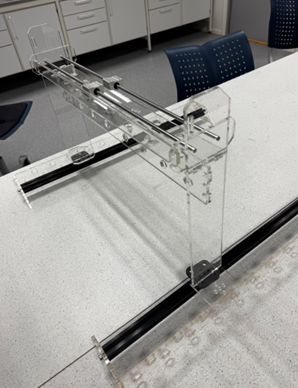
I have finally gotten the laser cutter to work and gotten the V-profile wheels printed. The wheel bearings I had sourced were heavily under dimensioned for use in the wheels, but that is a minor issue. Holes for mounting the V-profile trolley to the gantry have been designed and cut this week and a bracing for stability has been added to the top end of the robot. I have also started designing the top-platform that will consist of a system capable of movement in the X- and Y-direction.
Now that the main structure of the robot is completed, I can focus on the design and production of the propulsion system that will consist of a rack-and-pinion + stepper engines. Larger wheel bearings and screws/spacers will be used for the trolley.
This week has been well spent. Looking forward to the next step!

Emil – Week 6
We started this week by trying to figure out what was wrong or why we couldn’t get the motor working. Kristian, Jon-Eirik and I booked a group room and tried different things to get the motor to work. We were not able to. Then a bit later we asked steven for help, and we used some more time trying to figure it out. We swapped driver, motor, cables and Arduino and nothing worked.
When we changed out the power supply everything that we had tried earlier suddenly worked, and we could finally breathe. Now we can start some progress on figuring out how to “calibrate” the motors. We kind of need the construction of the machine to be a bit more complete to be able to calibrate the motor to got to the different squares, but before that happens, we can investigate how and what to code to use the stepper motors.
We learned a lot from trying to make them work in the first place. Both from how to wire up the motor in different ways and how to code it with an own library called “Accelstepper”. Here we can control each step the motor is going to take and make it as accurate as possible.
Kristian – Week 6
This week started with not being able to use the stepper motors after a lot of trying last week. Thankfully steven helped us and got us a new power supply which made them work perfectly 😀
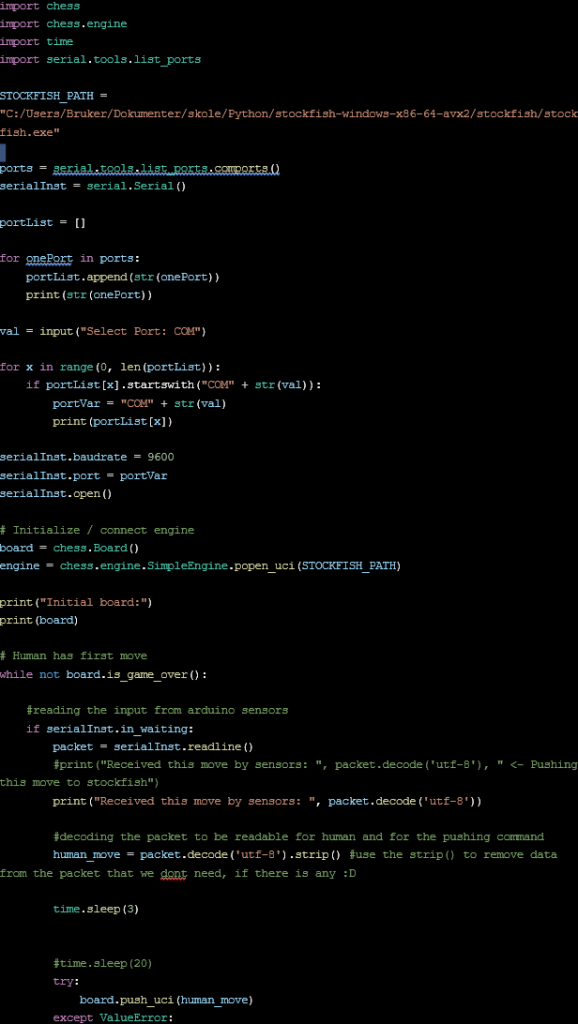
This week has consisted of Arduino ide and python coding, in addition to that I used a stepper motor to check my code frequently. The main problem I have been working on this week is the communication between the Arduino IDE, the Arduino itself and python. We need to have a stable communication to communicate the human moves (done by sensor reading) and pushing this through the Arduino Serial commands to read it in python. We can then apply the move to stockfish program. Stockfish can send its move back to the Arduino and it will then calculate where the x,y and z stepper motors will go.
This week I have managed to simulate a communication with the Serial functions bi directionally.
Python code:
What’s new:
- Port scanning to find which port Arduino is connected to
- Able to choose port
- Read strings from Arduino with Serial
- Sending string to Arduino with Serial
ps. The strings are chess moves
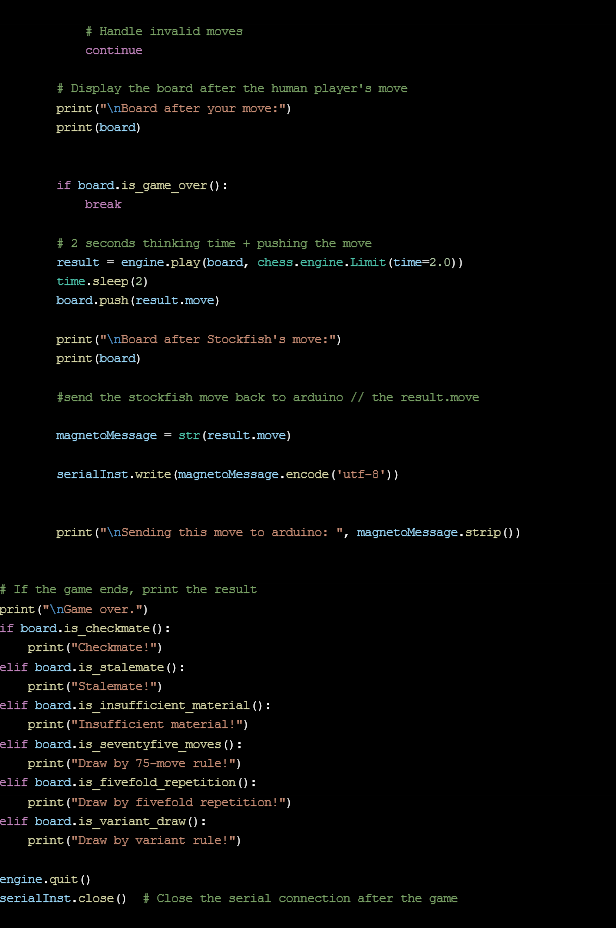
Arduino code:
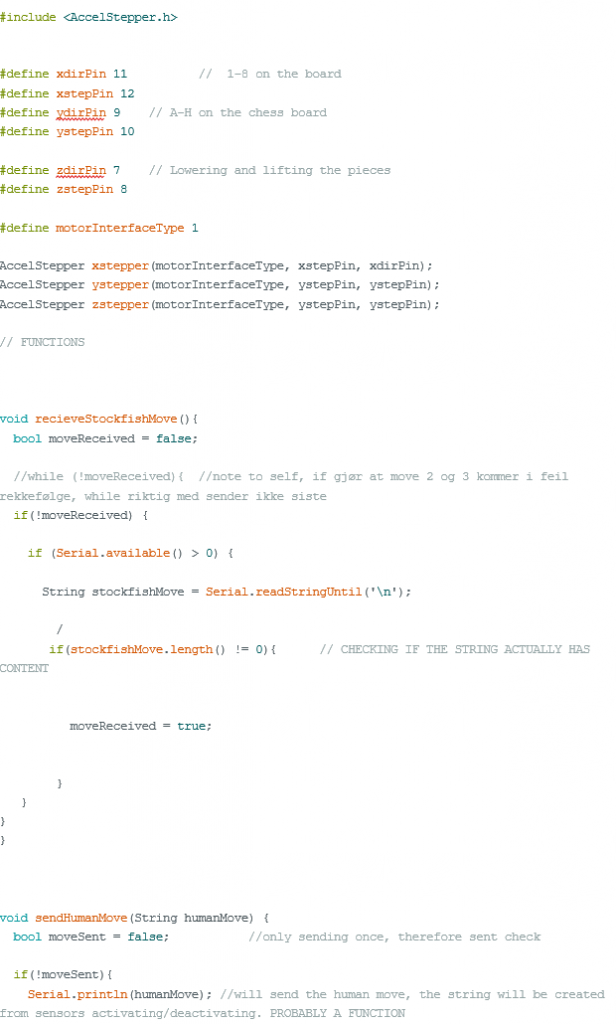
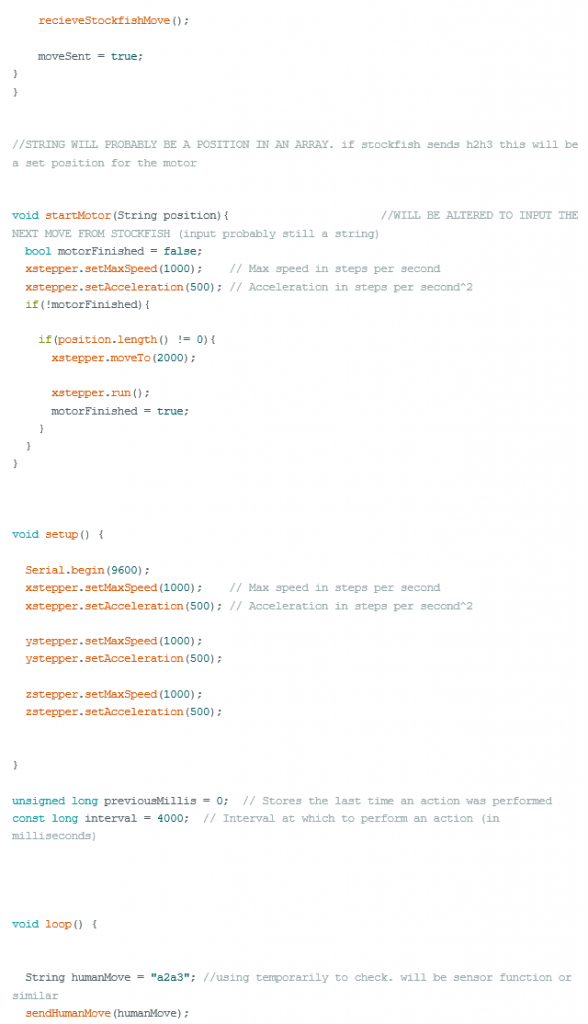

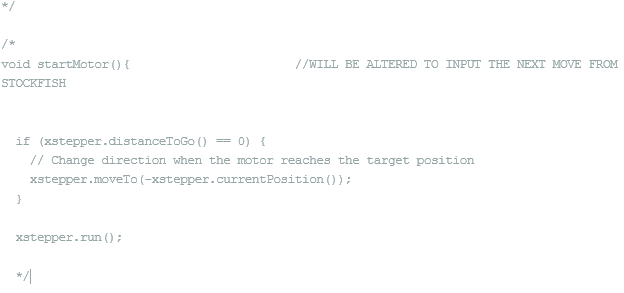
Communication from arduino to python works flawless. the other way needs more work. i have also been trying to start stepper motors when receiving a string from python with the stockfish move. i have managed to move the stepper motor but the serial communication and the continuous stepper motors run commands is restricting eachother. i can not use delay() either because it also prevents the stepper motor from running as it should. im gonna try use millis instead of delay() next week. most of the delay()’s are now deleted from the code 😀
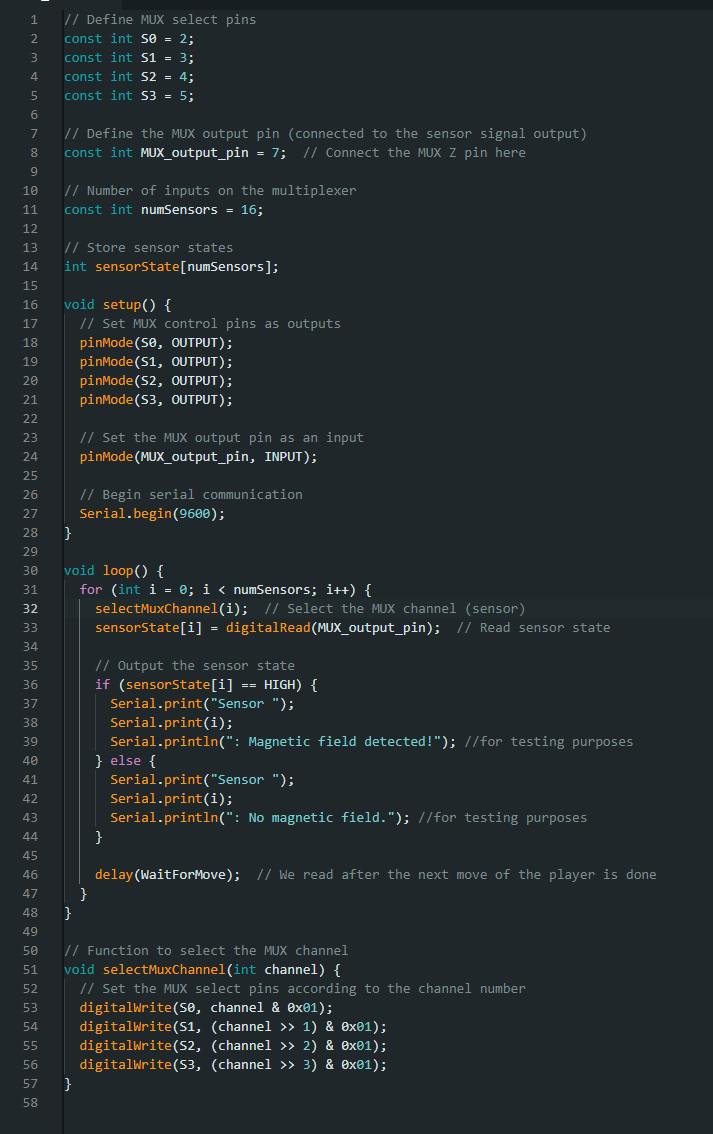
Jon-Eirik – Week 6
Hi, this week I have been working towards getting the sensors. Now that we have the chess board ready, we are closing in on being able to connect our sensors to the board.
My plan on coding the sensors will be using an Arduino IDE to read inputs while looping through the sensors connected to the multiplexer(s). I can use an array to put the state of the sensors in, so that we know how the pieces have been moved when looking over the array.
I’m not sure yet if we will get a multiplexer with 64 input channels, or if we will use more multiplexers with less channels.
This code is just something I will use to start testing the sensors, it will probably be changed throughout testing and is not the final product.