Abdiqani:
I started the project thinking of using the sensors as the only tool to navigate through the maze, but this soon became very complicated, challenging, troublesome, you name it.
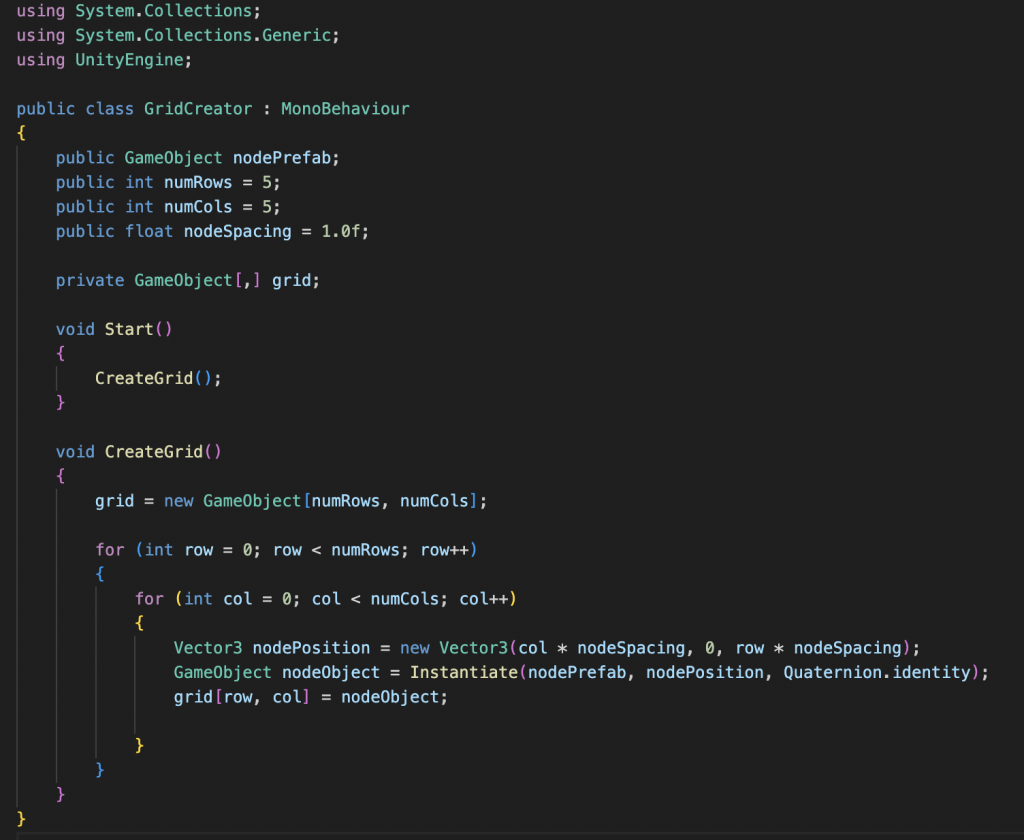
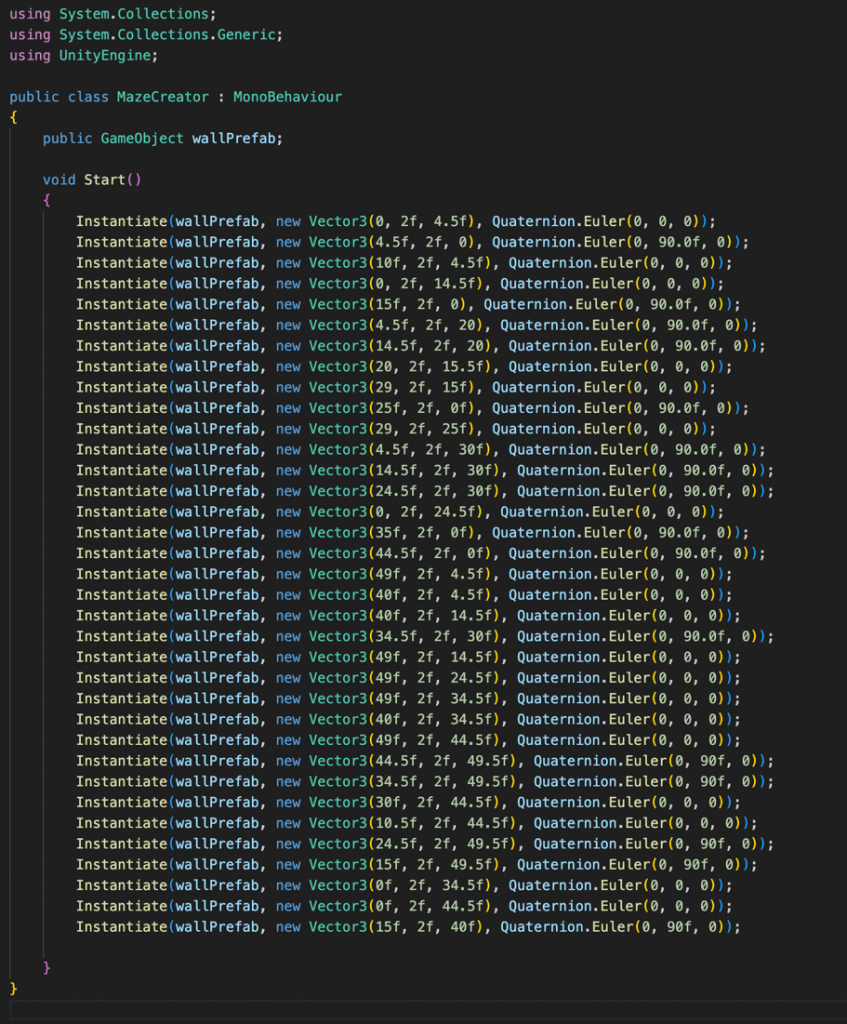
Who would have known that giving it commands for every kind of situation would make it harder for the game. This led me to try different kind of ways to navigate the maze which is when I researched the pathfinding algorithms. The problem was that although it is easy to understand how I works, it is hard to code it. The algorithm needs a grid where every single node in the grid should be the same size and the position should be specified. After that you would choose one of the pathfinding algorithms like Dijkstra, A Star, BFS, etc. So, I started learning about the nodes and the grid, algorithms and eventually made a grid and maze, when I came to choosing an algorithm, that’s when I realised that the pathfinding algorithm would need a target if was to find the shortest path to the end and would not work with my task which is supposed to be autonomous.
So, I was stuck trying to figure out how to navigate the maze, when a video about an autonomous car following a line came up on my YouTube feed. Watching the video, I saw the simple algorithm he used to navigate to the end with, it was of course a left turn algorithm, telling the car to always turn left I left is open.
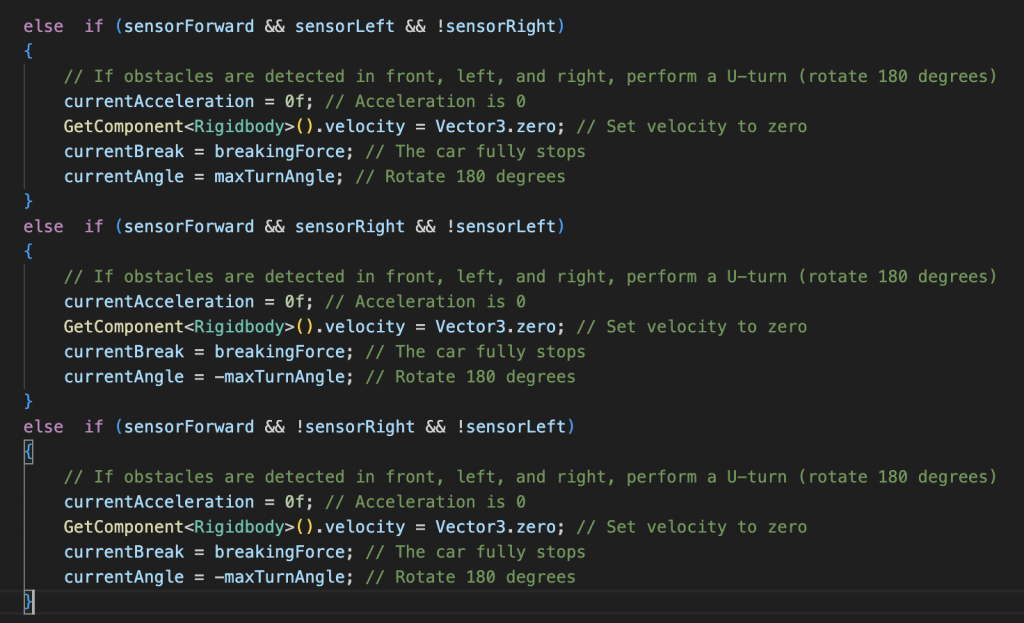
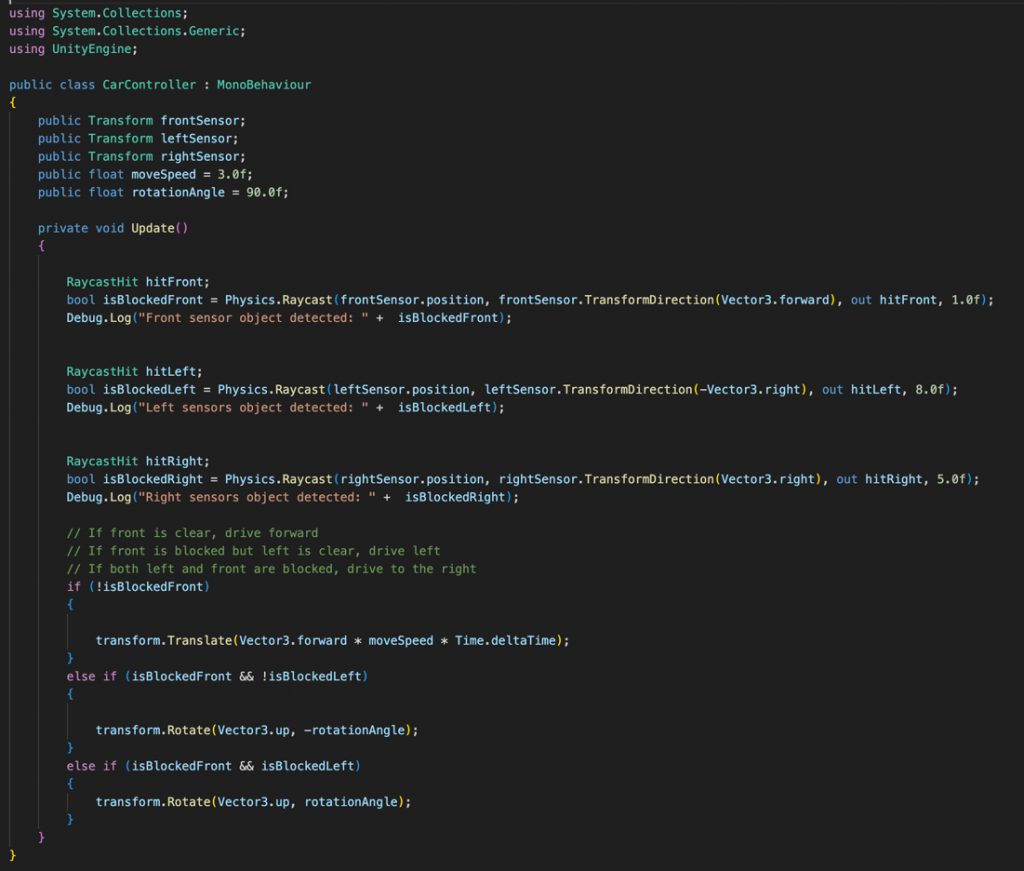
That’s when I realised why my code at the beginning did not work, it was because I gave too much instruction which made everything overlap. Using the grid and the maze I made I placed a car and programmed it using three sensors left, right and front to navigate through the maze which it managed to do. The maze however is to big for the car which made I hard to implement this algorithm, it will just spin in circles when I try to do it, which is why I made an easier version of it that prioritises forward and turns left if forward is unavailable.
Video:

Abdirahman
This week I tested the code that I showed last week. The code worked really well and executed its purpose flawlessly. I ran the code first and then I put the raspberry pi camera on a part of a small black whiteboard rubber and tested whether or not the camera pi could track the line of the rubber. Well, it did track it well, as you’ll see it on the video in the link below.
https://youtube.com/shorts/mOEOX2rbHxU
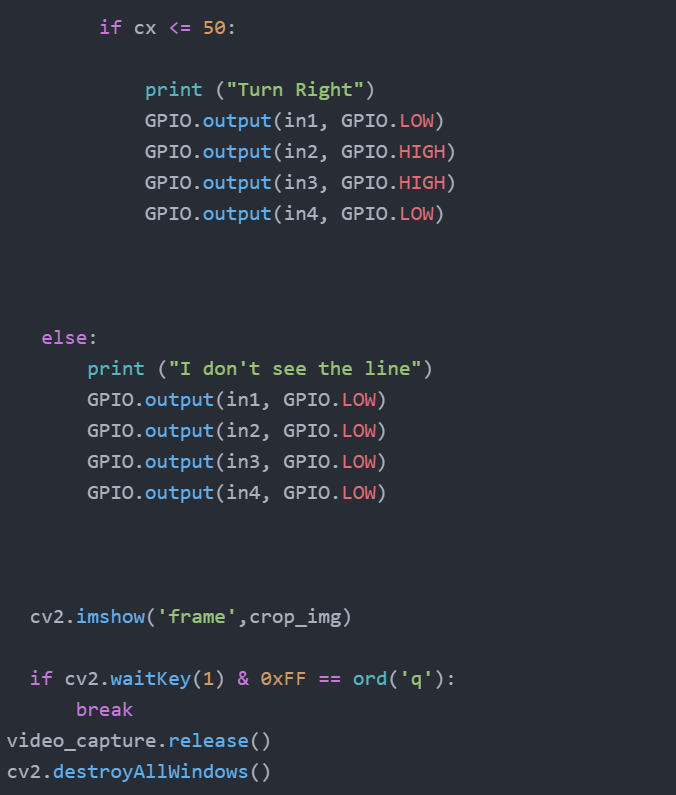
I also looked into GPIO (general-purpose input/output). Because it’s a crucial part of the raspberry pi. So, I added the outputs of the GPIO pins that I need from the raspberry pi. My code looks like this now:
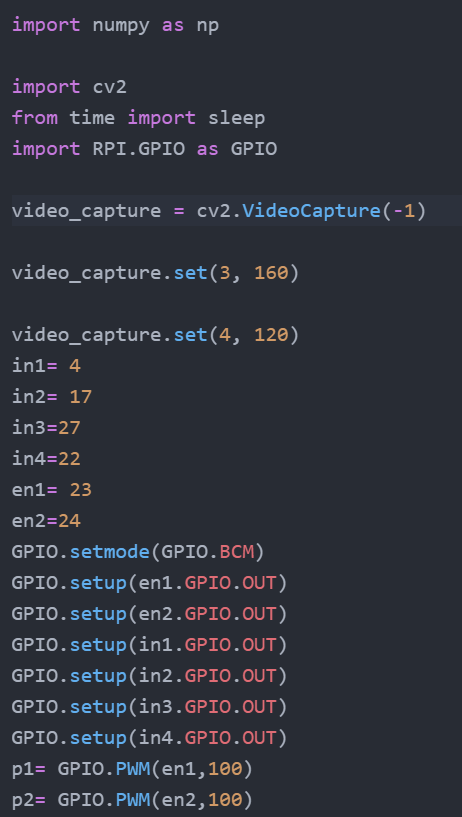
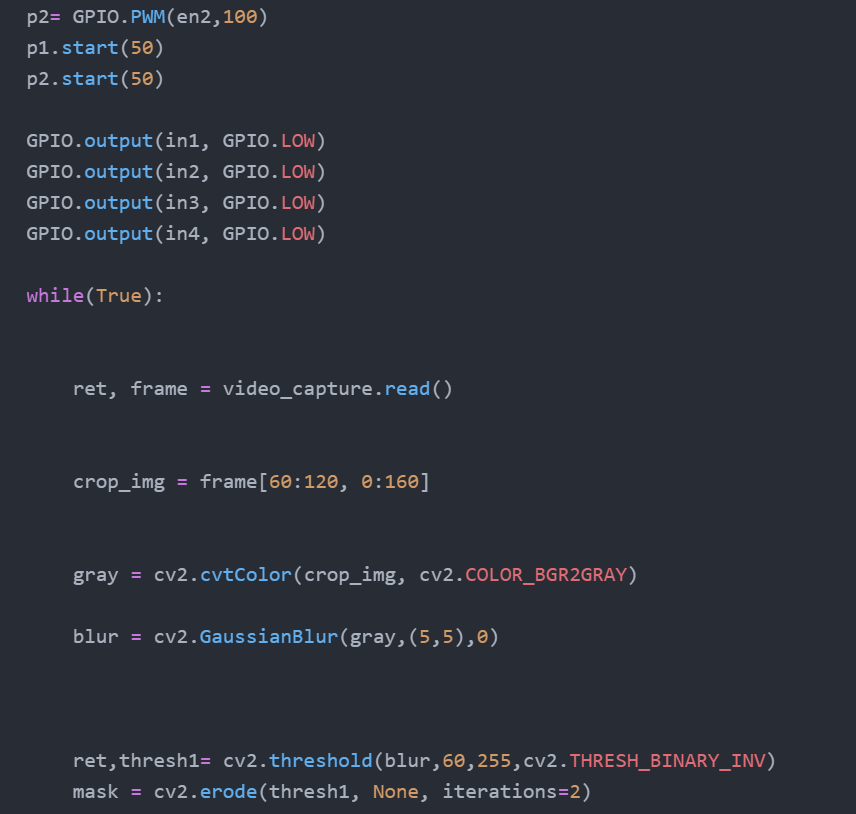
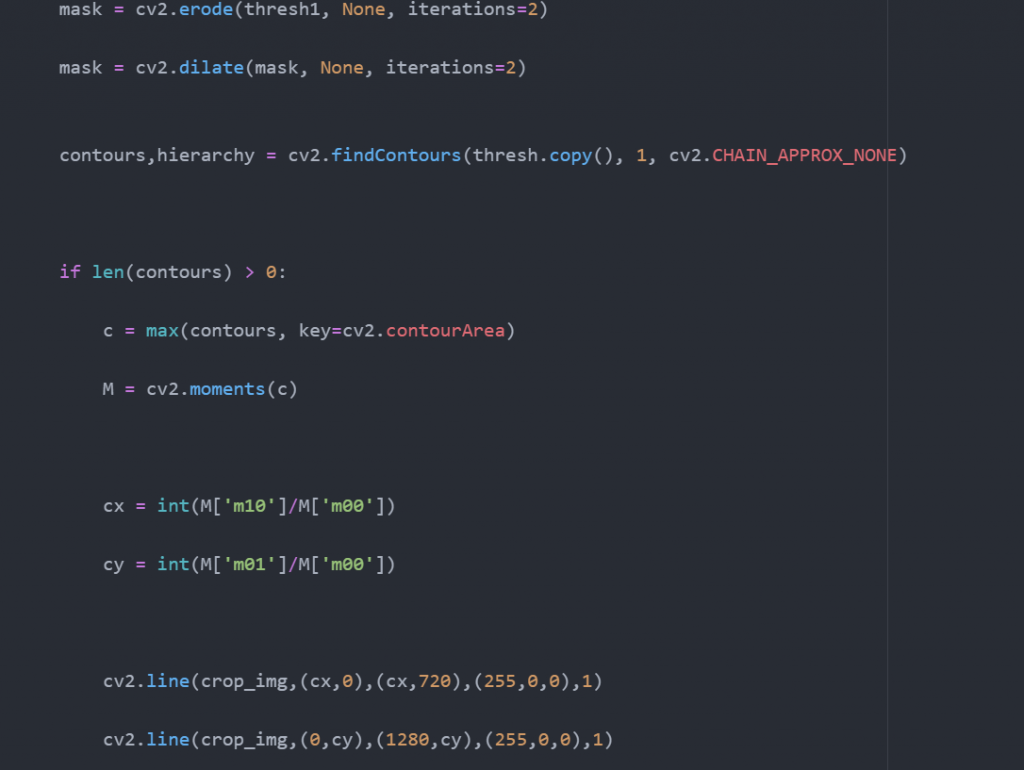
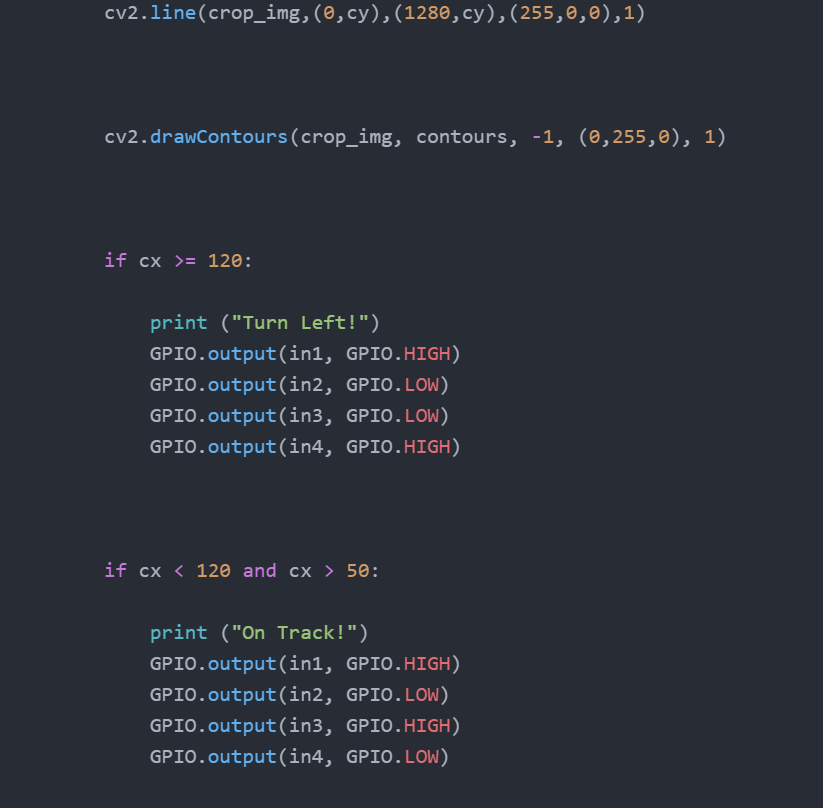
ALINUR:
This week I had to change my plan of building the app using swift UI it was complicated for me and I was stacked with the backend of the app. I consulted with the teacher and we agreed that I should develop a Bluetooth application using Microsoft make code. This will be my plan for the app.
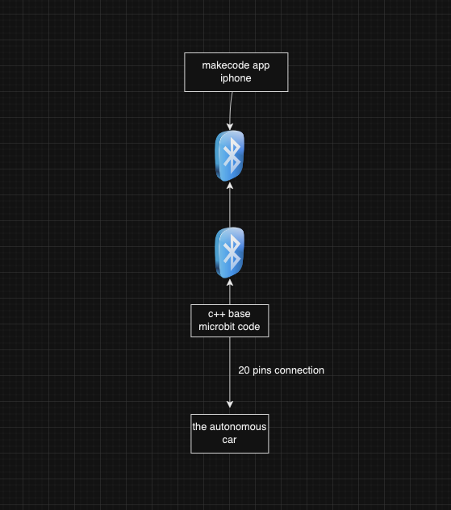
The application will be an iPhone based app that is will pre-installed from app store it will be configured to support the car by write a new codes and button interface. By the end of this week I will be able to have a functioning application that can communicate with the car.
Ghebre:
This time all sensors are working properly, as I had mentioned last time I had problems with the left sensor, but now it is working. The problem was wiring to the wrong pin.
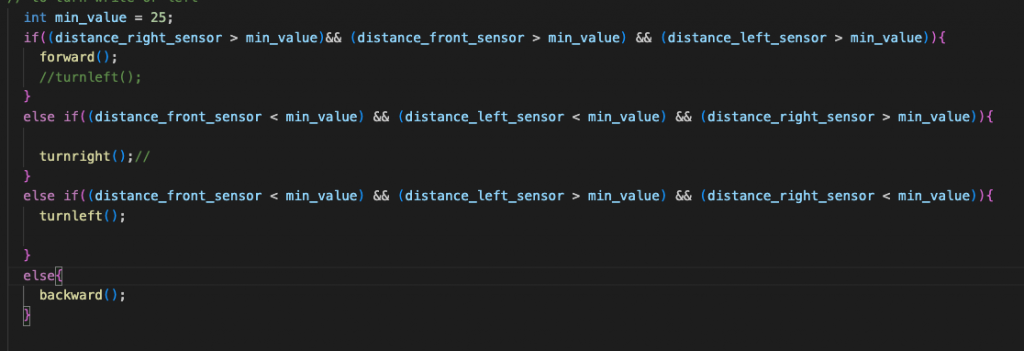
The car is for the time being driving forward, left, right and backward. Using all three sensors the car can check it perimeters and decided which way to drive. Here I choose the backward function instead of the stop because I want to see if the car can drive backward and check again whether the premiss is free.
Demonstration of the car driving to the different directions.
The past two weeks I have been working with the PID controller and here are some results.
I tried to adjust the speed of the car using the pid but for the time being that is not working as I expected it. Still troubleshooting and looking another way of doing it.
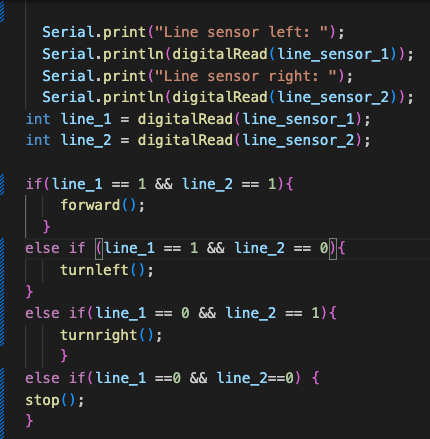
This code is for the line sensor. Here are only four commands which are if the line sensor is on the black line then the car is driving forward. But when the car is by any means miss the line sensor then it checks which side missed the line. If the left side line sensor is not seen the line then the car should drive to the right in order to be at the line.
Challenging that I have had working with the line sensors was that the sensors were traps by the tape that I used to make lines. Distance between line sensors and the line was to narrow and I tried to change it by cutting the spong that carried the line sensors.
Video: