This week has provided us with an updated overview of our project and refined the scope of our project scope and objectives. Here is an overview of what we have done for this week.
Abdiqani:
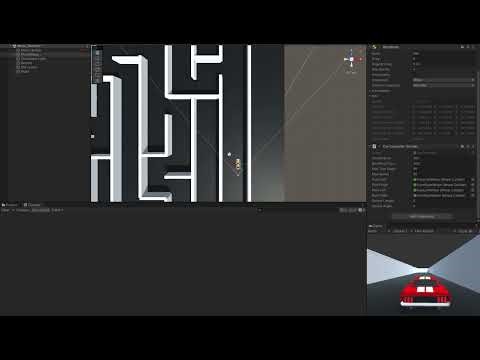
I have previously focused on an open-field scenario where the self-driving car in unity would be navigating autonomously, we have now shifted the focus to create a complex maze where the car will be only able to navigate with the sensors telling it whether it should turn or drive forward.
For this week I have been:
Scene design:
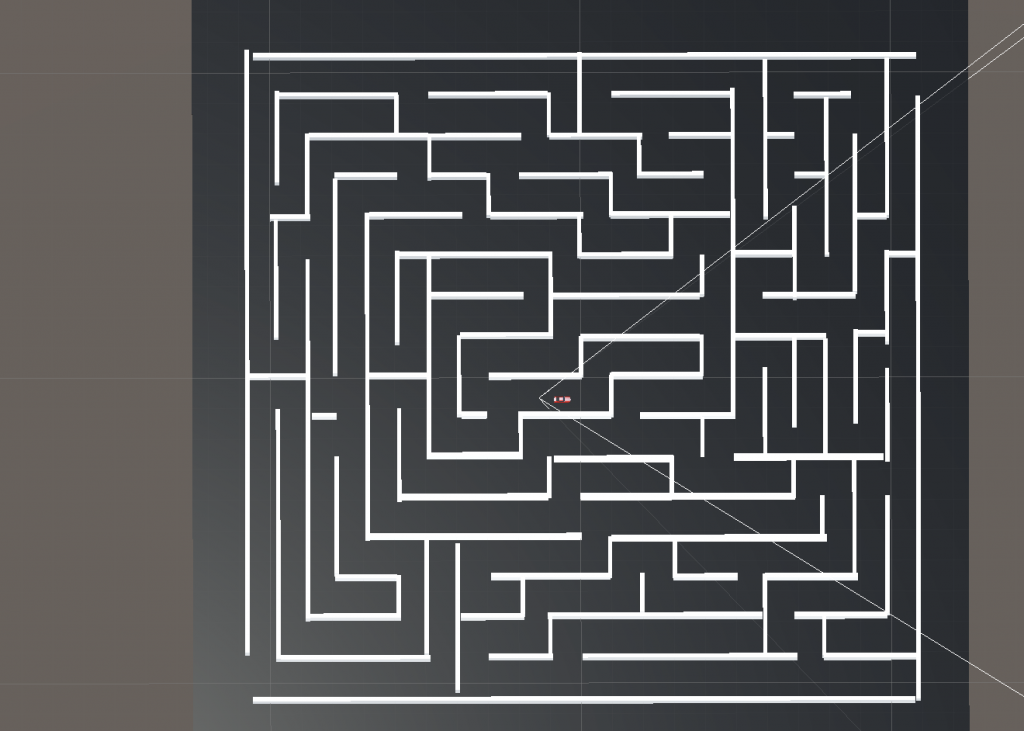
I have created a maze using a picture of a maze from google pictures and placed cubes manually where the lines were, then placed the car and scaled it.
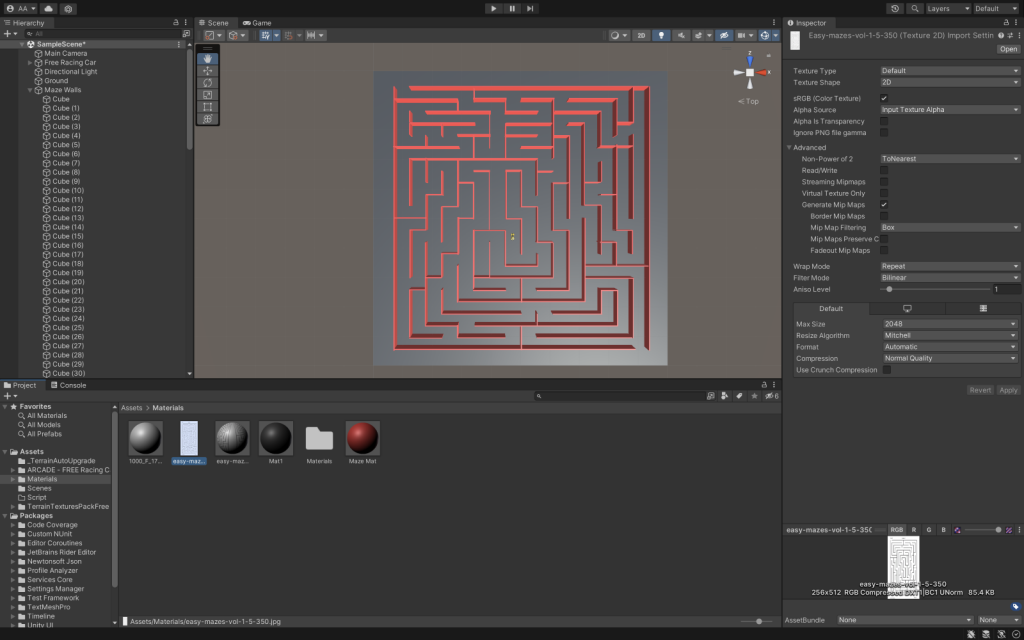
While trying to import an asset from unity I lost the scene that I was working on and the time I spent placing the cubes went to waste. I had to start from scratch again, but at least I went faster this time.
Car Integration and coding:
I download a car from the unity assets store that had colliders and even some code to drive it preinstalled, drove the car to see that the scene and everything worked before I started making my own code, I used some code I had already worked on the previous week and made some tweaking to make the car be able to autonomously.

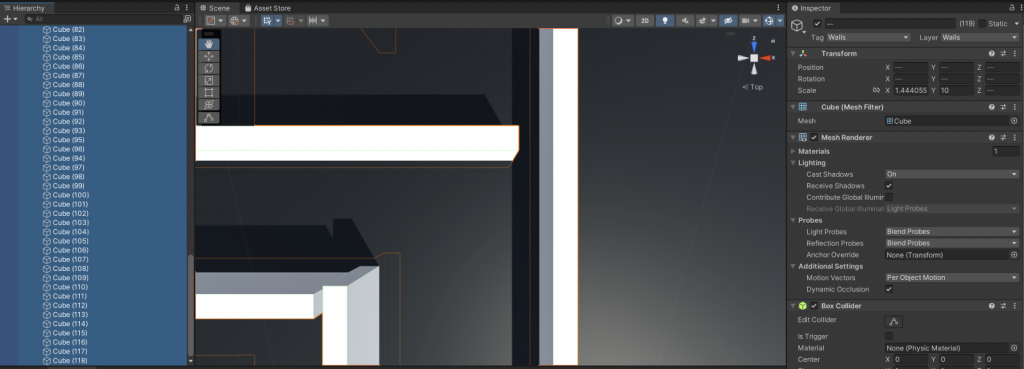
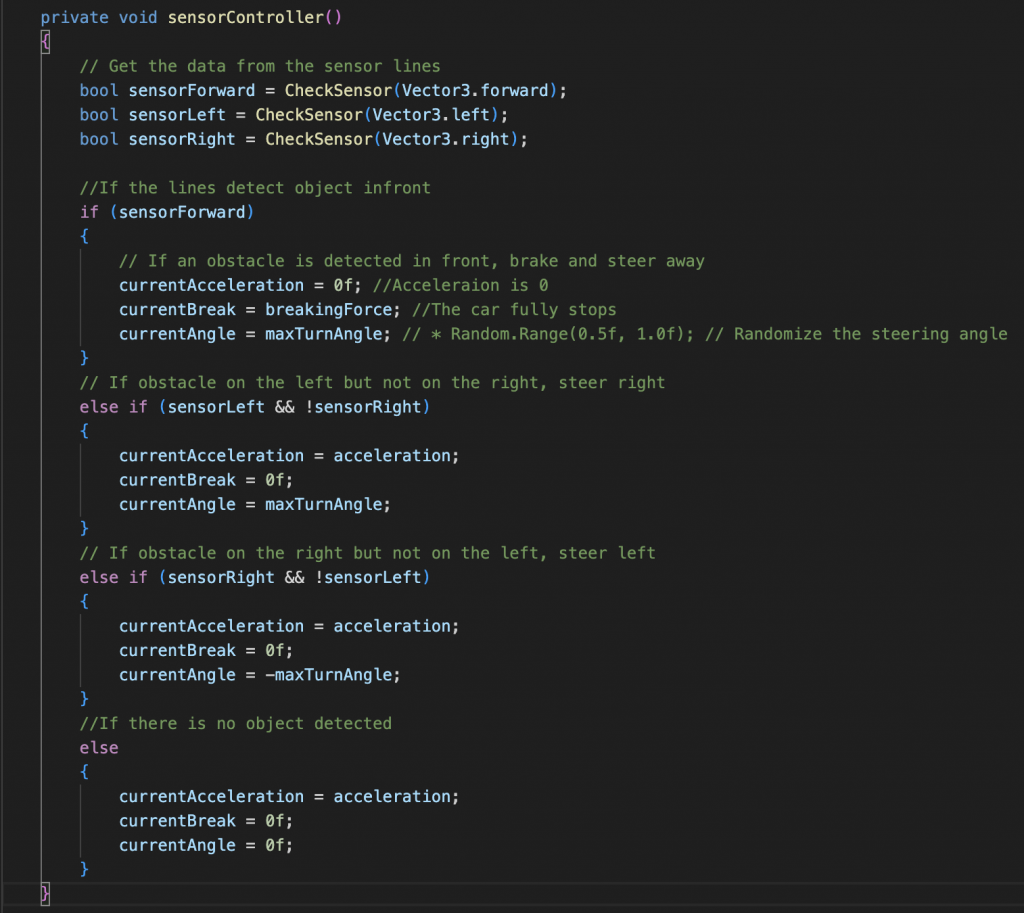
Later on, i used a checksensor function from previous weeks and added some code. I made a layer mask that would make everything 0 other than the layer with the tag “Walls” and added this to the Raycast, so that if the line hits a wall it would write it to the console.
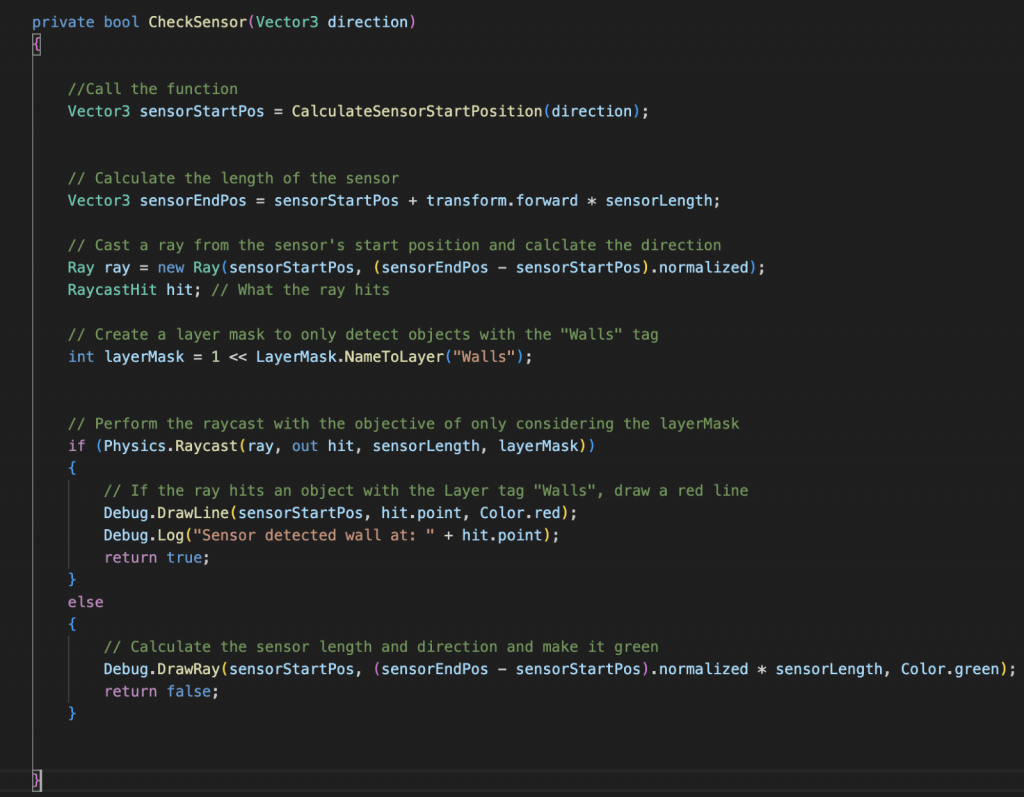
For the code to make an action when it detects a wall, I made a simple code that would stop the car, I am still working it to be able to turn to either side or the side that is open.
Video:
Autonomous Car Maze Sensor Testing
Alinur:
This week I am working on finishing the app interface. All the buttons were installed on the app interface, and I simulated the app interface on Xcode simulator using and iPhone 12 to the app UI. Below is a picture of the app interface and snippet code of the app interface.
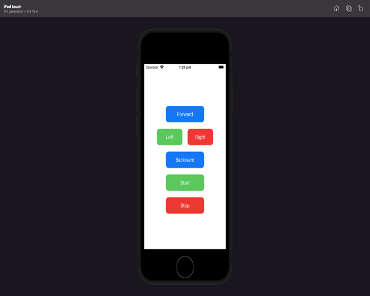
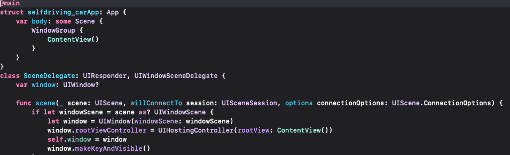
The app will have 6 button that will control the car once’s we finish integrating all the systems we need. The app will communicate the car via a Bluetooth and current I am working on finishing the Bluetooth peripheral code that will enable the Bluetooth to scan and find a Bluetooth connection that is closer to the app surrounding.
Ghebre
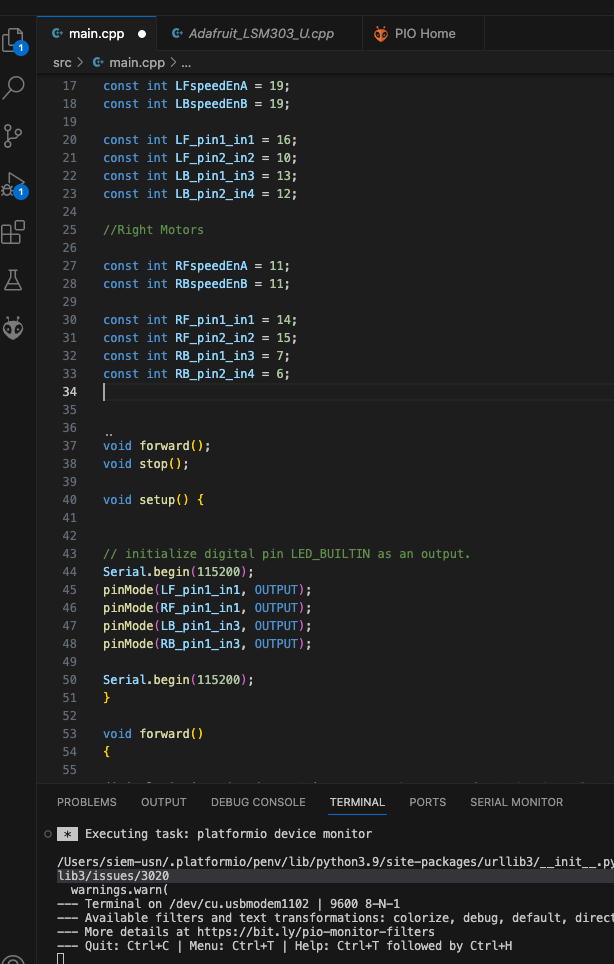
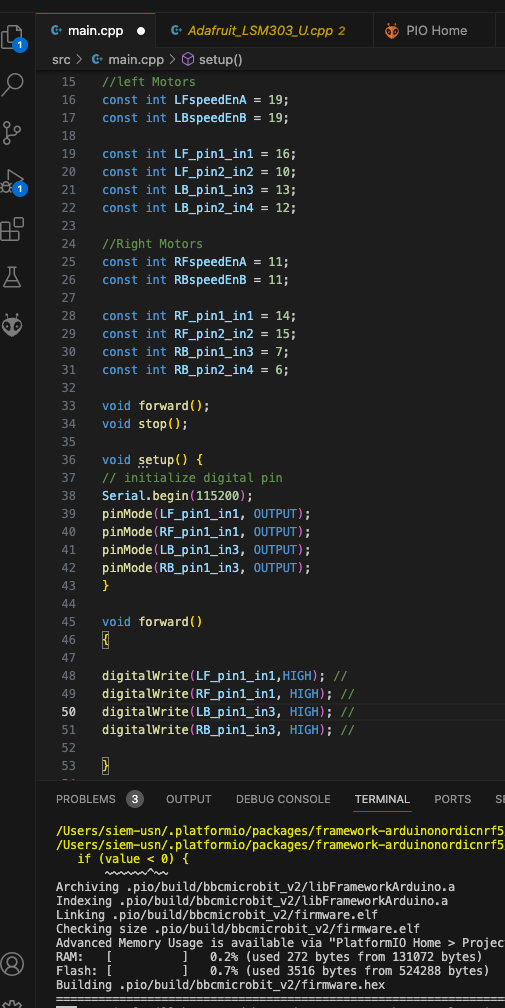
I was mostly focused on getting done the library, but I did not realise the Platform IO was a better way to start the project, because all the library that is useful for the project could be installed and some came with it. After some weeks I decided to use the Platform IO and start the project on that Platform IO. It took me some time to start with vs code and all the integrations system.
After I begun with Platform IO, I created a new project autodrivecarg5 and started to code and see if it works. But went I run the code it keeps getting error message that says Arduino.h not found. But I keep trying to start as many new projects as possible until I understood the problem.
I write some startup codes but still the cars motor is working. Here are some off them.
Abdirahman:
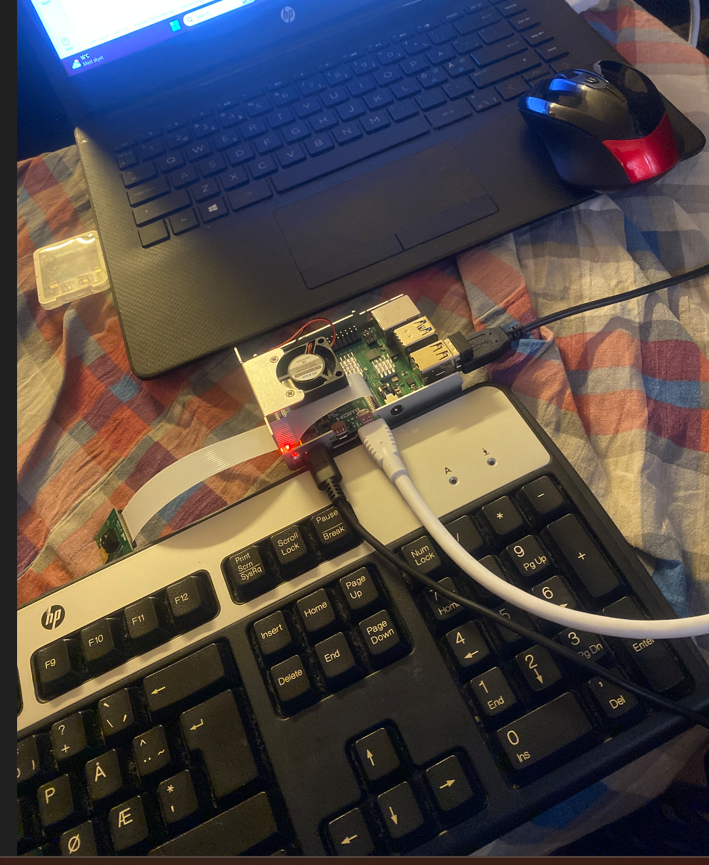
This week I started working with raspberry pi. How it works and what it is used for. How its components are set up. I also looked into OpenCV. Which is important for my work in programming a camera that can track a line (normally a black line, that is either straight or has loops). Below you can see a picture of me trying to set up the raspberry pi.