Dear blog, MicroBros here 🥰
We are still solving the Micro Mouse mystery, but this time in english… 👨💼
Below are some highlights of our progress this week; enjoy!
Jonathan 🧙♂️
Dear blog. And dear blog enjoyers.
Today is 11.09.23. A blessed day. 🙏
I’m working with Mats 🕵️♂️ today (duo-coding) and we’re looking at some of the components on the car.
First out today are the >>> L298N motor drivers <<<which power the wheels of the car. Through physical inspection and data sheet analysis we have determined the digital and analog pin layouts and what signals they require to function. Accordingly, we made a micropython class to test and showcase the logic used to interface with them, as a basis to build upon later when we migrate to C++ (including video 🎥 ):
class L298N:

    # Initializing the motor driver class with pin class objects relating to motor directions
    def __init__(self, pin_enable, pin_forward, pin_backward):
        self.pin_enable   = pin_enable    # Analog pin (we input motor speed here)
        self.pin_forward  = pin_forward   # Digital pin (enable/disable motor)
        self.pin_backward = pin_backward  # Digital pin (enable/disable motor)

    # Accepts values [-1023, 1023] "num" which determines motor power output.
    def set_value(self, num):
        self.pin_enable.write_analog(abs(num))
        if num > 0:
            self.pin_forward.write_digital(1)
            self.pin_backward.write_digital(0)
        else:
            self.pin_forward.write_digital(0)
            self.pin_backward.write_digital(1)

# Initializing one class object per motor wheel. FL --> forward left motor
FL = L298N(pin0, pin2, pin3)
BL = L298N(pin0, pin6, pin7)
FR = L298N(pin1, pin12, pin13)
BR = L298N(pin1, pin14, pin15)

# This sequence of calls make the car go forward
FL.set_value(500)
FR.set_value(500)
BL.set_value(500)
BR.set_value(500)NEXT UP:
>>> THE ULTRASONIC HC-SR04 DISTANCE SENSOR <<<
This one required a bit more brain to solve…
The sensor works by sending an ultrasonic audio signal through the trigger pin, and receiving it on the echo pin. If done correctly, the sensor should return the amount time in microseconds the audio signal spent travelling from trigger to echo. Considering the speed of sound and dividing the number by 2, one should be able to calculate the distance to the obstruction in front of the sensor.
Note: The angle from the sensor to the obstruction must be somewhat perpendicular to each other, or the measurement will fail.
Note 2: The timing diagram at https://cdn.sparkfun.com/datasheets/Sensors/Proximity/HCSR04.pdf helped us figure out how to successfully execute a trigger signal.
The below code illustrates how to successfully make a distance measurement considering all the above mentioned (including video 🎥 ):
from microbit import *
import machine
import time

trig_pin = pin9
echo_pin = pin0
SPEED_OF_SOUND = 343 #m/s

# Function to send a trigger signal
def trigger(trig_pin):
    trig_pin.write_digital(1)
    time.sleep_us(10)
    trig_pin.write_digital(0)

# Function to return the echo time
def echo(echo_pin):
    return machine.time_pulse_us(echo_pin, 1, 100000)

while True:

    # Sending audio from trigger and receiving it as echo
    trigger(trig_pin)
    echo_time = echo(echo_pin)

    # Calculating the distance in cm based on the echo time and speed of sound
    distance = (echo_time * (SPEED_OF_SOUND * 100) * 10**(-6)) / 2

    print("Distance = " + str(round(distance, 2)) + "cm")

time.sleep(0.1)Mats 🕵️♂️
Robot 🤖
This time only me and Jonathan met up on Monday, due to how the group was not able to work together last week I spent Monday on catching up helping out accessing the functionality of the car within MicroPython. This focused on working towards enabling the functionality needed for a MVP.
During this we quickly realised we would run out of pins if we wanted the 3 ultrasonic sensors we need to be able to detect walls in front and to the sides. After emailing Steven for advice and meeting up with him at his office I was given the driver expansion board from DFRobot.DFRobot Micro:Bit expansion board
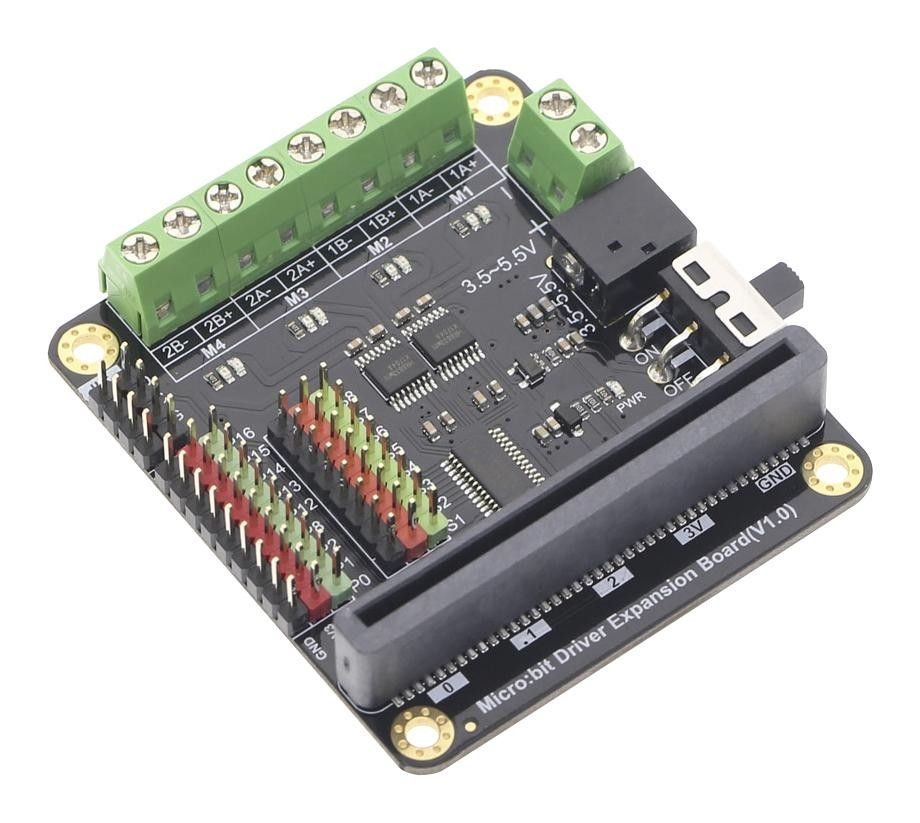
The board will support controlling the motors over i2c, meaning that our current setup of 3 pins per motor can go away for only the two i2c pins, freeing up loads of pins for other functionality!
Simulator 🖱️
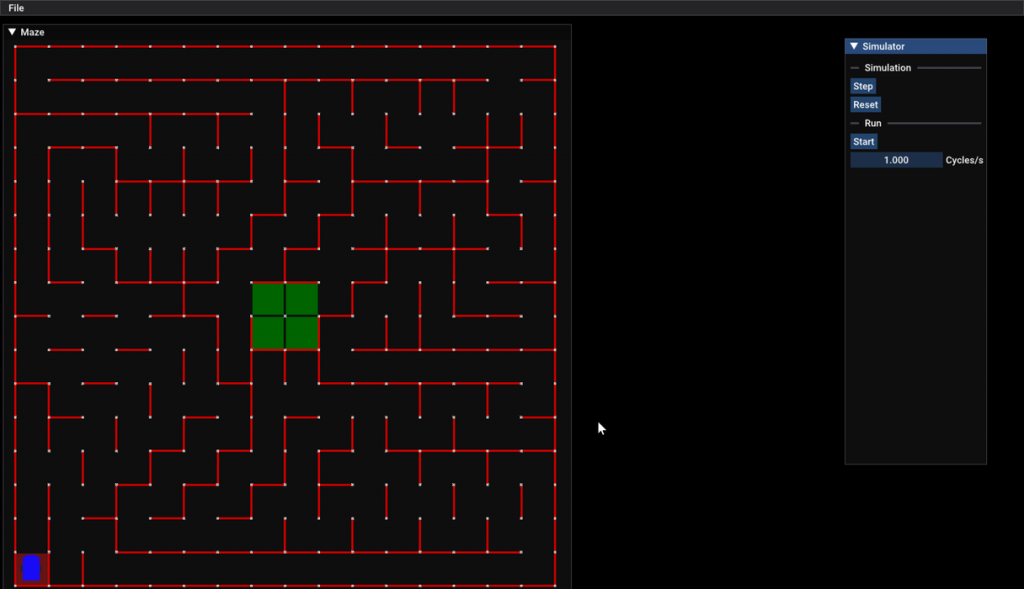
This week I have mostly worked on the inner workings of the simulator, preparing for algorithms and actual simulation.
This included writing a loader for sprites (images) loaded using stb_image. Down in the bottom left corner you can see our “mouse”!
I’ve been refactoring code to enable code sharing between the Simulator and actual Mouse firmware, and trying to figure out where to put the various state needed.
Also I’ve flipped the maze coordinate system so 0,0 is now the bottom left instead of top left as that seems to be the norm when it comes to Micromouse positioning.
Next up is writing abstractions for defining algorithms and then simulating it!
Documentation 📚
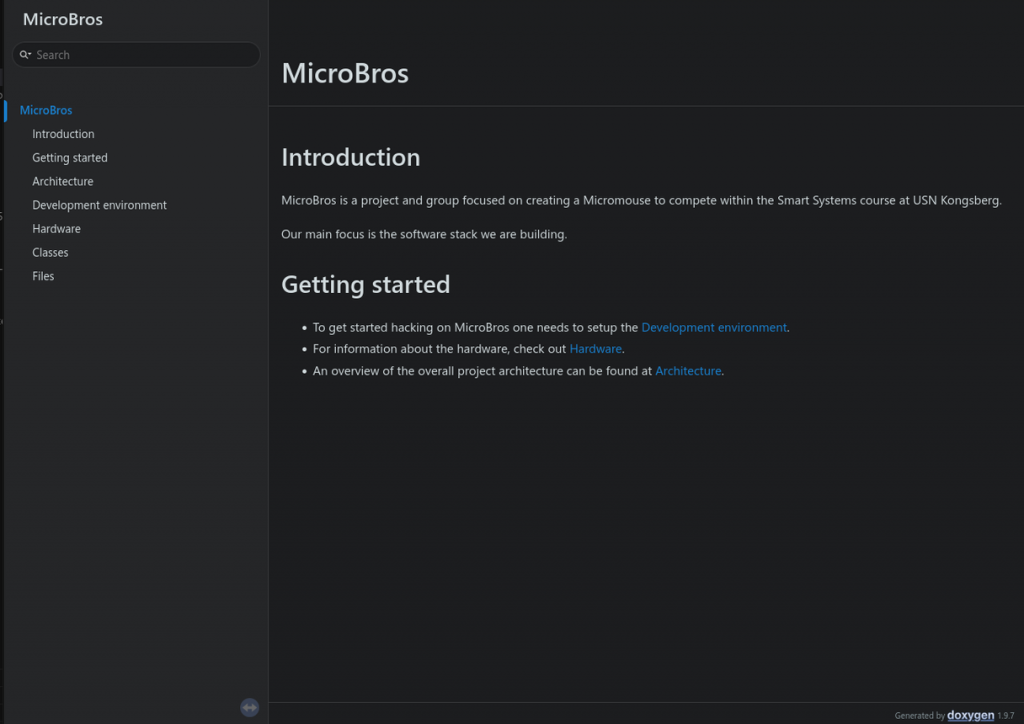
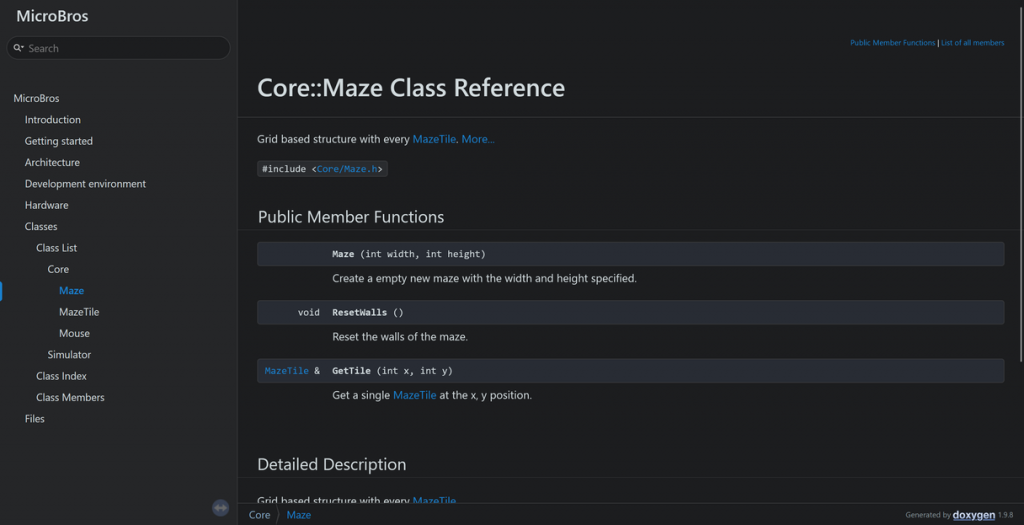
To help everyone understand the code and project structure I have set up Doxygen which people can generate to see the code documented with explainations.
Here is the front page and an example of a class:
Iver
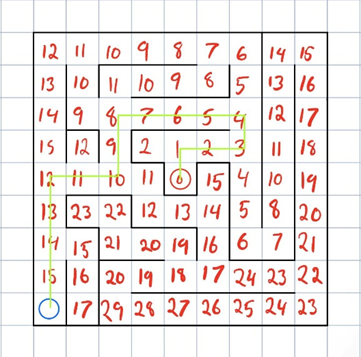
Floodfill
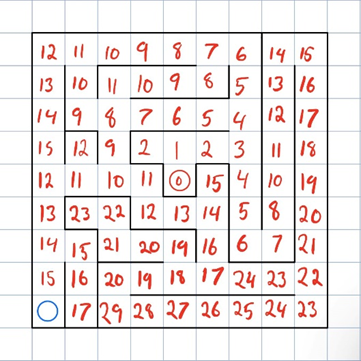
I will try to explain the floodfill algorithm, so it is as easy as possible to program later.
Traversing an unsolved maze
The first important thing to understand is to know what the mouse knows to begin with. The mouse knows how big the maze is, both how many blocks there are and how many. It knows that the maze is a square, that the goal is in the middle and that the start is in the bottom left block.
For my examples i used a 9X9 maze to make the drawings easier to read.
The goal is to end up with a map of the maze consisting of blocks. Each block will have a number assigned to it; these number indicates how many blocks the mouse will have to drive through to find the goal. The mouse will then always choose the block with the lowest value to find the fastest route to the center.

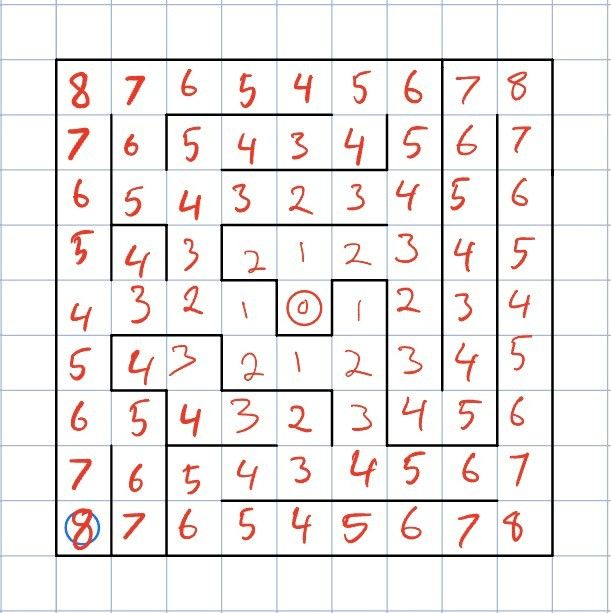
The mouse will first try taking the easiest path it knows how. It will then go straight up until it finds the number 4 and then turn right to try to go directly to the goal. When it runs into a wall, it will see that the block it is on can`t be a 1. It then changes the number of the current block to one number over its nearest neighbors that it thinks is accessible which is 2.
That block now becomes 3. Then it turns left or right to the lowest number, since both are 2 it chooses whatever is chosen to be prioritized in the code. In this case the mouse always prioritizes right. The mouse will now try to find the new shortest way to the goal. It turns to the block with the lowest value, which is the block to the left with the value 1. After trying to enter the goal it finds another wall, and the process repeats itself. Before it goes on however it has to update the values of the blocks since the last wall was hit.
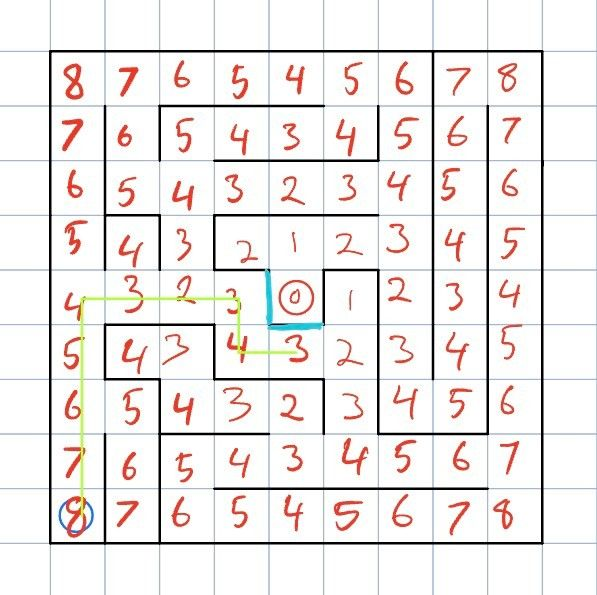
Repeating this process will eventually find the center of the maze. However when it has identified that a way to the center is found it will go back to the next best path would have been without the walls. If we have sensors on the sides, the robot will also log all walls that are not hit on its way which makes the process quicker.
When the mouse has mapped the entire maze and updated each value, it will go to the goal and end the first try as it has found the map to the shortest path.
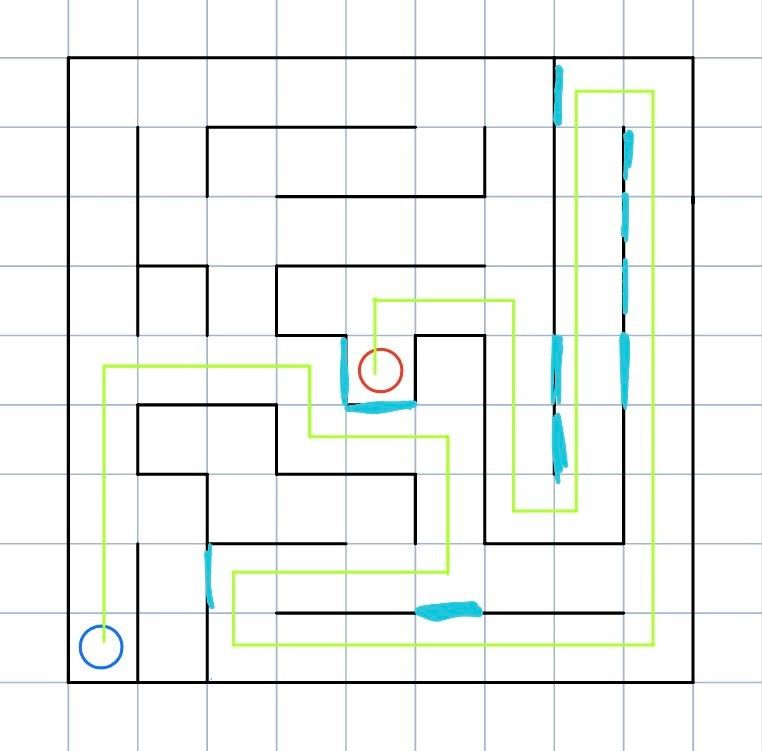
Traversing a solved maze
Group changes
This week Cezar notified that he had to leave the group, this means that there is now three group members.
We also set up a Kanban board after a short meeting on friday focusing on the requirements and setting up a roadmap.
NEXT WEEK ON KEEPING UP WITH THE MICROBROS: 🕺
- Research the remaining sensors we are going to use.
- Work on a motor driver for the new expansion board.