
Kjartan
Been watching Unity HoloLens Development playlist on Youtube and tested a bit of it as much as I could as some functions are deprecated because of them using older versions of software in their videos.
The remote connection with HoloLens to Unity I was not able to work, as their function in Unity was deprecated and I was not able to immediately find a new way to make this work, as for now that is put on hold to wok on other parts of my progress.
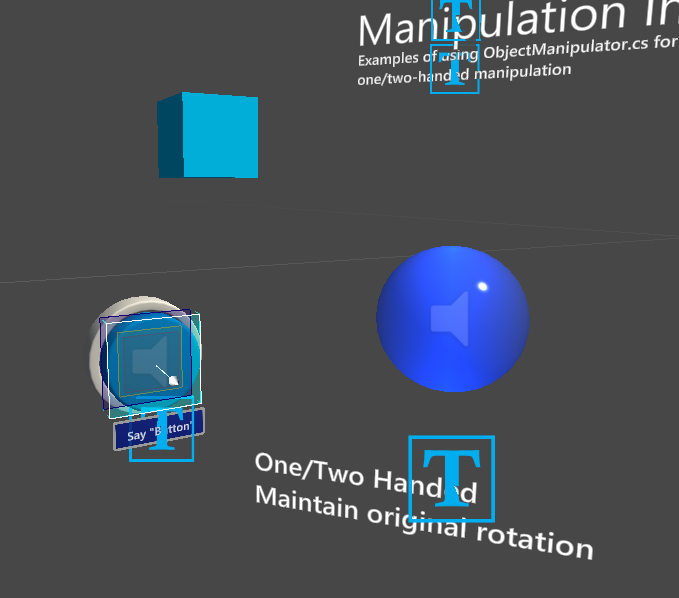
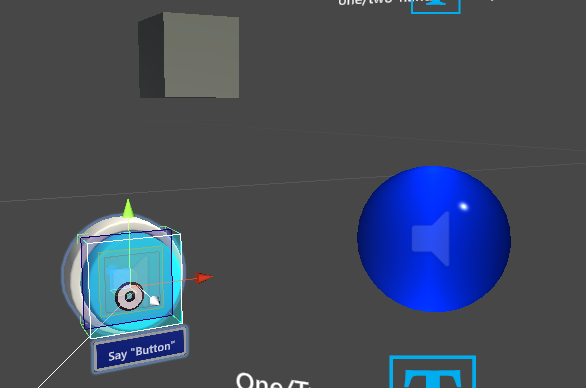
With testing of simple scripts I’ve made a button which changes colour of the sphere with a mesh and the box.
For next step I was hoping to make the HoloLens map the room to make object interact with the room I am standing in, for example a ball rolling off the table and hit the floor without falling forever.
Stian
I have been doing tutorials in unity so that I may help in the HoloLens better. But my focus has been on the Arduino and getting it to work again and refamiliarize myself with it. I have been focusing on the parts that will be used in the project namely servos, buzzer, LED and Bluetooth.
Mads
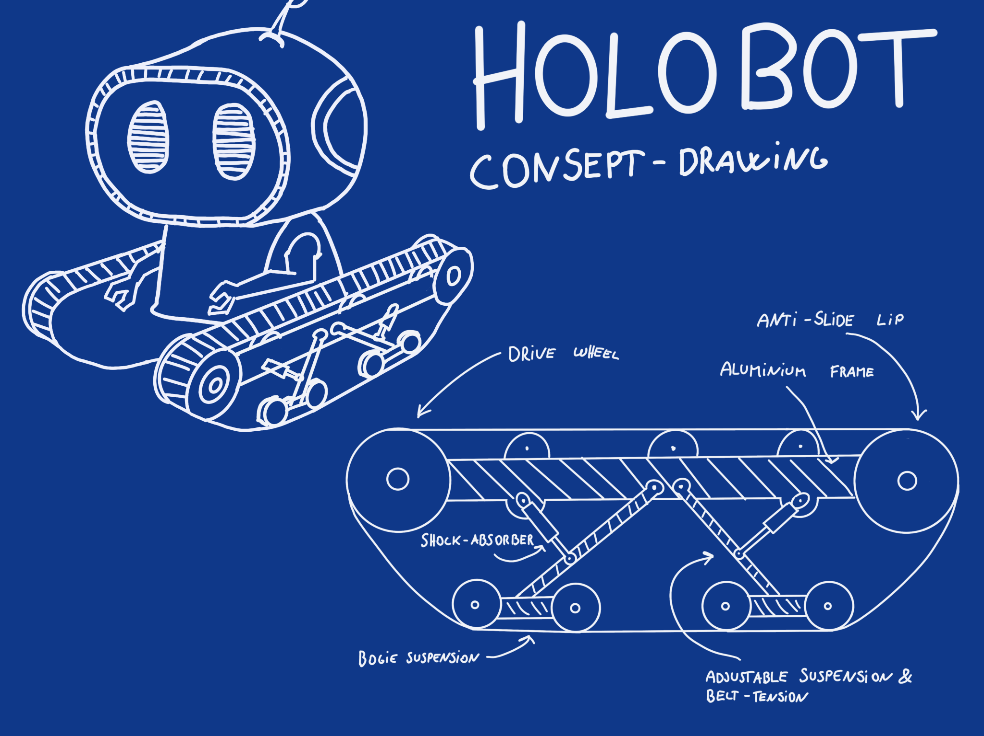
This week I started of making a sketch for a fun concept art of what the Holobot may look like, to have some visual representation.
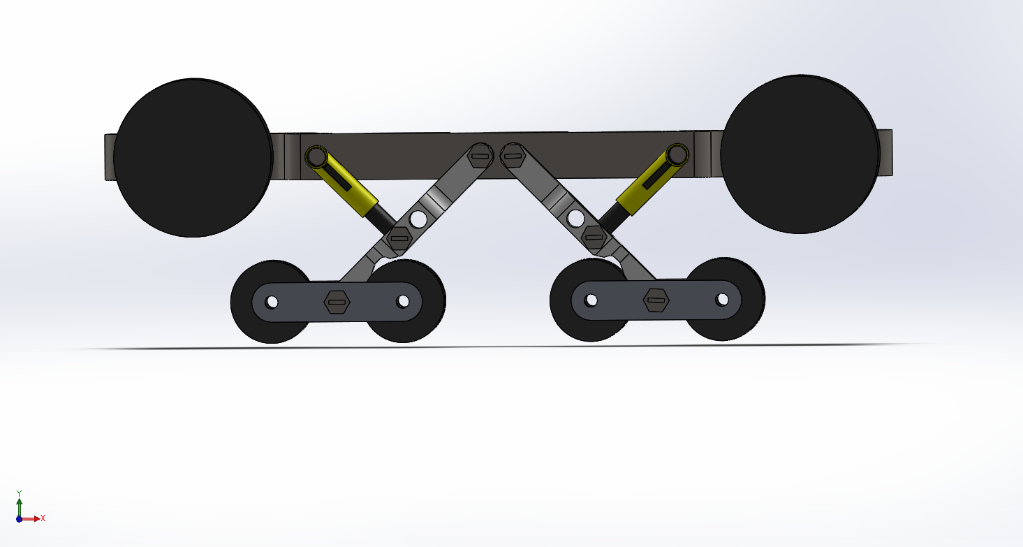
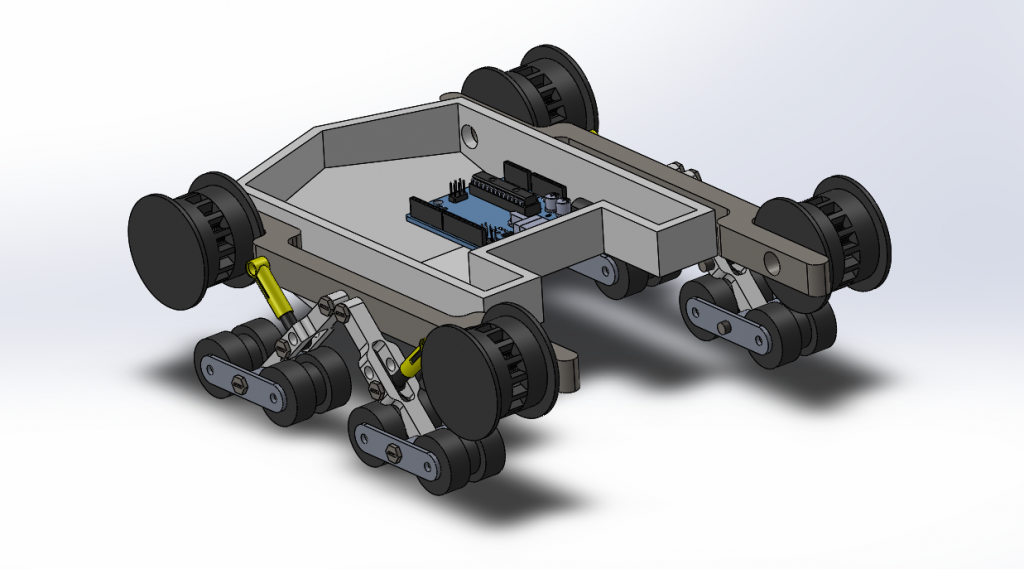
I then started working on the belt module, as this is the part of the Holobot that requires the least amount of verification and dimensions regarding components. Things like the size and weight of the battery pack, the electric motor, and the gearbox etc. Are all pending on the school if they must be bought and what they already have. Thus, the body of the Holobot will be a “black box” for now, and I will focus on designing the module systems that are known.
The belt module will use a bogie system, which greatly increase the suspension and ride comfort. This along with two shock absorbers will ensure the belt module is well equipped for driving in difficult terrain. How difficult terrain it is capable of will be determined by how low the center of gravity and the design of the chassis and the rest of the Holobot.
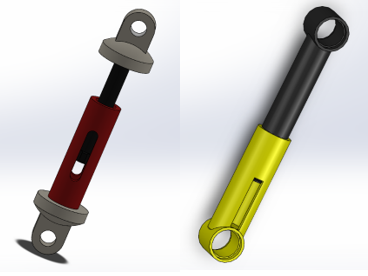
I wanted to see if I could make the shock absorbers by 3D printing and
casting, because the ones you buy for RC cars are seemingly overpriced. This is
however a complicated part to both print and cast, so I have gotten technic Lego
shock absorbers as a backup.
The belt module v1 is nearly finished, I will probably have to make some adjustments when the belts I have ordered arrives and depending on the chassis for the Holobot.
Jens
The last week, I’ve been researching inductive charging and have ordered components to build EM transmitter and reciever. For the reciever, we will need a rectifying circuit. Since the robot is quite small, the size of the recieving module matters. This might mean that we need to make a circuit board instead of handplacing diodes and capacitors on a breadboard.
Battery is not in place, and will have to be ordered. The battery needs to be able to power the robot while under charging. If this can’t be done, I can build a bypass so that the robot is powered.
For the arms, we have confirmed that we have the right size and amount of step-motors and servos available.
TBD: For next week, I will research further on the construction of inductive charger, order a battery and look for DC motors.