Date: 03.10.2019 – 10.10.2019
We have continued working with hardware this week as well, since we started testing some components last week. We ended the last sprint with some questions and minor setbacks, which we have solved and overcome this week.
Last week we encountered some power distribution problems, and after discussing and getting some guidance from Jan Dyre, we concluded that the Power Distribution Board we currently have is good enough for our purpose, and that it should work fine depending on whether the cables are wired together properly or not. We assembled some of the components and tested the PDB by using dual motors and a RC transmitter.
The motors obviously needs to be calibrated to cooperate synchronously, which we will achieve by installing the flight controller, but at this point we have ensured that all motors are functioning as expected and we can continue the development without needing to change any components. We will connect all four motors to the flight controller once it is all wired up to the power distribution board.
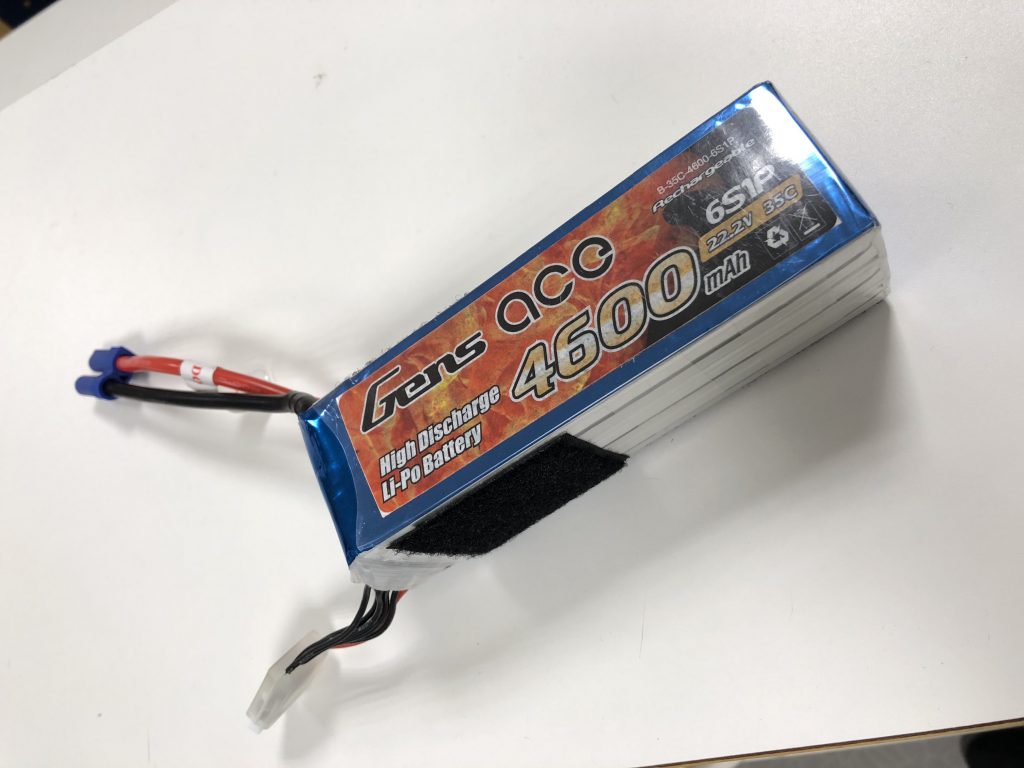
We also have a new battery, since we realised that our old one is not powerful enough to provide power to all of our components. We loaned a much bigger and more powerful battery from Jan Dyre and tested it with the power distribution board, which gave us positive results. We are hoping to only use this battery to supply all components, plus the Nvidia Jetson Nano board and the microcontroller we are planning to use in the landing gear. So far we have ensured that this battery is enough to deliver power to all four motors, including the speed controllers and the flight controller. These components consume a lot of electricity, so the Jetson Nano board and the microcontroller should not be a problem, as we should have some spare electricity reserved for these devices as well.
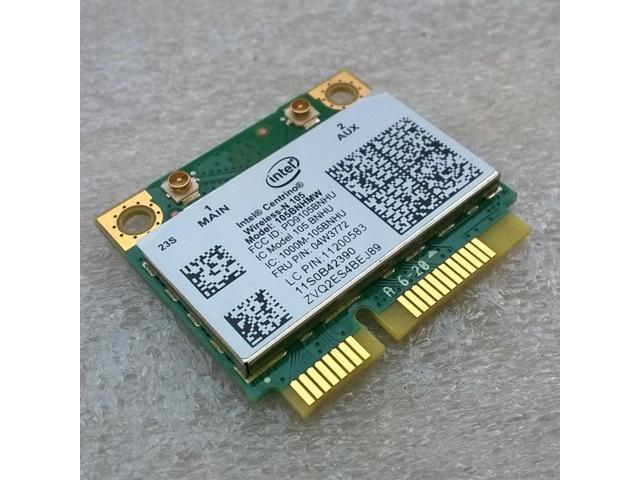
We have received another new component as well, which is the WiFi card for wireless connectivity. It turns out that the Nvidia Jetson Nano only ships with an Ethernet slot without wireless possibilities for either WiFi or Bluetooth. And since we are planning to mount the Jetson Nano on top of the drone, we need a wireless connection to establish a communication link between our control center and the drone. Luckily the Jetson Nano has a M.2 PCIe slot, so we can easily attach a wireless network card to the board.
We had a setback regarding the landing gear this week, as it turns out the general purpose IO pins (GPIO) on our Jetson Nano does not have a chance of providing enough current to turn the stepper motors. As such, we have to drive the motors using another separate microcontroller instead, which has no problem producing enough current. This means a slight redesign to account for the microcontroller board and necessary power cables, but it’s not too bad. The landing gear driver runs as a ROS node on the Jetson Nano board. It’s possible to run a complete ROS node on for example an Arduino, but because we wouldn’t need to publish any messages, we decided it was faster to have a node publishing commands over the serial port instead.
Speaking of which, the Arduino driver code was also written this week. It reads one byte from the serial port at a time: if it reads the value 49, which is the ASCII code for 1, it will raise the landing gear. If any other byte is received, the gear will be lowered. As a safety measure, if no signal is received after a while, it will automatically lower the landing gear. In case the system crashes, it is beneficial to automatically lower the landing gear in order to prevent damage to the drone if it should fall down from height.
The design of the drone is very much completed, we just need to make sure we have enough space and a fitting place for every single component. This is what we have been working on the last couple of days. This will include a bit of redesigning along the way, since the first iteration will not satisfy the needs of space for every component.
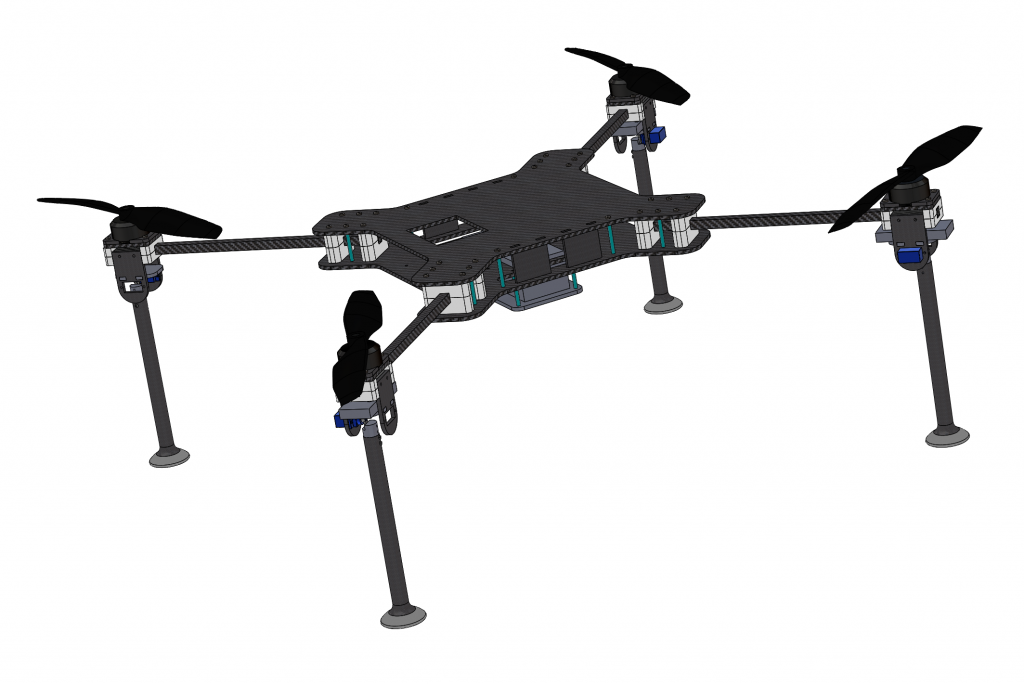
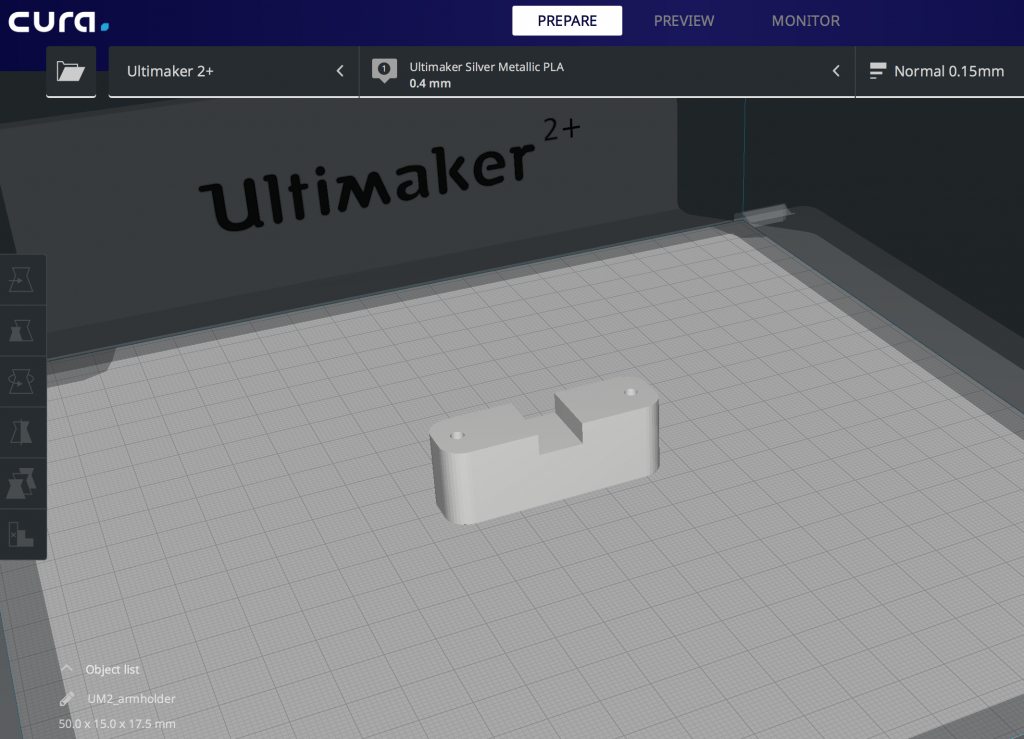
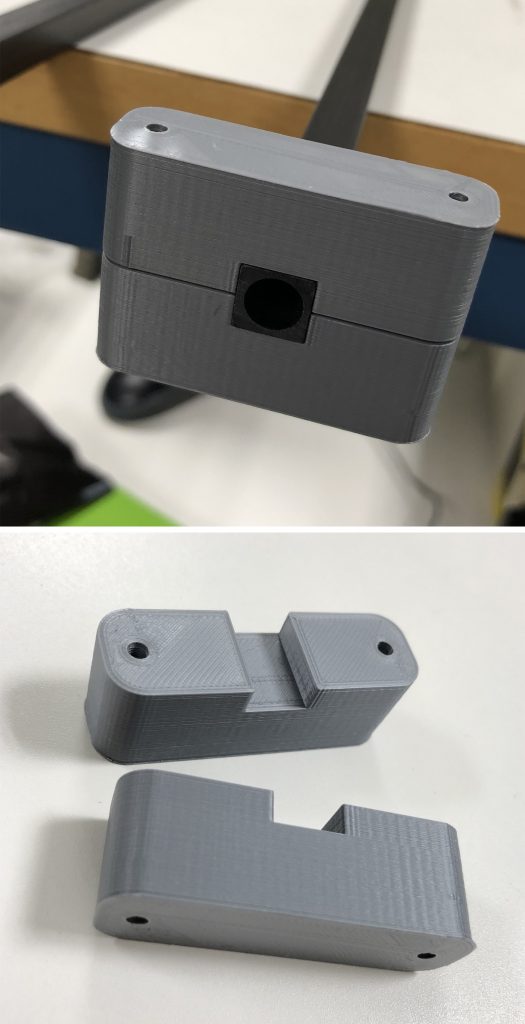
We have started 3D-printing the components that are ready, as we are confident about these components considering that we won’t make any new changes to them. The 3D-printing is a long process and it takes quite some time to make multiple prints. We are using the Ultimaker printer and we started with printing the arms mount for the drone, which takes about two hours per print. We need 16 prints of this model, so it will take some time to have all models printed out. Even though it takes some time, 3D-printing is a very useful resource, as we can print out anything we design and customize based on our drone. The print material is cheap as well, so it does not matter if we need to redo the print or make some test models, except the fact that it of course takes some time.
The critical part of the design phase is that everything must be measured and tested correctly since we only have one chance of getting the design right. The reason why this is critical is because we only have one chance of cutting the carbon fiber plates due to its expensive price. We cannot afford to make mistakes when laser cutting the plates and that is why we are using plywood right now, since it is cheap and flexible. The same goes for our other components as well, as they are quite expensive. As soon as we are confident of the design and we feel it is ready, we will laser cut it in carbon fiber as a part of our last design iteration. During the next sprint we will continue to make space for every components and possibly redesign if necessary. We will also attach the components onto the new prototype model to see how they fit together.