Blog post 2:
Robin:
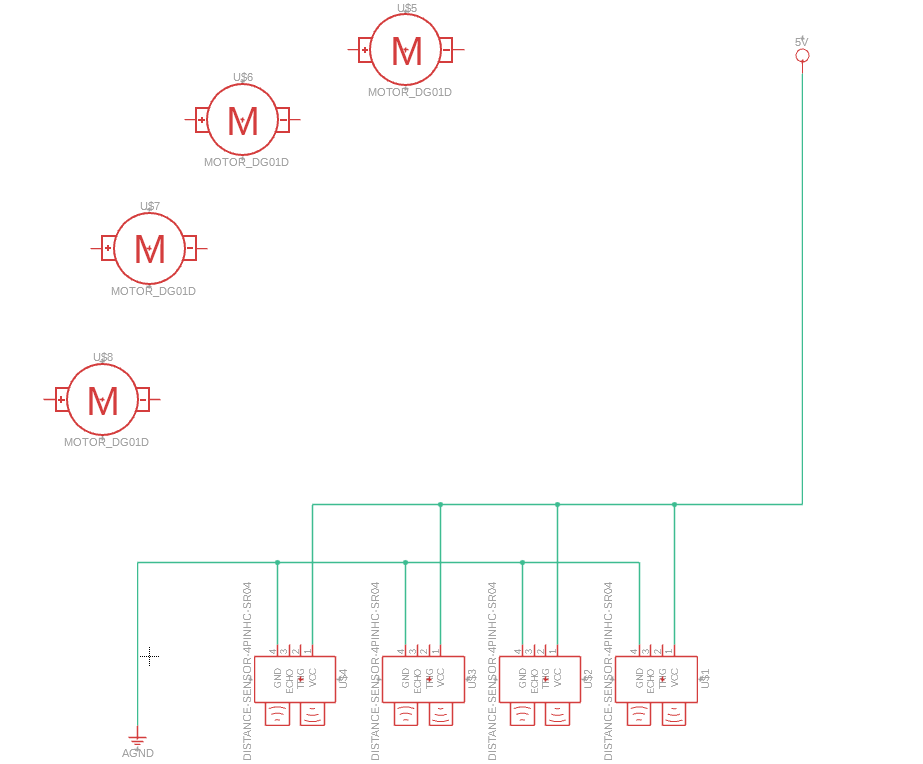
This week, I began working on the robot’s electrical design. To organize the schematic, I plan to start building a component library for the micro:bit driver expansion board, ensuring all the essential elements are included. At this stage, our setup consists of four ultrasonic sensors, a micro:bit driver expansion board, a micro:bit controller, and four motors.
Matias:
This week we started thinking about making our own PCB, but specifically for the power distribution of the car. The goal is to replace the current setup with a cleaner solution that reduces the amount of cabling and makes the wiring easier to manage. By handling only the power side, the board should still simplify the system while keeping the design focused and manageable.
On my side, I worked on organizing the project tasks and clarifying what needs to be done next. I also reviewed some of the concepts and considered different approaches for the design. It feels like a good foundation for the next steps.
Focusing on a custom power PCB feels like the right balance between functionality and simplicity.
Anette:
This week we got the automated vehicle we are supposed to modify. In addition we started discussing ideas about how we are going to proceed with the project.
I started looking up the components and the corresponding datasheets that we need to make the power budget. Furthermore I started brainstorming ways to add an opening and closing mechanism
We were told the current motors are going to be switched out and we were going to get a battery, so we are awaiting additional information about this area
I have also been reviewing information about system engineering from last year.
Théo:
This week I try to understand how to upload code. First I thought about using pyCharm but for this I had to download microPython on the microBit. Then upload the file on the microBit. I had to use these two commands :
>python -m uflash
>python -m uflash nameOfFile.py
But then Sondre show me MU editor that is way easier to upload our code on the micro bit so we might keep using MU.
Next week I’ll probably start working on the feed back from the sensor.
Sondre:
Since we received the car and microcontroller this week, I have focused on understanding the hardware and planning how to integrate the car’s movement. I have downloaded programs to facilitate communication with the micro:bit and have transitioned to using Python as the programming language.
Given that the car is equipped with mecanum wheels, there is a specific logic that must be considered to control its movement effectively. I have conducted research on this topic and have developed a pseudocode outline, which will simplify the process of writing the final program.
The logic for controlling the car’s movement is detailed below:
FL=Front left
FR= Front right
RL = Rear left
RR = Rear right
| Move forward | FL, FR, RL, RR |
| Move backward | -FL, -FR, -RL, -RR |
| Turn left around center axis | -FL, -RL, FR, RR |
| Turn right around center axis | FL, RL, -FR, -RR |
At this stage, there are four main movements that the car needs to be able to do. Other movements, like moving diagonally or turning around the front or back, are not important right now and can be added later if needed.
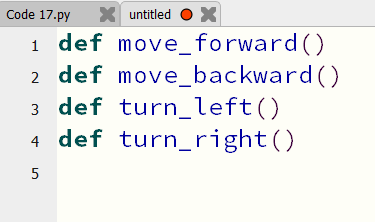
I plan to make each movement a separate function in the code. This will make it easier to use the movements in different parts of the program and will keep the code organized and clean. Each function will handle one specific movement and can be called whenever we need it, which also reduces repeated code. The functions will look something like this:
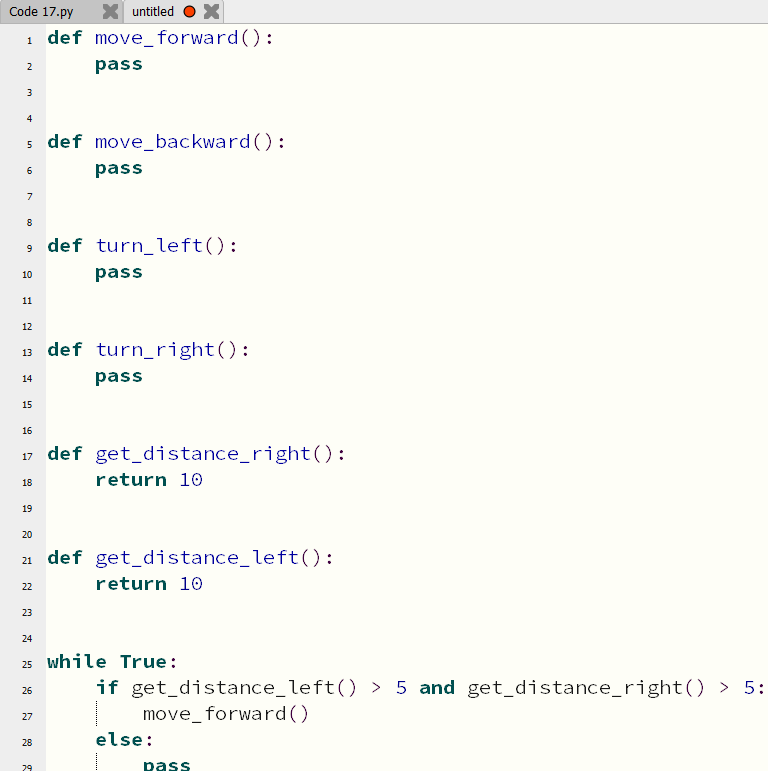
Once these functions are ready, they will make it much easier to add the ultrasonic sensors. I expect that the control logic, using both the movement functions and the sensor input, will look something like this:
I have looked into different simulation tools like Webots, MakeCode, and Unity. I think Webots is the best option if we need to simulate the car because it is more powerful, supports Python, and lets us test the car without setting up a physical course. Unity mainly uses C#, which doesn’t fit our workflow, and MakeCode is not as strong for simulations. The challenge is that I need to learn Webots, so that will be my focus for the next period so I can use it properly.
At the same time, I have thought about whether to use block coding or Python. Block coding is easier and good for quick experiments, but Python is more flexible and better for more advanced tasks. Since we want the project to grow in complexity, Python seems like the better choice.
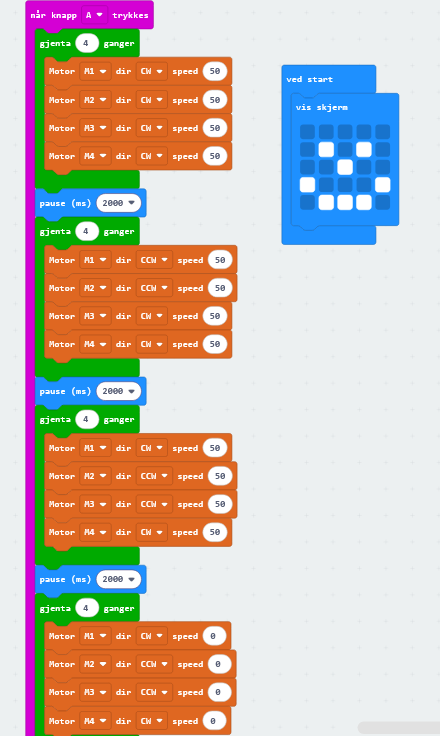
At the end of the week, I decided to get the car moving so that we would have a somewhat functional robot. I used Microsoft MakeCode to create a simple block-based program that controls the car’s basic movements. You can see it in action here: https://youtu.be/had7Wau_qtI
Here is the block code I used: